Let's say you work for a company that has a lot of APIs. You might have a few questions:
- How do you manage the lifecycle of those APIs?
- What governance would you apply to these APIs?
- What is the list of environments needed to manage these APIs?
- What are the deployment strategies for those APIs?
- How would you integrate those APIs with other services?
As your company's number of APIs increases, so does the complexity of managing them. Azure API Center (APIC) is a central repository for your APIs lifecycle management, and it offers the more efficient ways for management. Throughout this post, I will take a first look at what Azure API Center is and what it offers.
You can find a sample code from this GitHub repository.
Prerequisites
There are a few prerequisites to use Azure APIC effectively:
- Visual Studio Code with the Azure API Center extension, Rest Client extension and Kiota extension
- Azure CLI with the API Center extension
- Azure Developer CLI for easy resource provisioning through Bicep
API Center instance provisioning
There are three ways to provision an APIC instance:
- Through Bicep
- Through Azure CLI
- Through Azure Portal
I'm not going to discuss how to provision an APIC instance in this article. But here's the reference you can do it by yourself through Bicep – Azure API Center Sample
Register APIs to APIC
The purpose of using APIC is to manage your company's APIs in a centralised manner. From design to deployment, APIC tracks all the histories. To register your APIs to APIC, you can use either Azure CLI or Azure Portal.
Let's say there's a weather forecast API you have designed and developed. You have an OpenAPI document for the API, but not implemented yet. Let's register the API to APIC.
az apic api register \
    -g "my-resource-group" \
    -s "my-api-center" \
    --api-location ./weather-forecast.json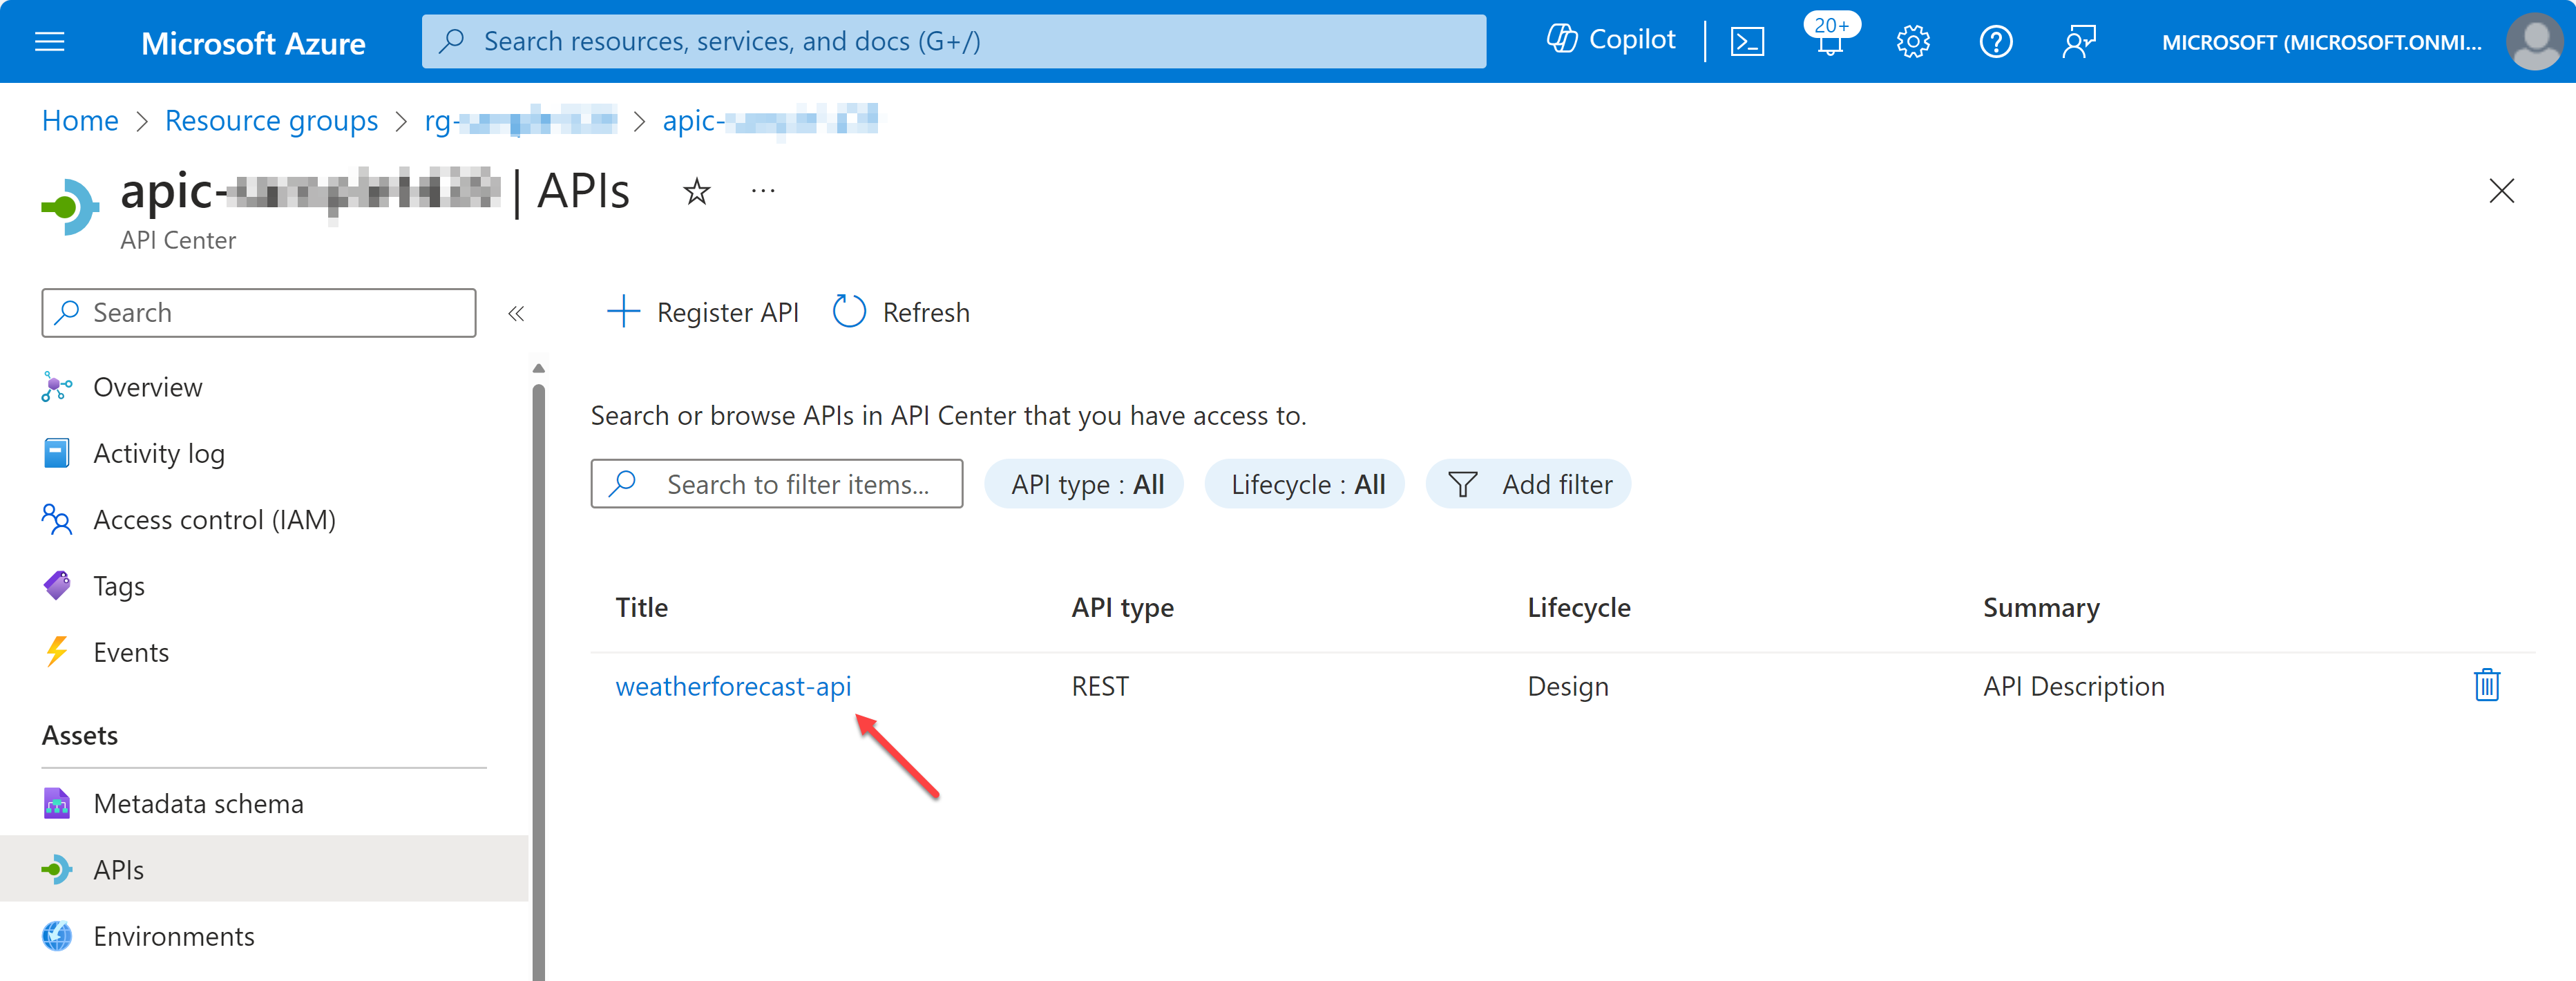
If you want to register another API through the Azure Portal, you can do it by following the official documentation.
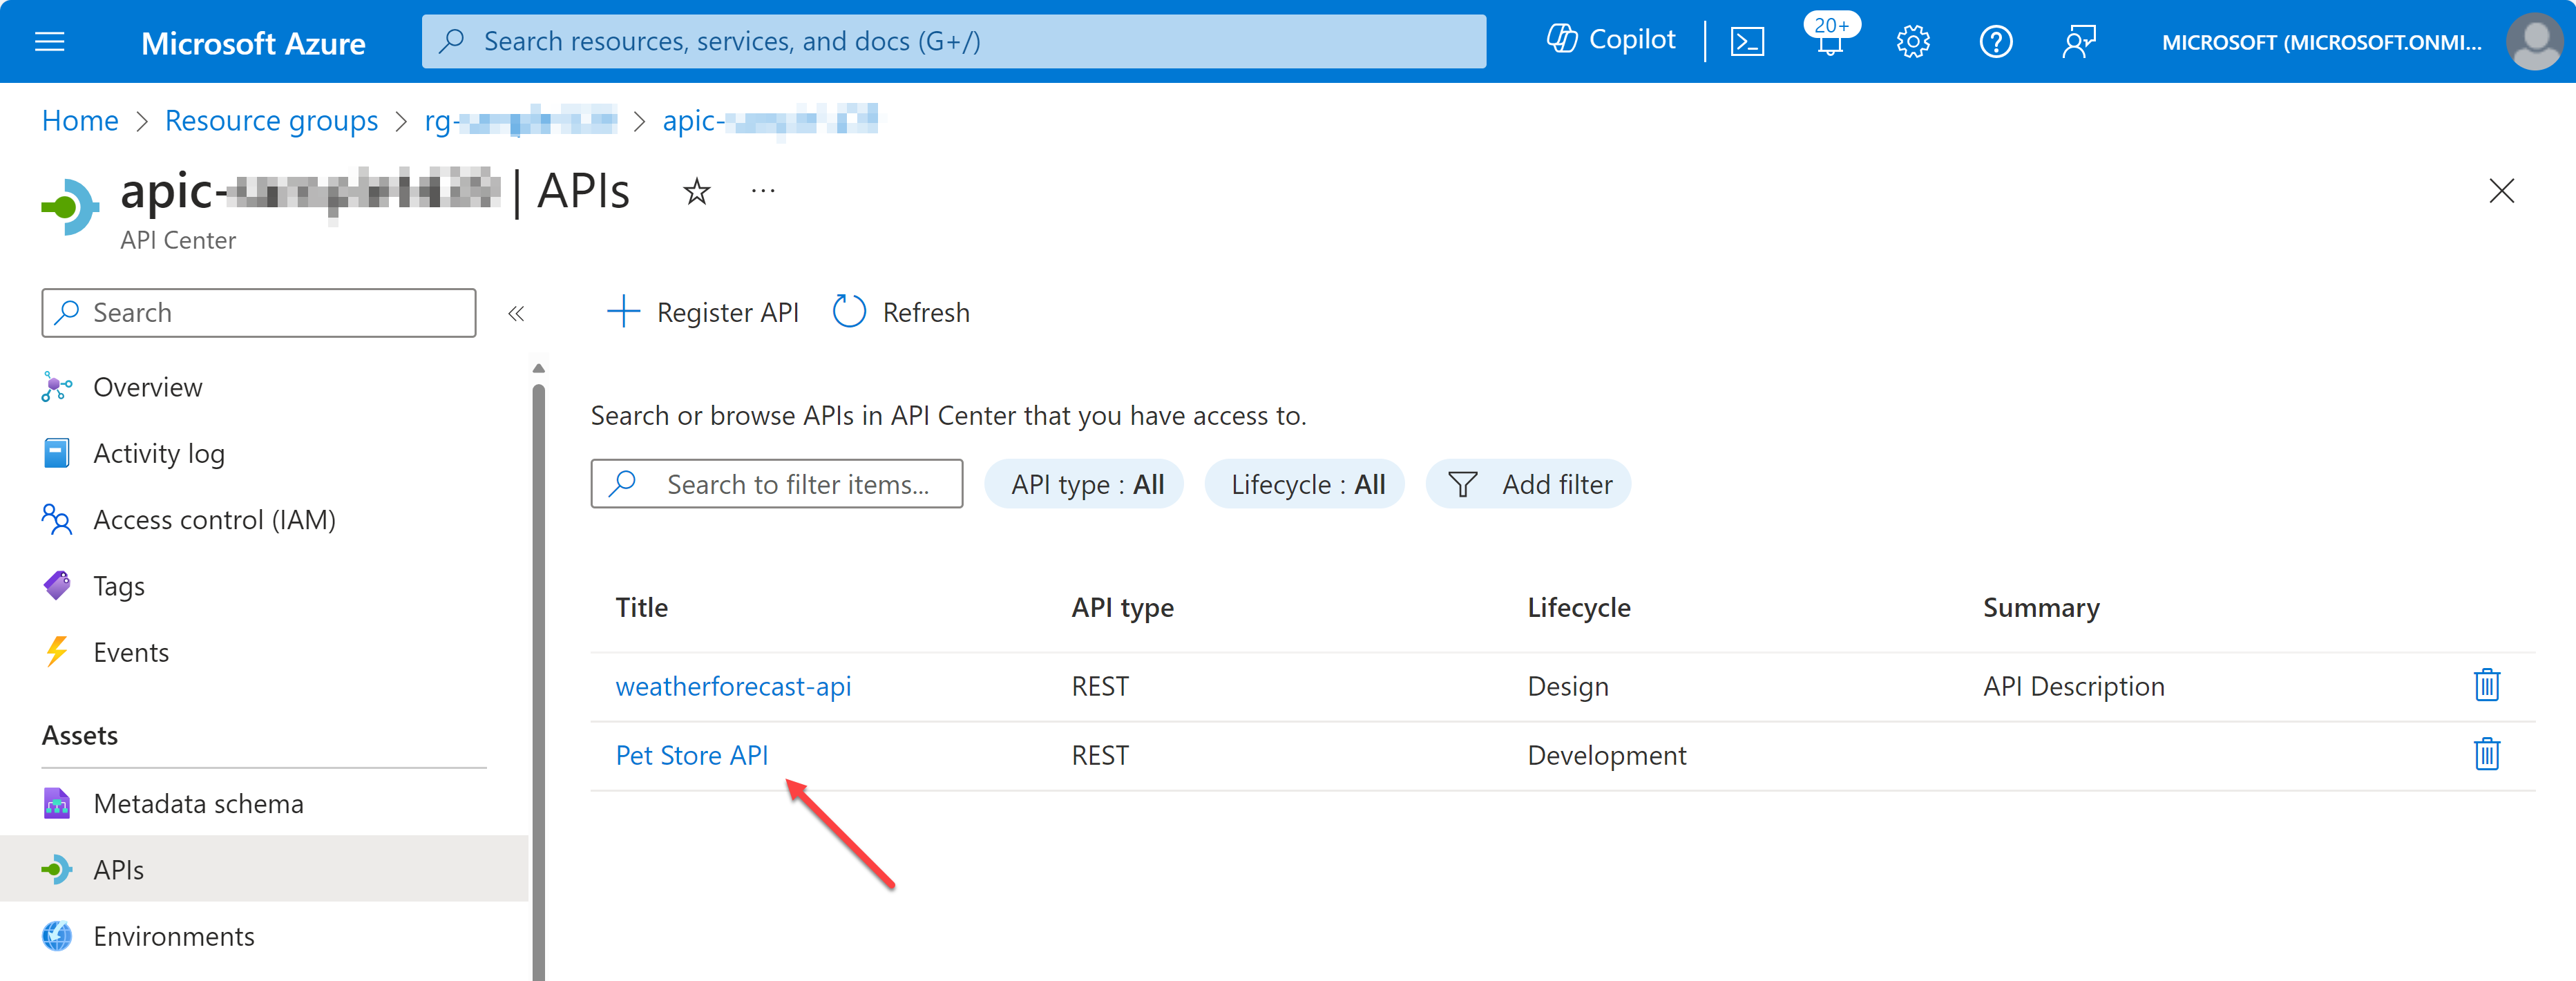
Import APIs from API Management to APIC
If you have already working APIs in Azure API Management (APIM), you can import them to APIC through Azure CLI. But it requires a few more steps to do so.
-
First of all, you need to activate Managed Identity to the APIC instance. It can be either system identity or user identity, but I'm going to use the system identity for now.
az apic service update \ -g "my-resource-group" \ -s "my-api-center" \ --identity '{ "type": "SystemAssigned" }' -
Then, get the principal ID of the APIC instance.
APIC_PRINCIPAL_ID=$(az apic service show \ -g "my-resource-group" \ -s "my-api-center" \ --query "identity.principalId" -o tsv) -
Now, register the APIC instance to the APIM instance as an APIM reader.
APIM_RESOURCE_ID=$(az apim show \ -g "my-resource-group" \ -s "my-api-center" \ --query "id" -o tsv) az role assignment create \ --role "API Management Service Reader Role" \ --assignee-object-id $APIC_PRINCIPAL_ID \ --assignee-principal-type ServicePrincipal \ --scope $APIM_RESOURCE_ID -
And finally, import APIs from APIM to APIC.
az apic service import-from-apim \
    -g "my-resource-group" \
    -s "my-api-center" \
    --source-resource-ids "$APIM_RESOURCE_ID/apis/*"
Now, you have registered and imported APIs to APIC. But registering those APIs to APIC does nothing to do with us. What's next then? Let's play around those APIs on Visual Studio Code.
View APIs on Visual Studio Code – Swagger UI
So, what can you do with the APIs registered and imported to APIC? You can view the list of APIs on Visual Studio Code. First, you need to install the Azure API Center extension on Visual Studio Code.
Once you install the extension, you can see the list of APIs on the extension. Choose one of the APIs and right-click on it. Then, you can see the context menu. Click on the Open API Documentation menu item.
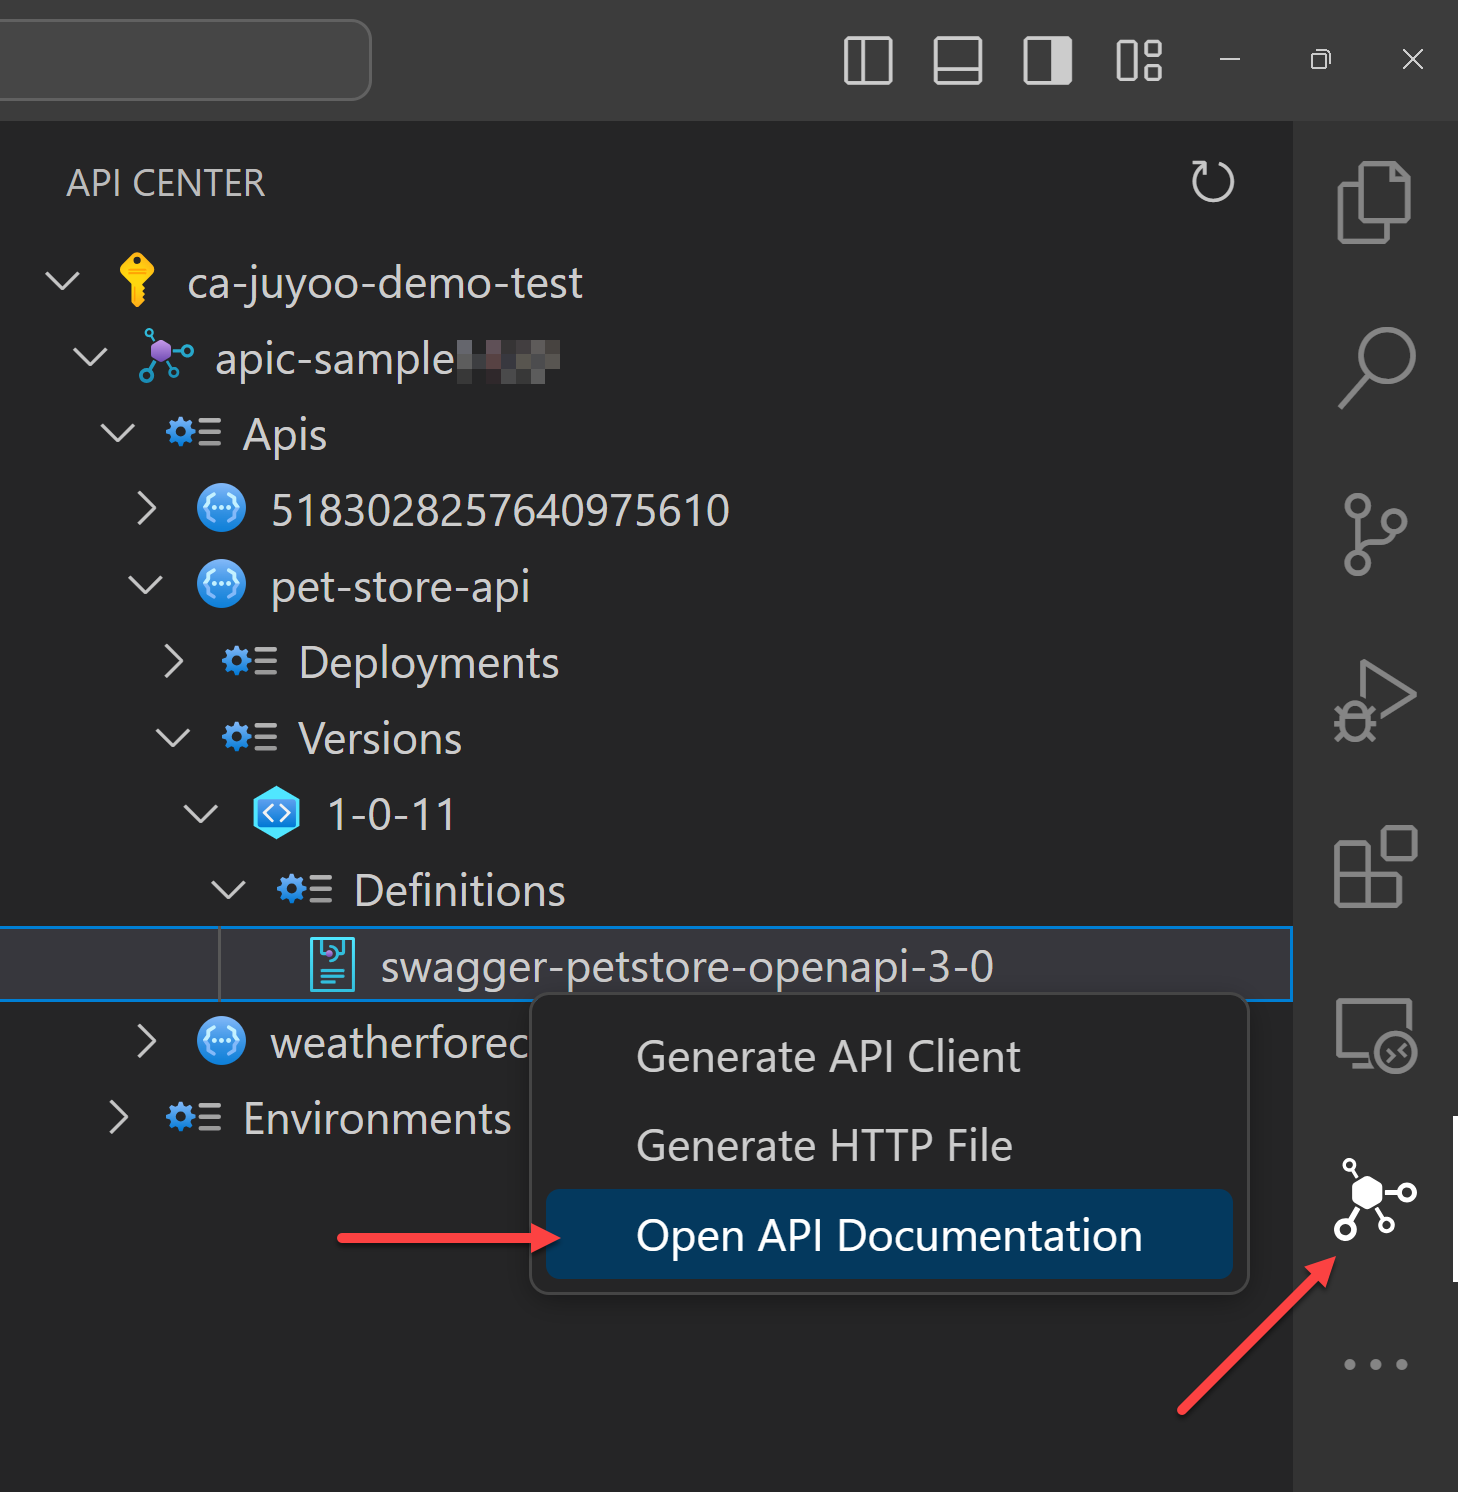
You will see the Swagger UI page, showing your API document. With this Swagger UI, you can test your API endpoints.

Test APIs on Visual Studio Code – Rest Client
Although you can test your API endpoints on the Swagger UI, you can also test them in a different way. For this, you need to install the Rest Client extension on Visual Studio Code.
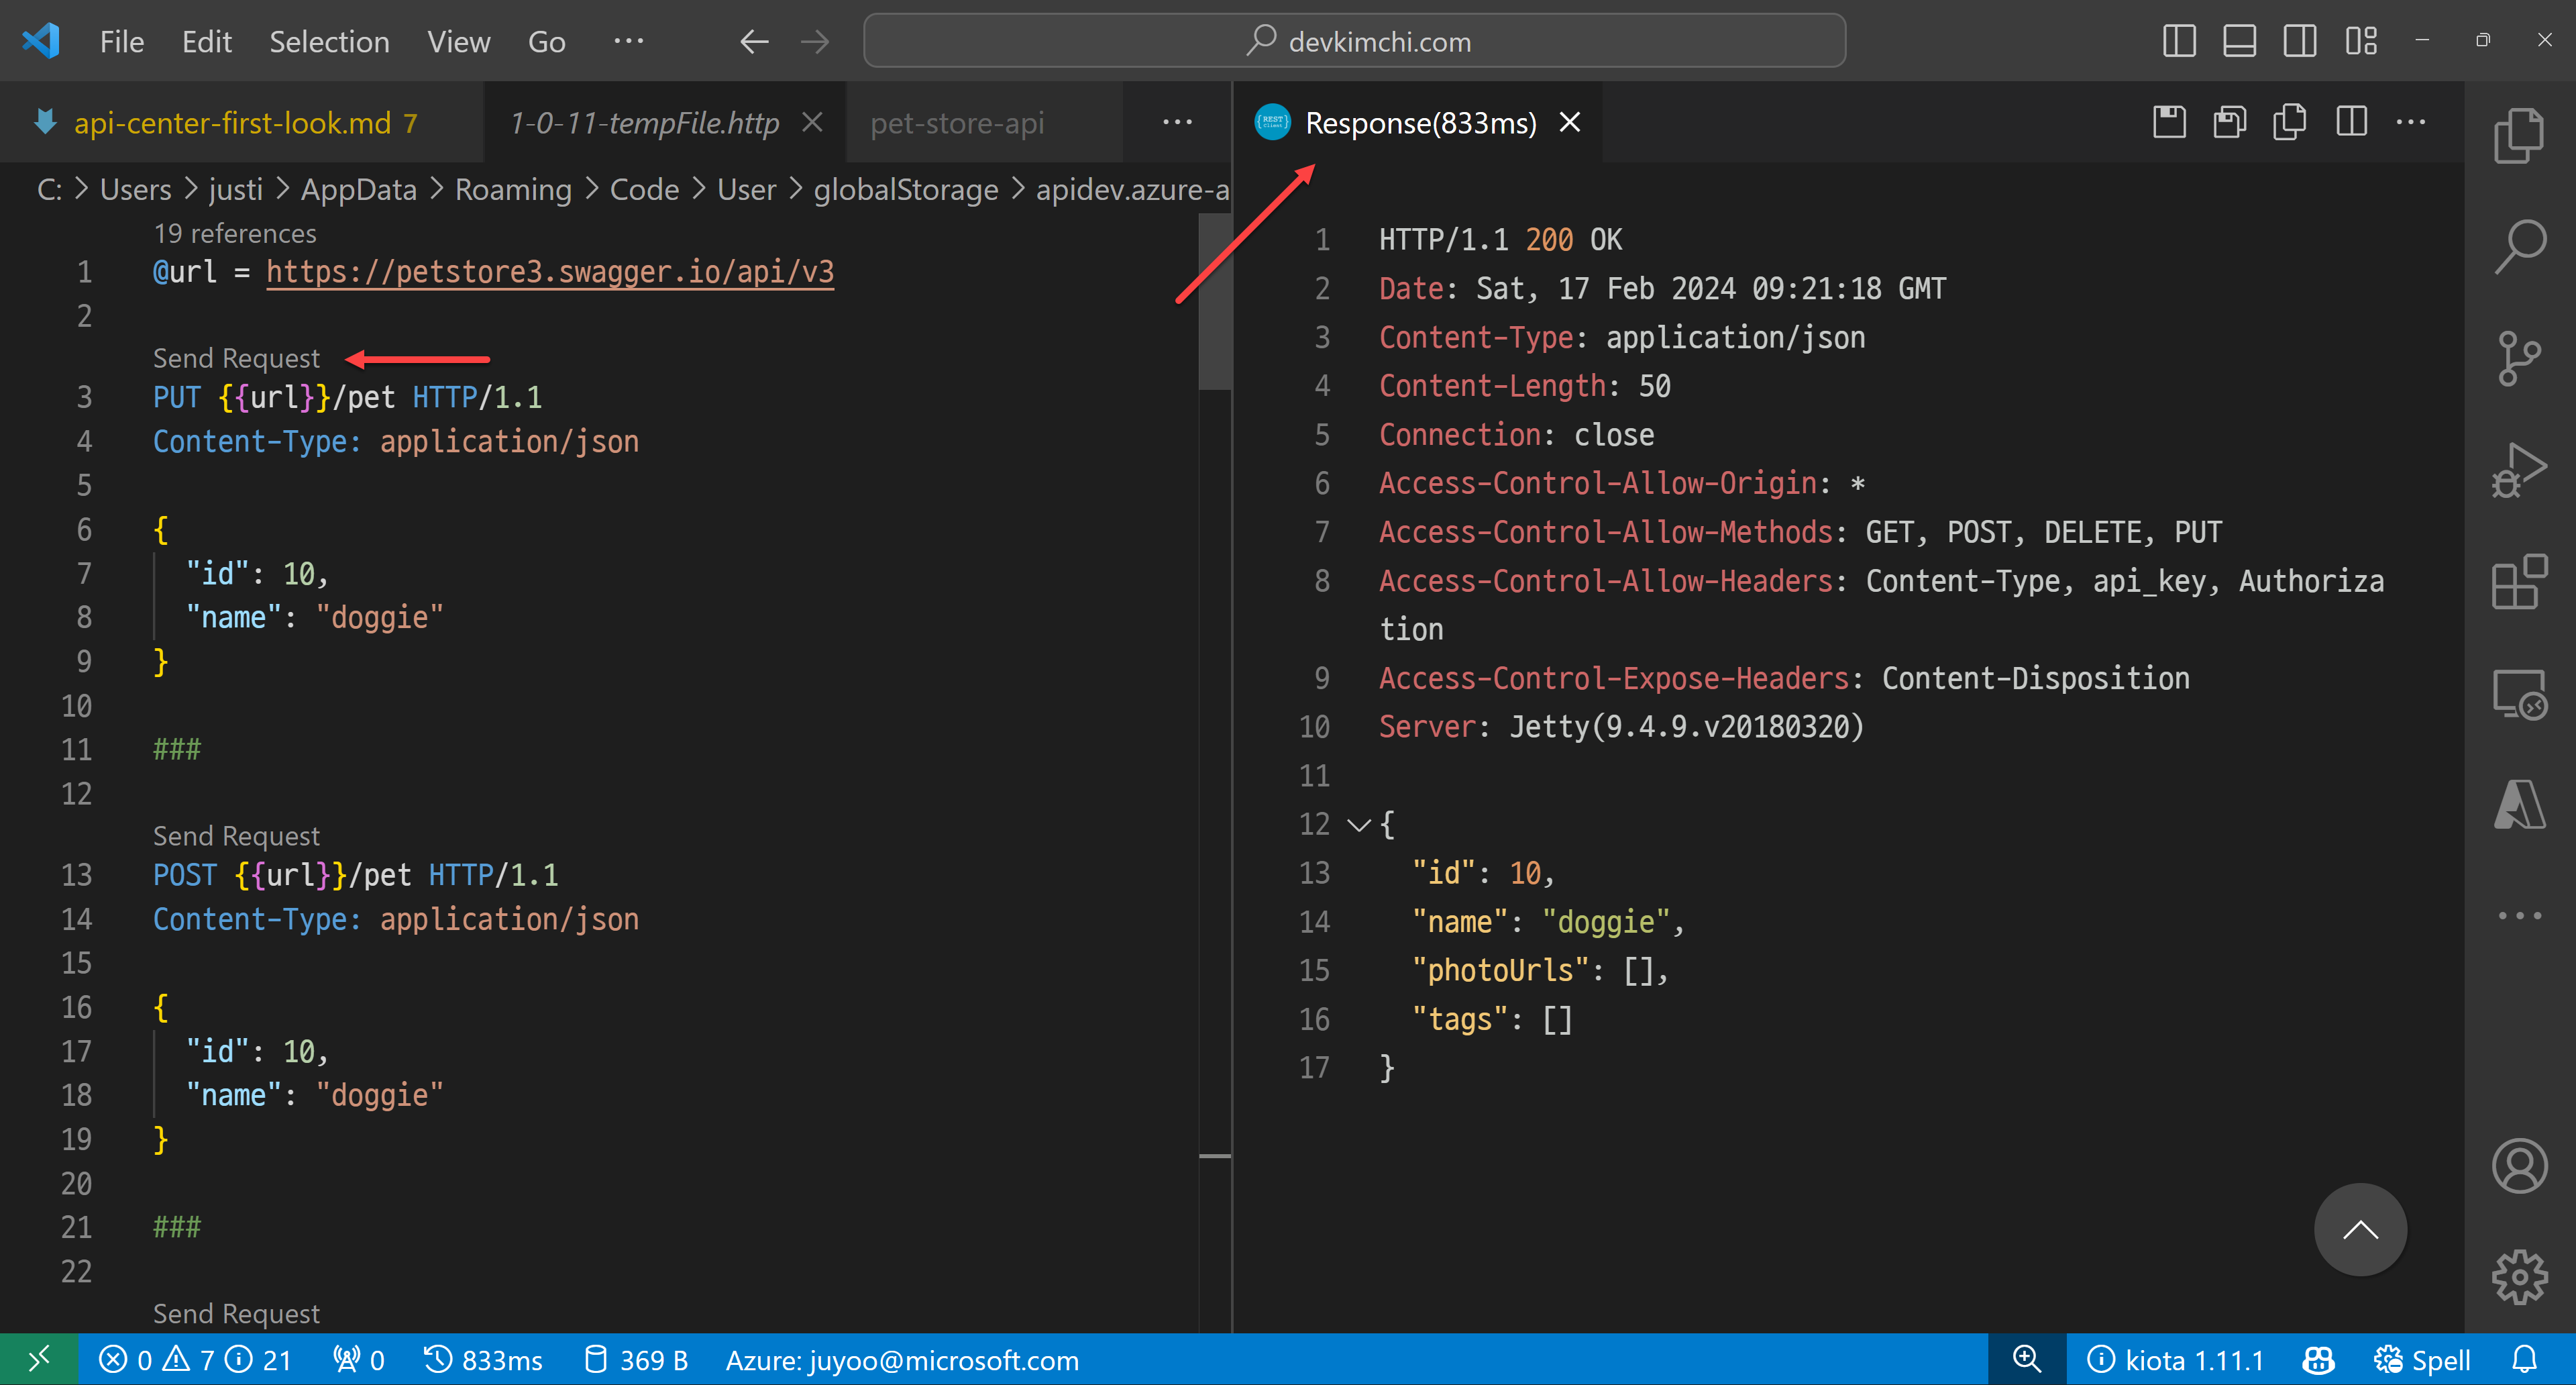
After you install the extension, choose one of the APIs and right-click on it. Then, you can see the context menu. Click on the Generate HTTP File menu item.
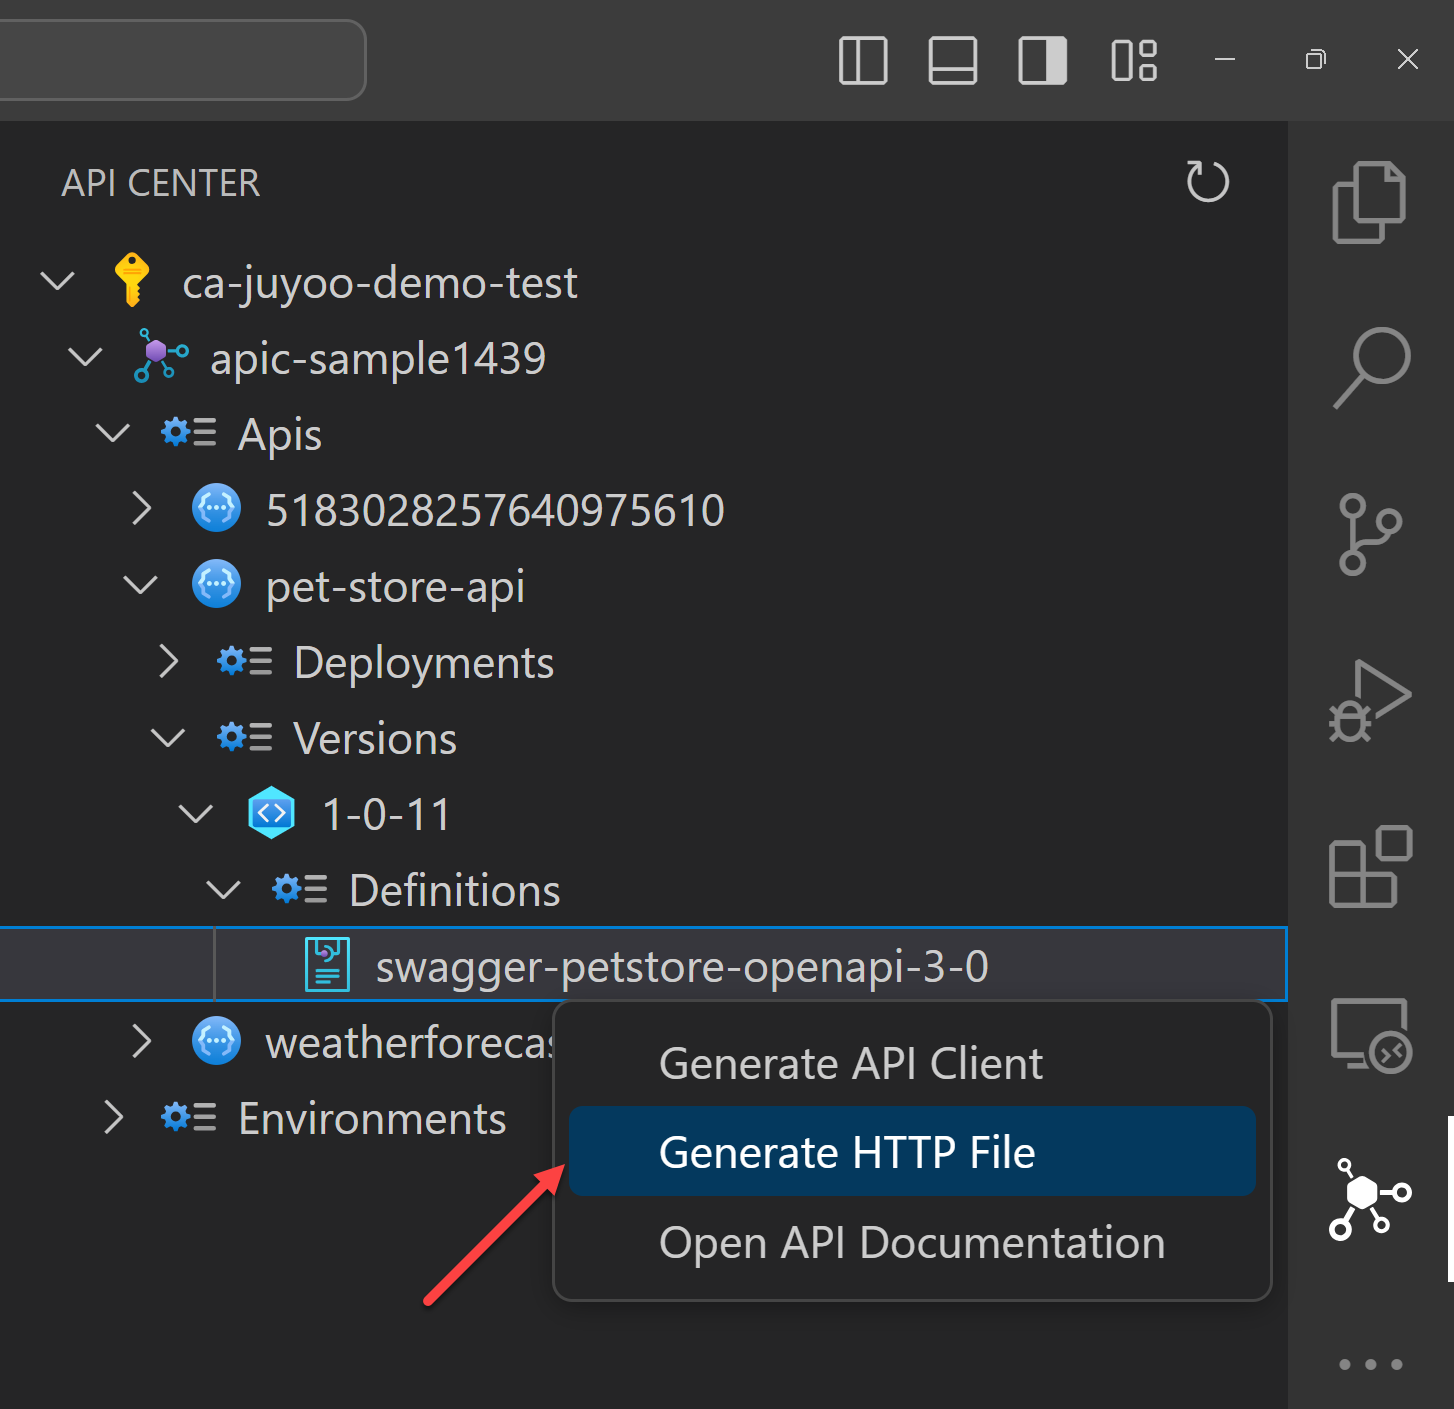
Within the HTTP file, you can actually test your API endpoints with different payloads.
Generate client SDK on Visual Studio Code – Kiota
You can write up the client SDK by yourself. But it's time consuming and fragile because the API can change at any time. But what if somebody or a tool creates the client SDK on your behalf?
One of the greatest features of this APIC extension offers is to generate client SDKs. You can generate the client SDKs for your APIs in different languages. Although the API itself has no implementation yet, you can still work with the client SDK because you know what you need to send and what you will receive in return through the SDK. For this, you need to install the Kiota extension on Visual Studio Code.
After you install the extension, choose one of the APIs and right-click on it. Then, you can see the context menu. Click on the Generate API Client menu item.

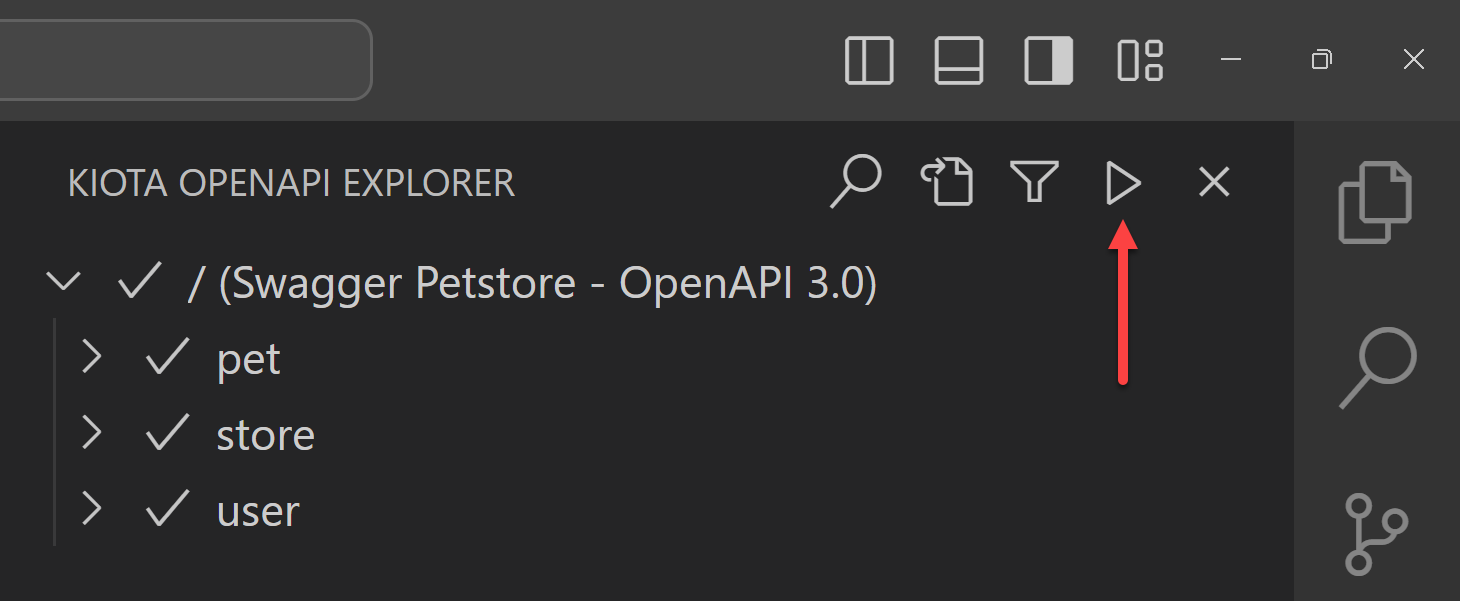
Because I have a Blazor web application, I'm going to generate a C# client SDK for the API. The Kiota extension finds out all the API endpoints from APIC. You can choose them all or just a few of them. Click the ▶️ button, and it generates the client SDK for you.
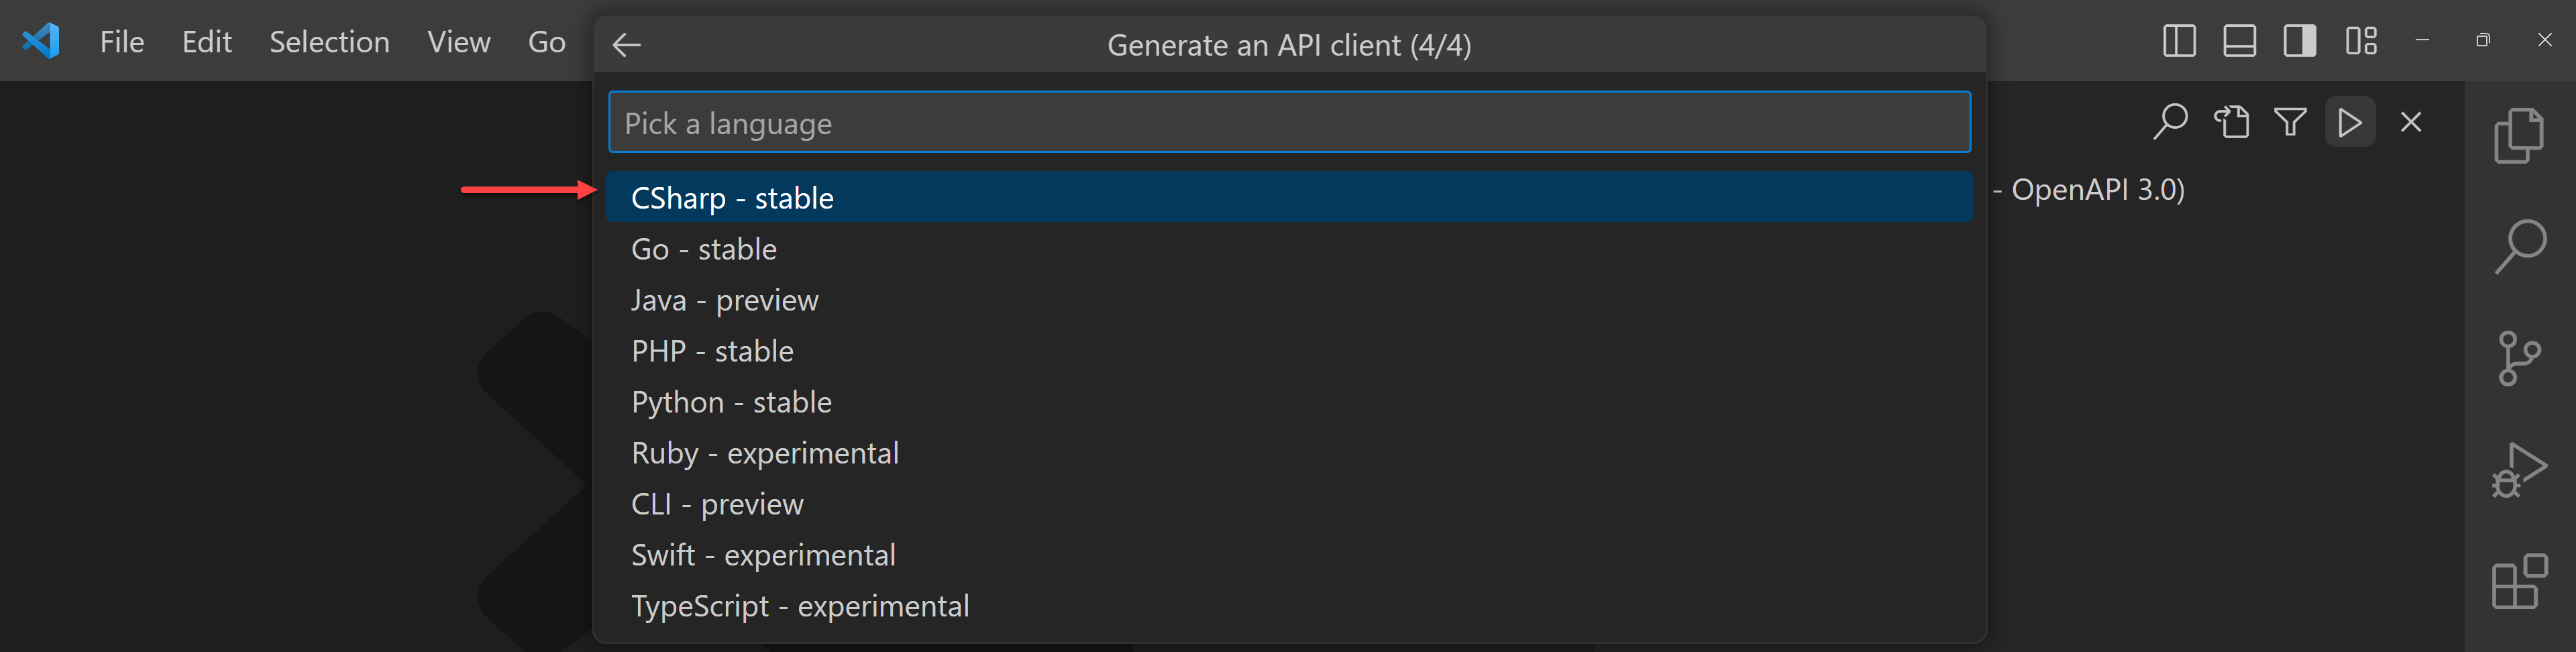
Add the necessary information like class name and namespace of the client SDK, and output folder. Finally it asks in which language to generate the client SDK. There are currently 9 languages available for now. I'm going to choose C#.
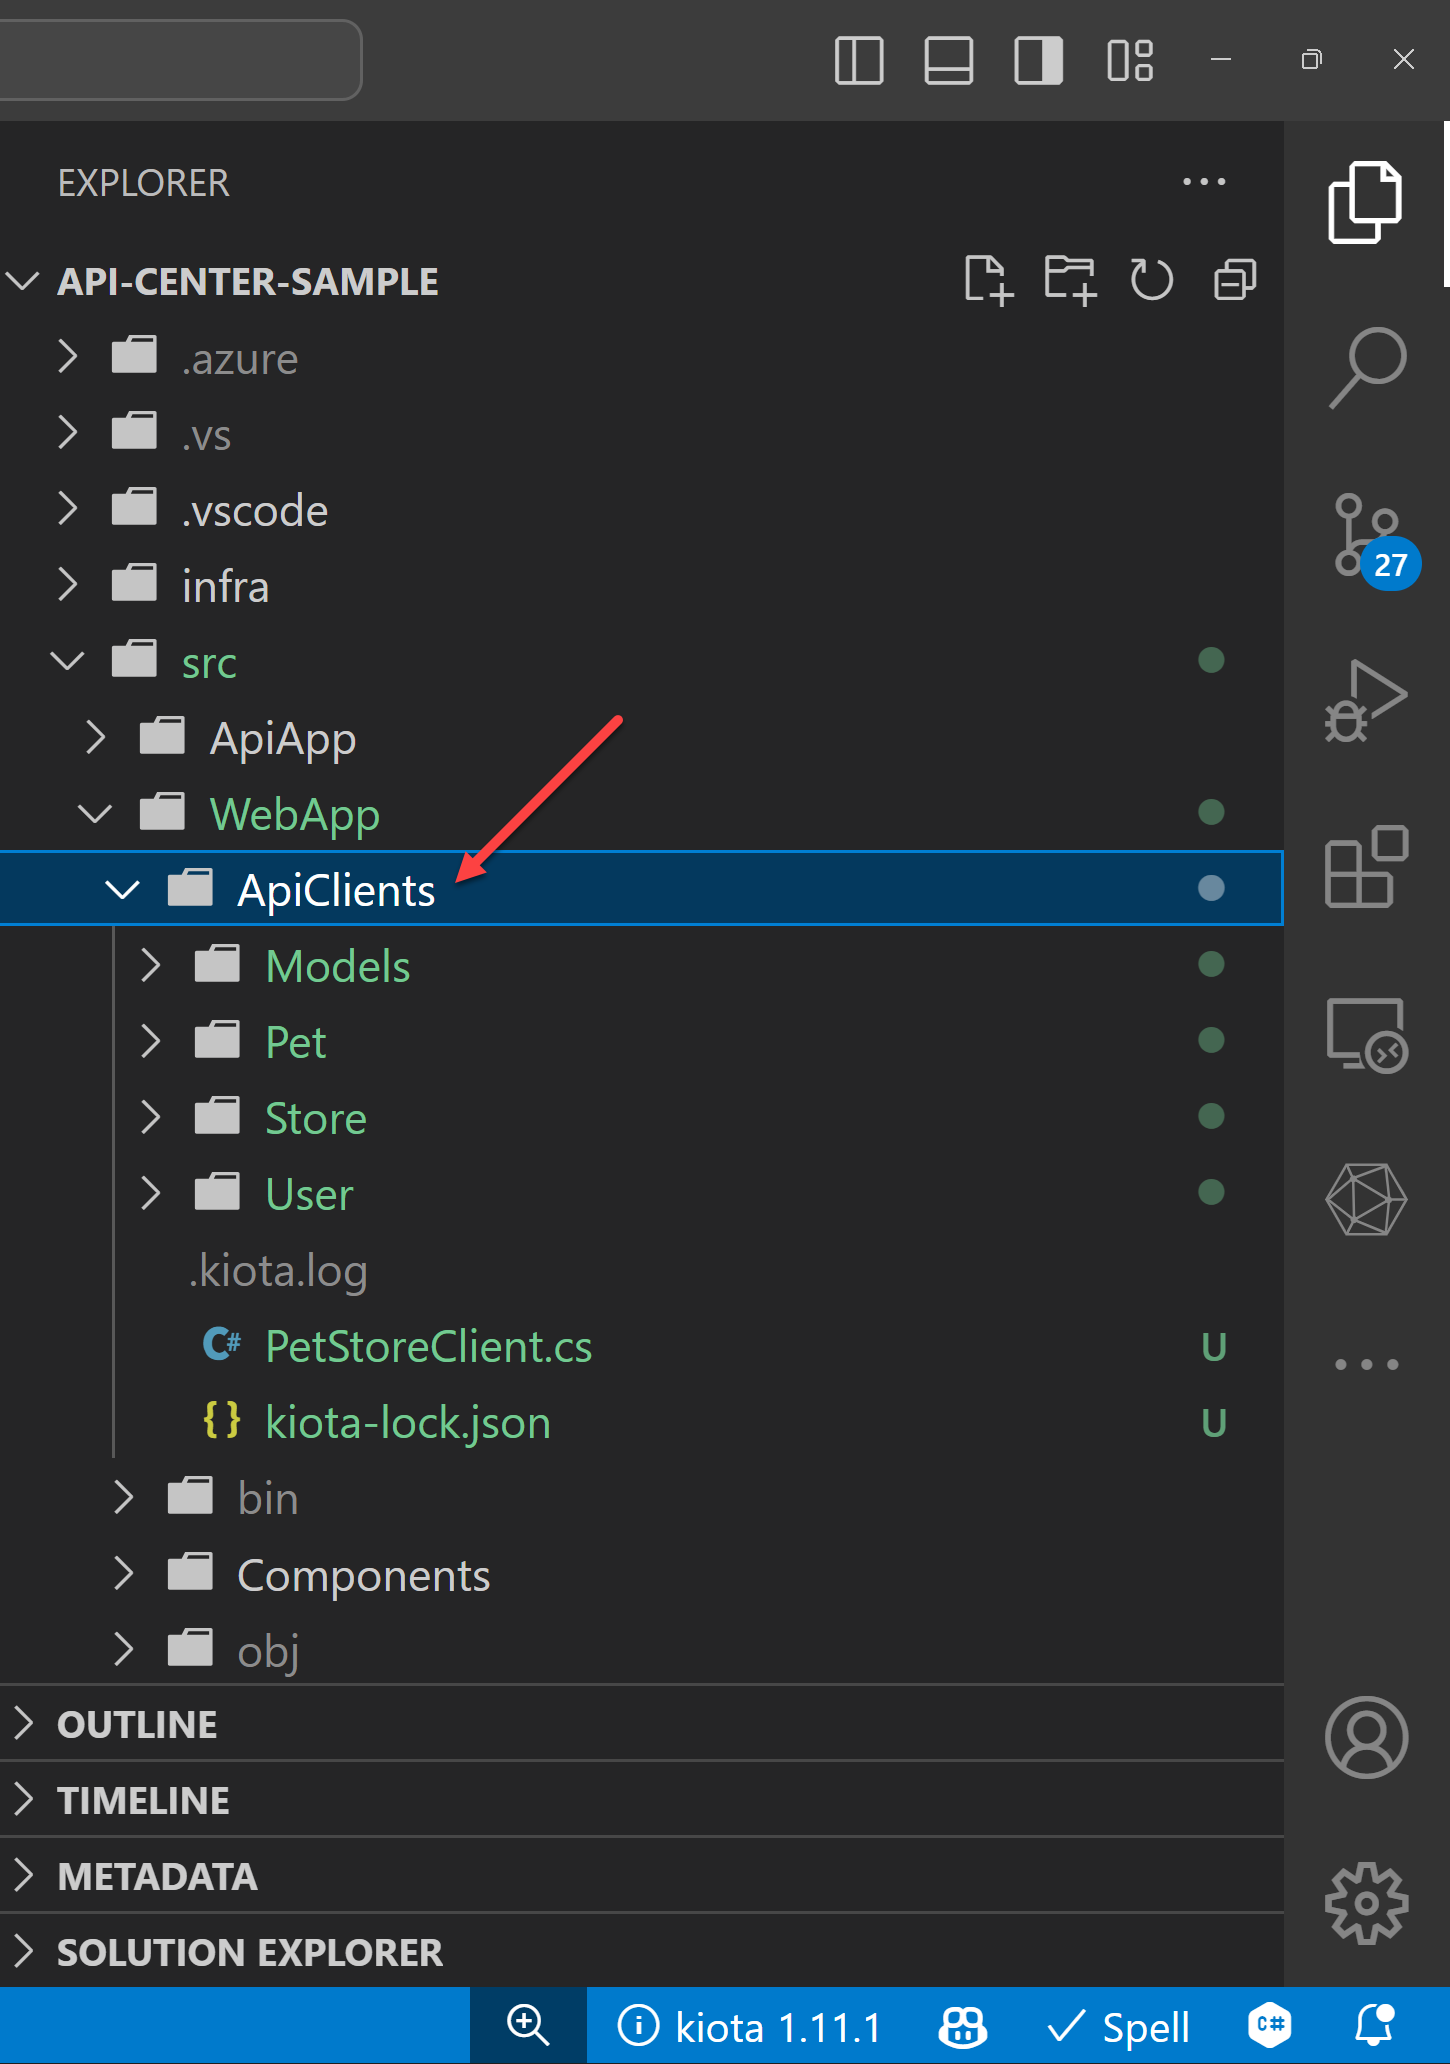
The Kiota extension then generates the client SDK into the designated directory.
Consume the generated client SDK within an application
Now, the client SDK has been generated by the Kiota extension from APIC to my Blazor application. Because it uses the Kiota libraries, I need to install the following Kiota NuGet packages to my Blazor web application.
dotnet add ./src/WebApp/ package Microsoft.Kiota.Http.HttpClientLibrary
dotnet add ./src/WebApp/ package Microsoft.Kiota.Serialization.Form
dotnet add ./src/WebApp/ package Microsoft.Kiota.Serialization.Json
dotnet add ./src/WebApp/ package Microsoft.Kiota.Serialization.Text
dotnet add ./src/WebApp/ package Microsoft.Kiota.Serialization.Multipart
Add dependencies to the Program.cs file and update the Home.razor file to consume the client SDK. Then you will be able to see the result.
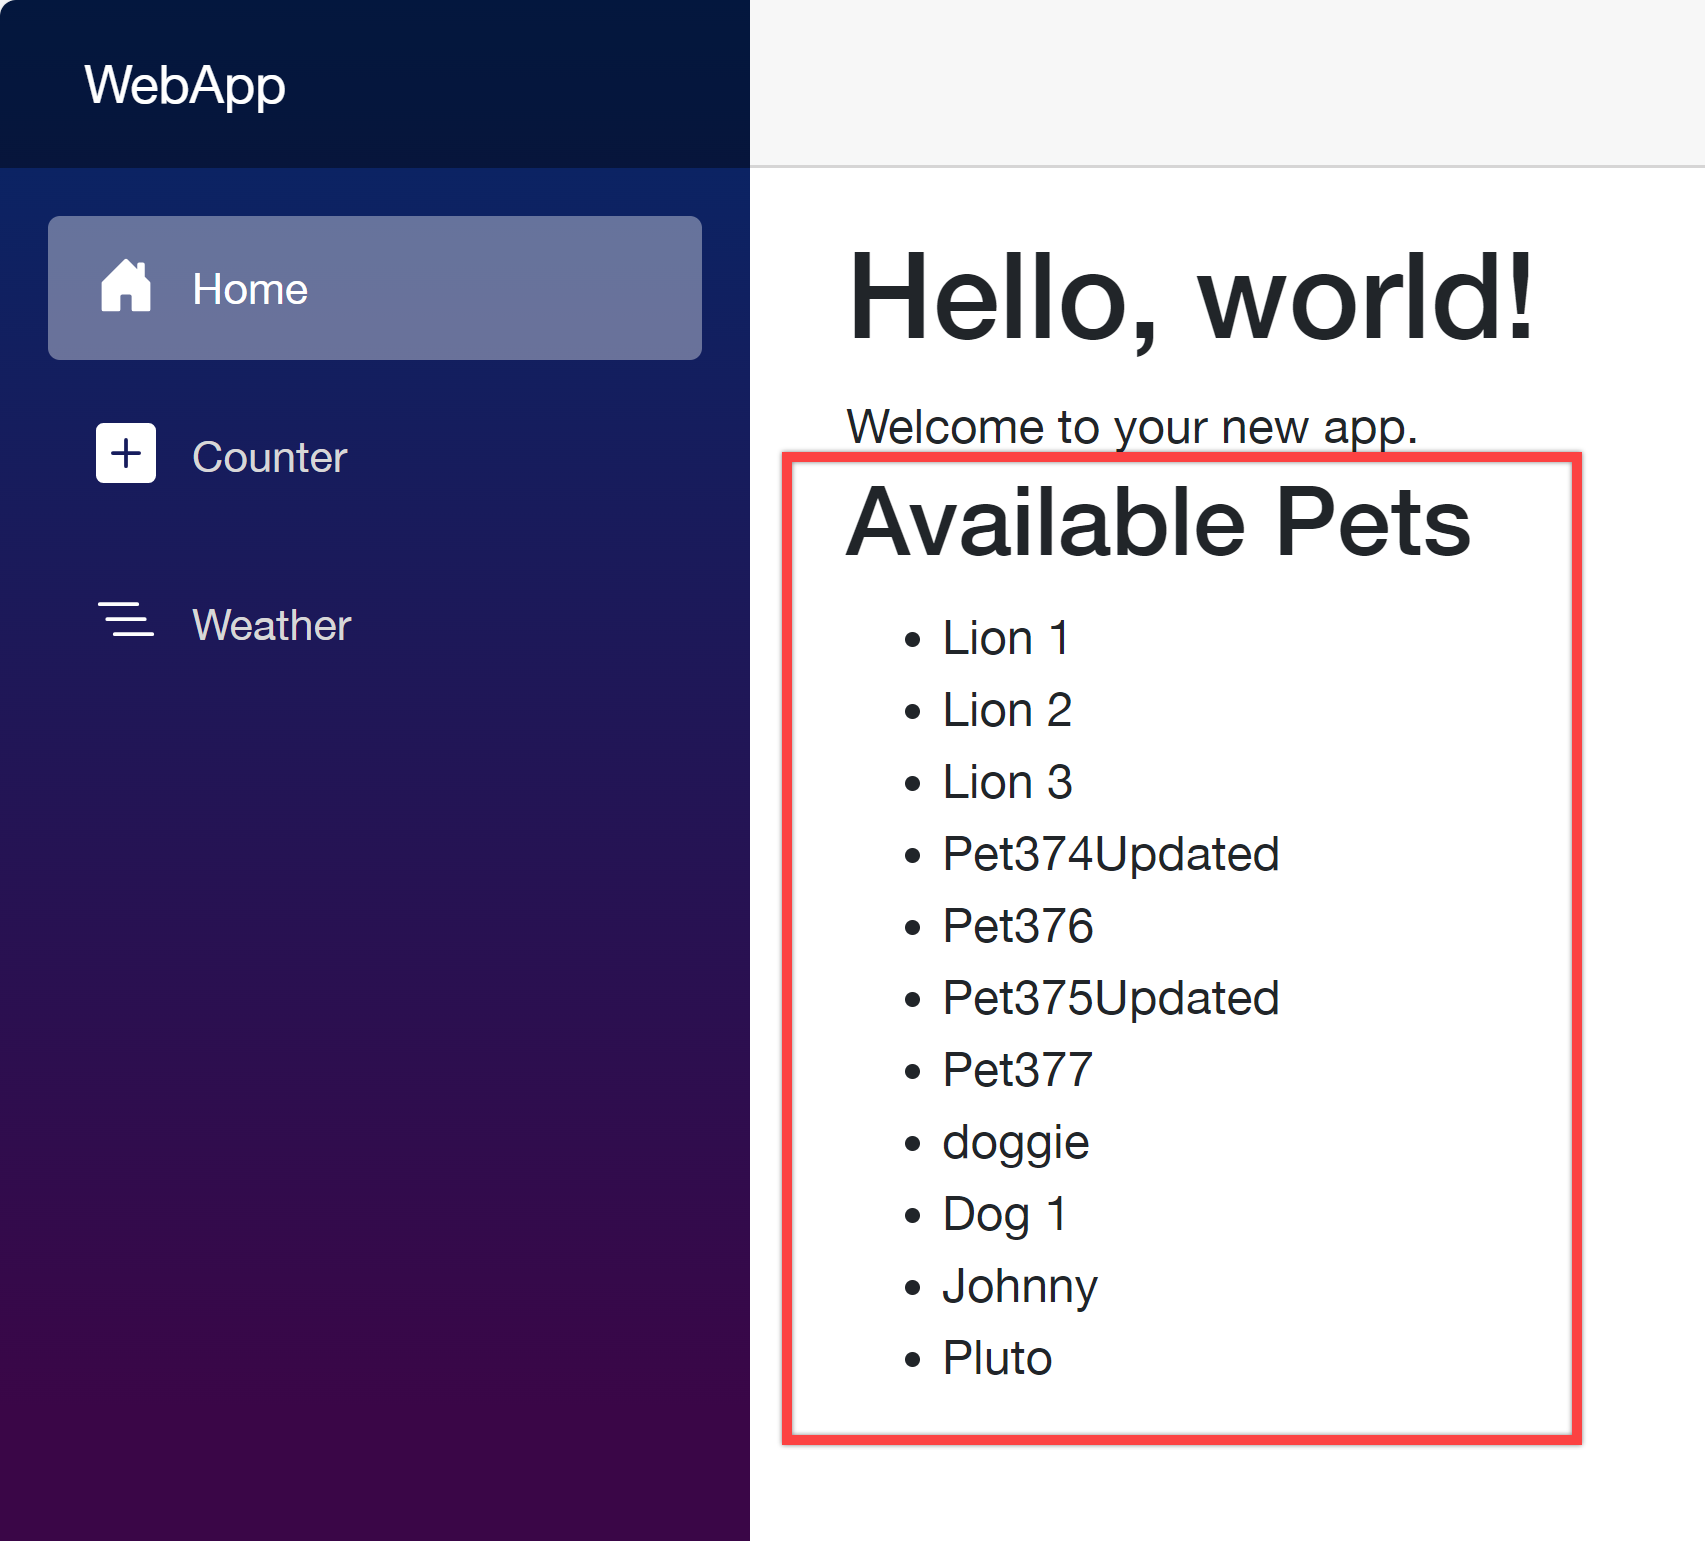
Your web application as the API consumer works perfectly with the client SDK generated from APIC.
So far, I've walked through how Azure API Center can handle your organisation's APIs as a central repository, and played around the APIC extension on VS Code. This post has shown you how to provision the APIC instance, register and import APIs in various ways, and how to test those APIs on VS Code and generate the client SDKs directly from VS Code.
As I mentioned in the beginning, taking care of many APIs in one place is crucial as your ogranisation grows up. You might think that you don't need APIC if your organisation's API structure is relatively simple. However, even if your organisation is small, APIC will give you better overview of APIs, and how they can interconnected with each other.
More about Azure API Center?
If you want to learn more about APIC, the following links might be helpful.