There are many ways to implement authentication and authorisation onto the Blazor WebAssembly (WASM) app. If you publish it to Azure Static Web Apps (ASWA), you can use the built-in authN feature dealt with in my previous post. What if you're publishing your Blazor WASM app onto GitHub Pages? There's no built-in authN feature in this case. However, Azure AD B2C offers a straightforward way for it. You can see literally nothing to write codes to make this happen except a few configurations. Throughout this post, I'm going to discuss how to integrate Azure AD B2C with a standalone type Blazor WASM app.
You can download a sample application from this GitHub repository.
Azure AD vs Azure AD B2C
As the naming implies, both Azure AD and Azure AD B2C are similar to each other. In terms of the authentication and authorisation service provider, both are basically the same as each other.
What are some differences, then? Azure AD does granular controls for internal (organisation-wide) resources like SharePoint, Teams, Dynamics365, etc. Azure AD sets permissions on each resource and account. On the other hand, Azure AD B2C provides the same authN-ing feature, but it's for specific applications. As Azure AD B2C works independently from Azure AD, it's NOT for organisation-wide purposes unless it's configured in that way.
Configuring Azure AD B2C
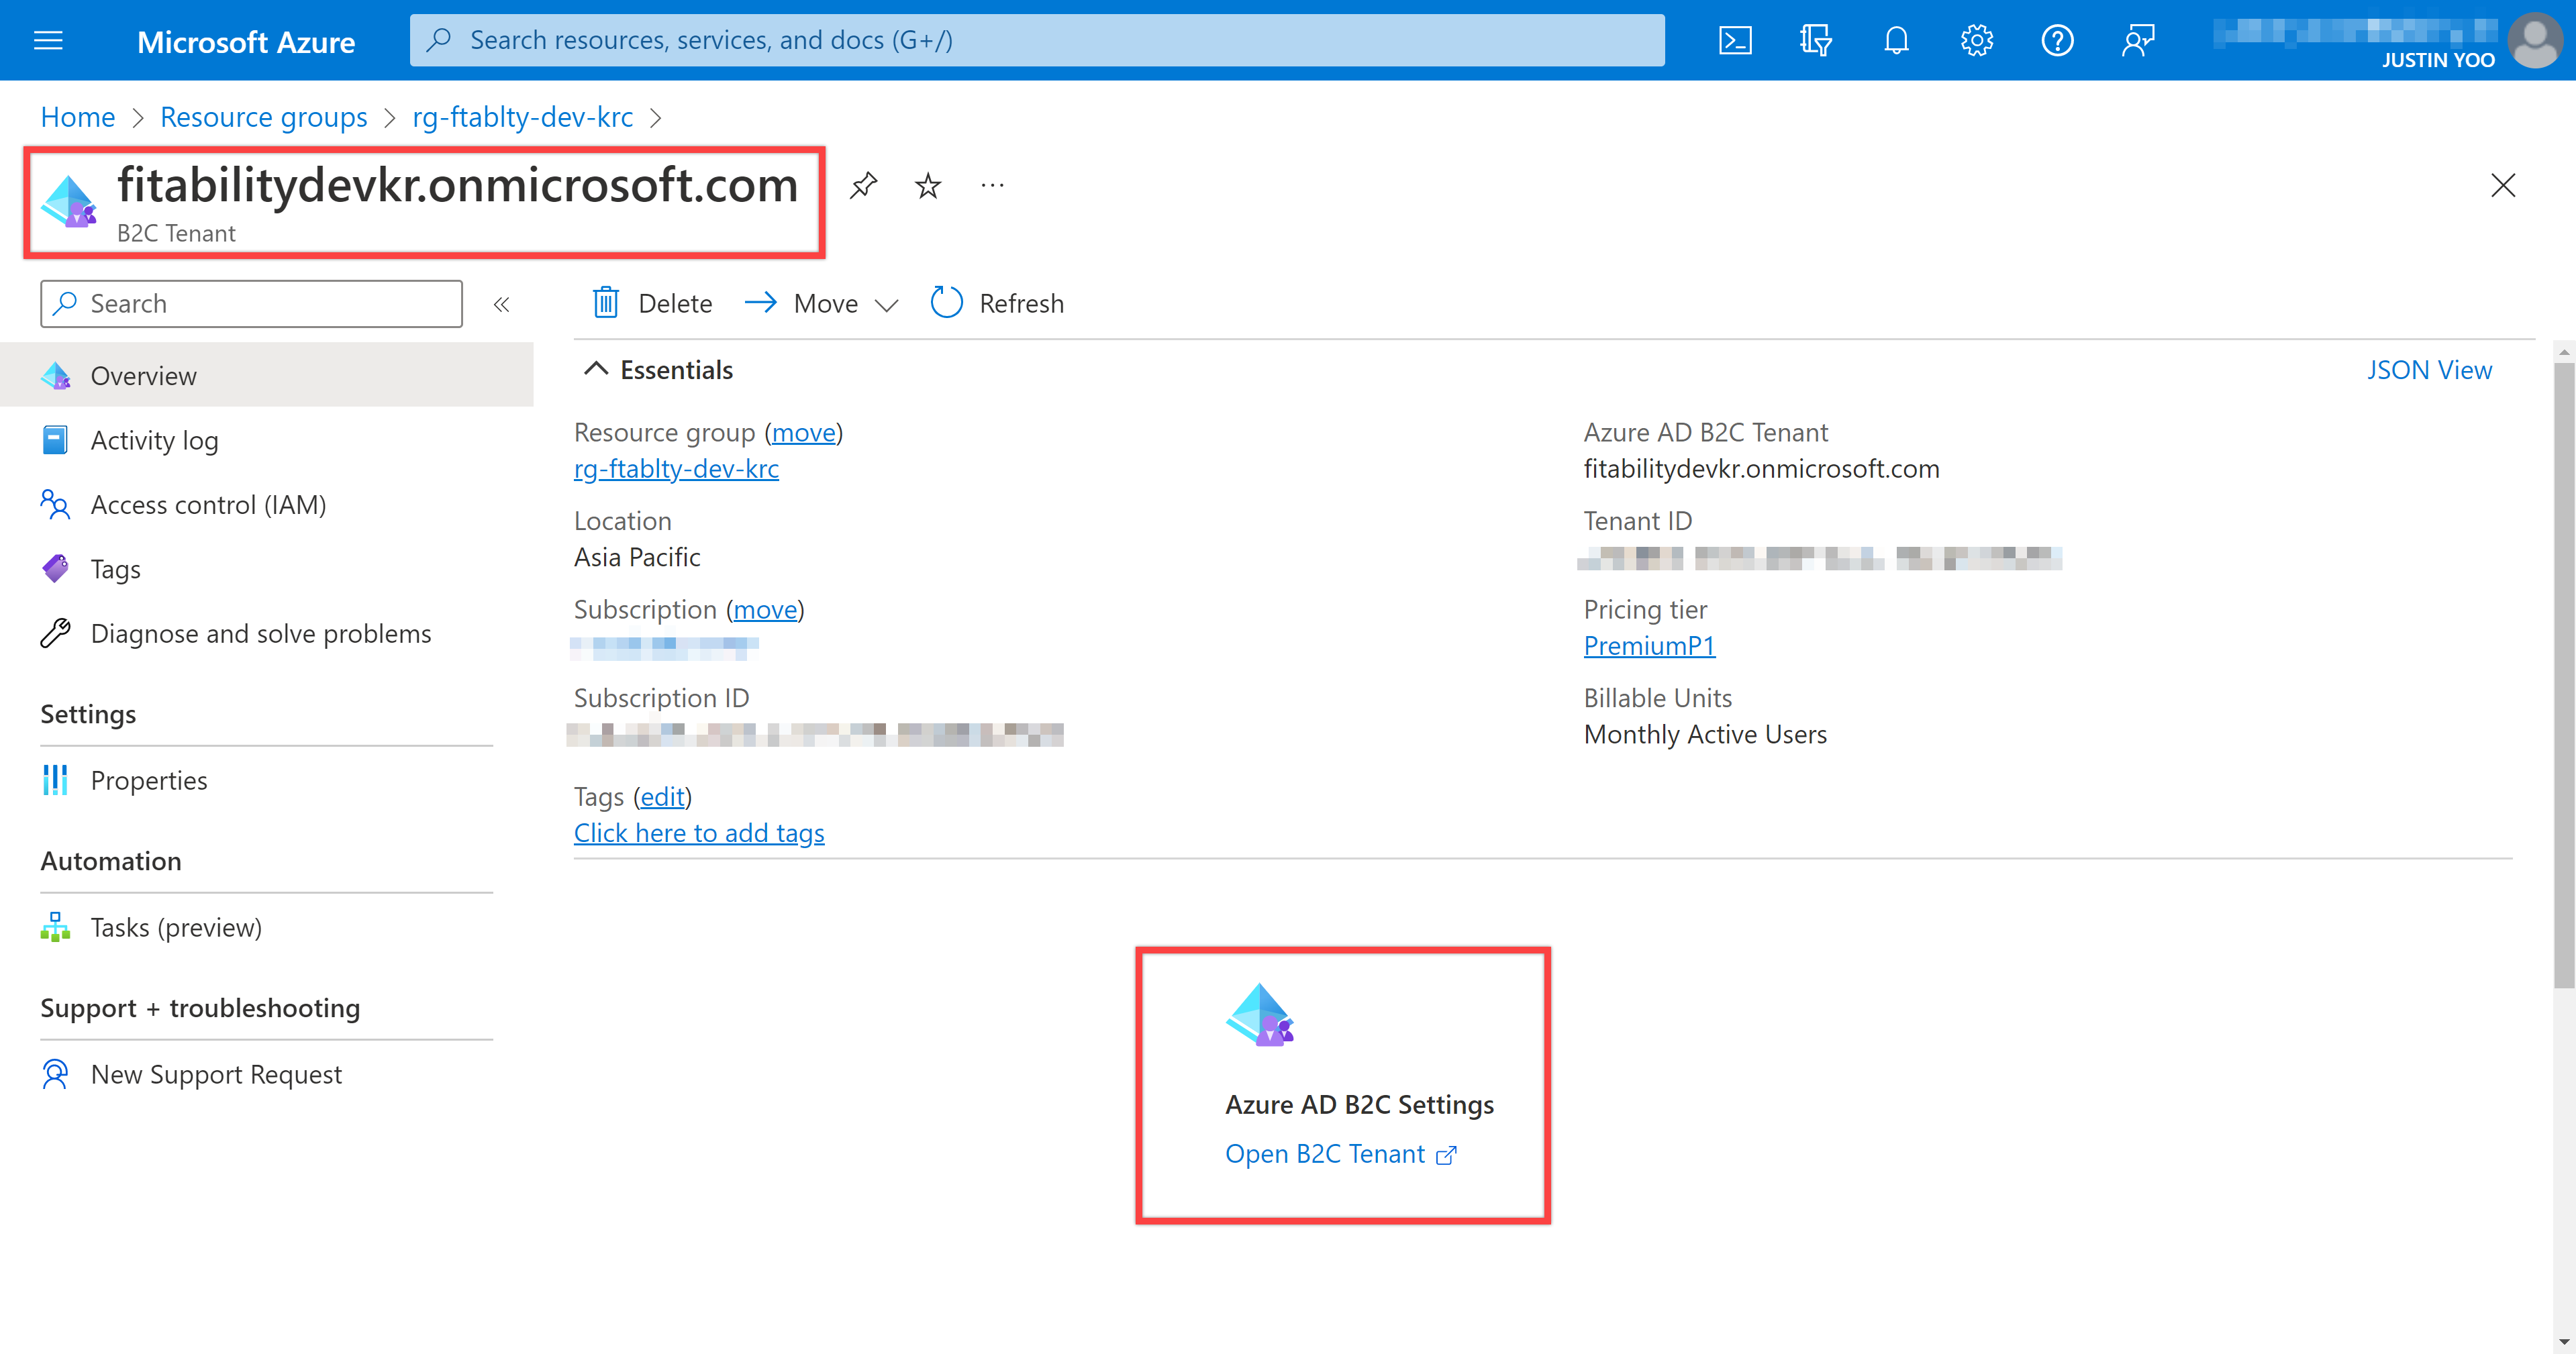
Create an Azure AD B2C instance from Azure Portal. You can give any name for it, but let's say fitabilitydevkr for now. Then, you'll get the Azure AD B2C instance like below.
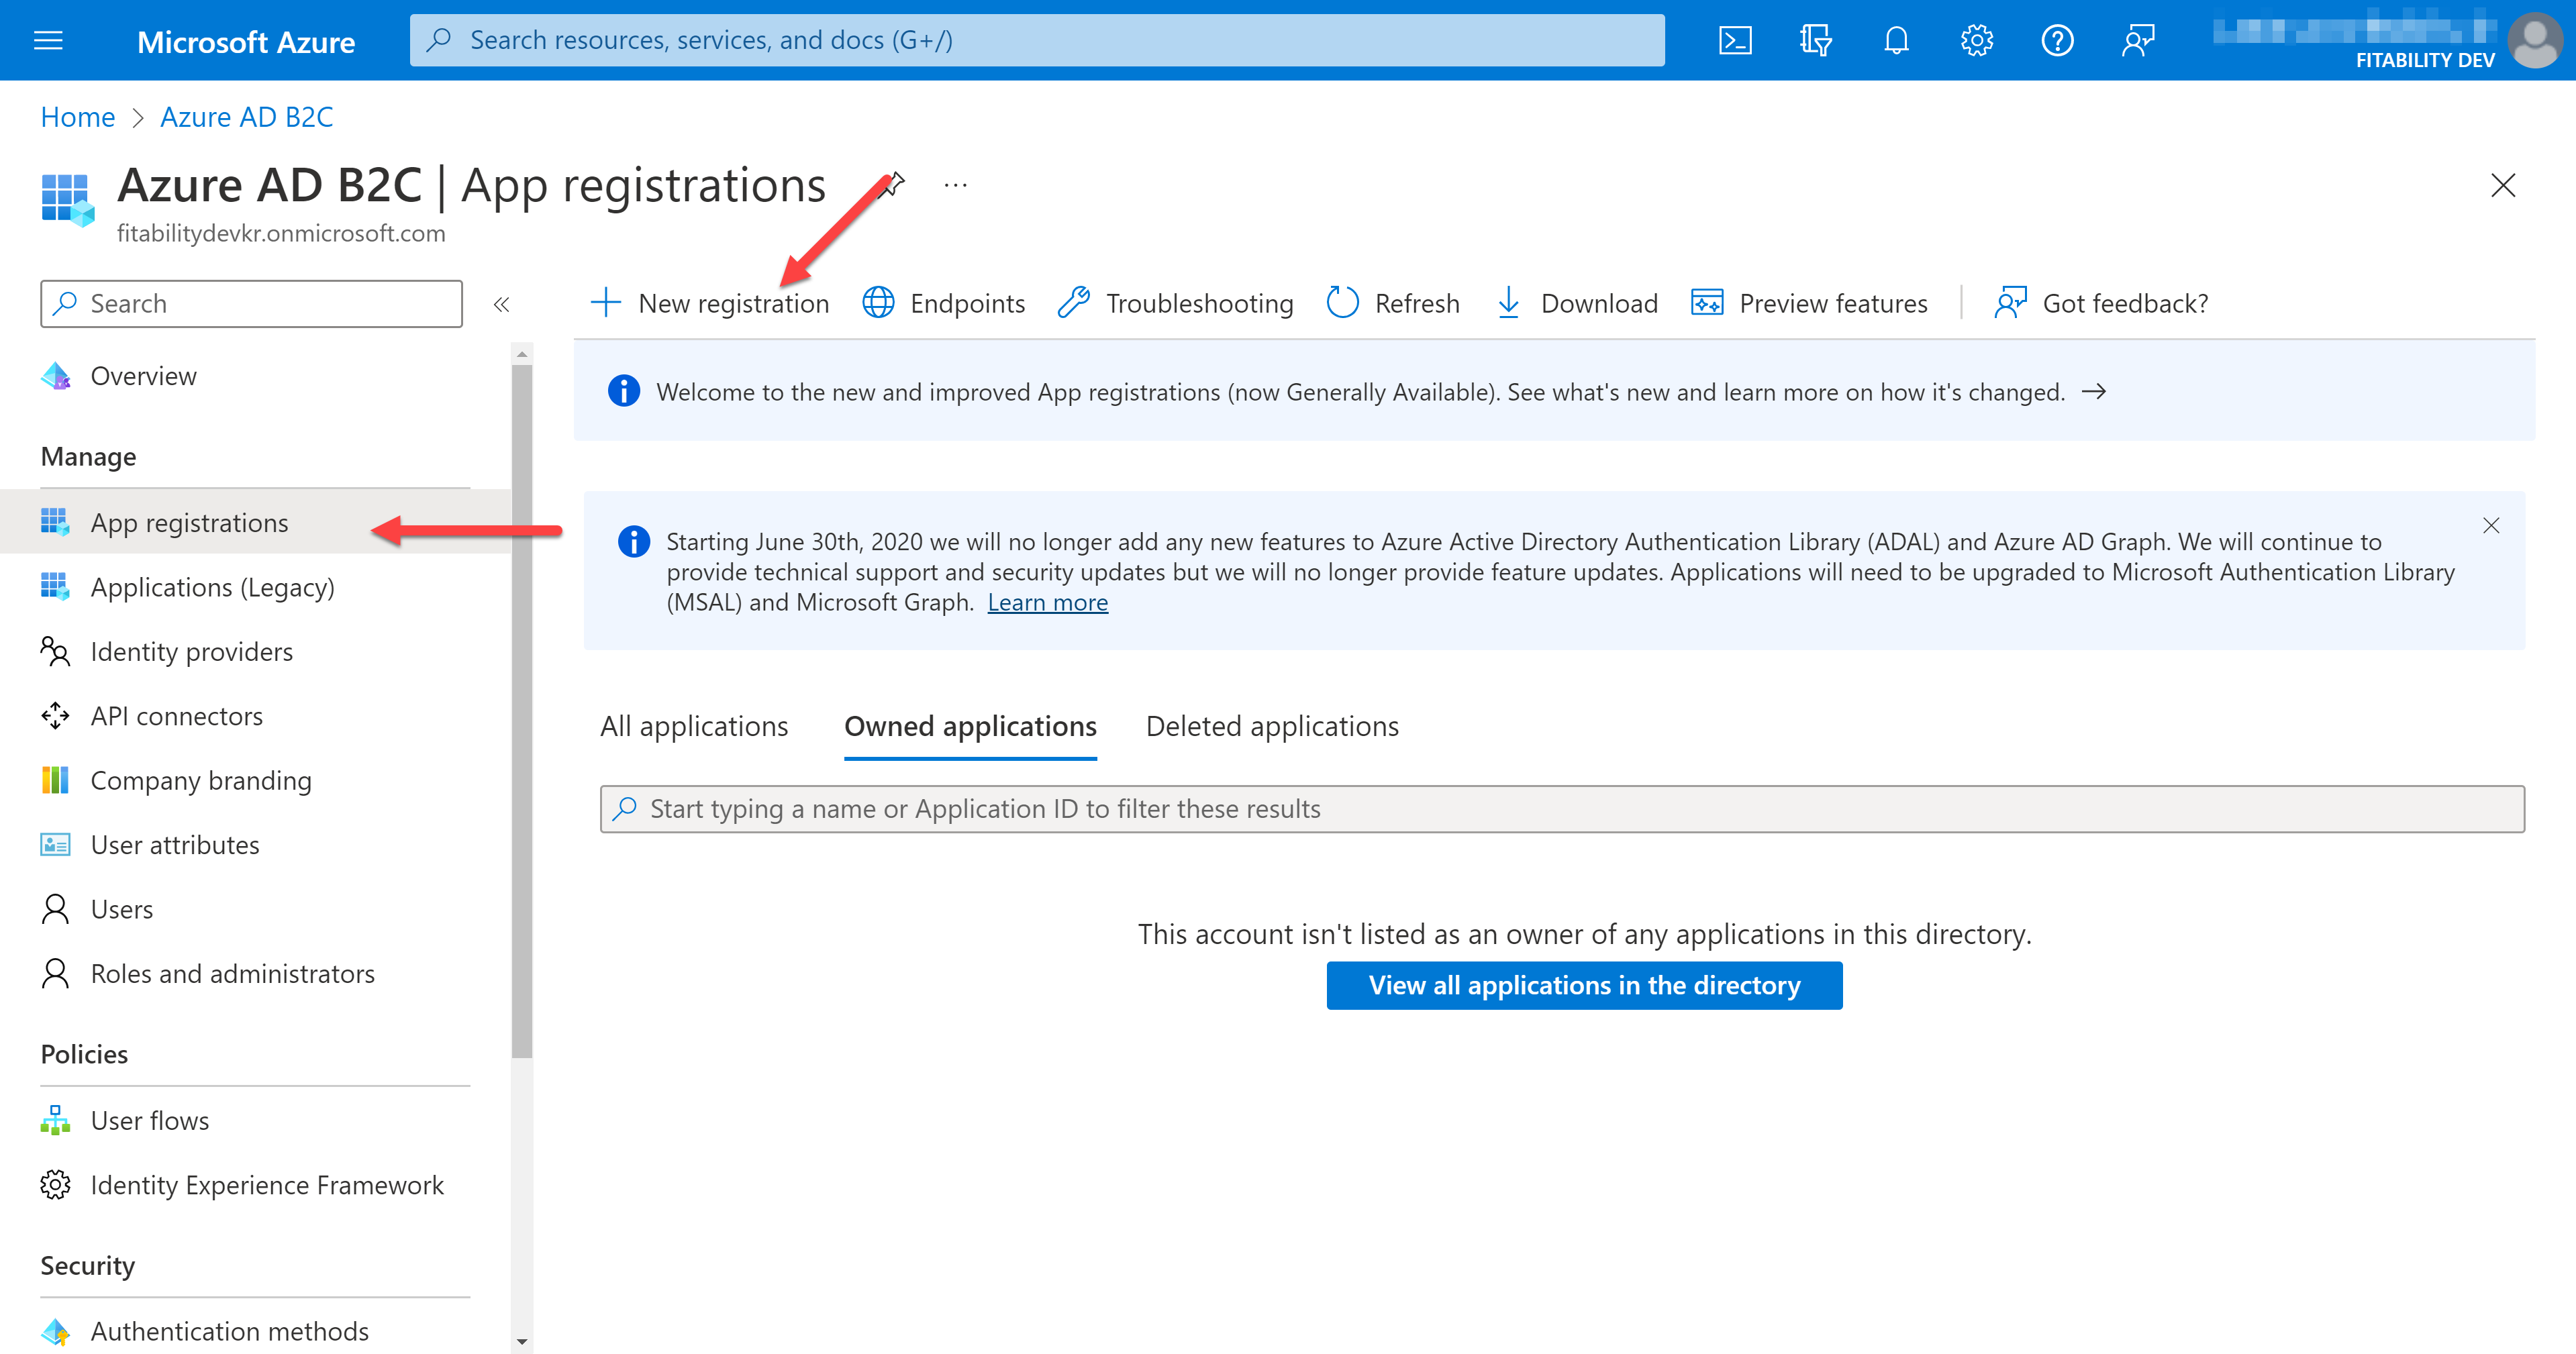
Click the "Open B2C Tenant" link to access the Azure AD B2C admin page. On the admin page, click the "App registrations" menu on the left. Then click the "New registration" button at the top.
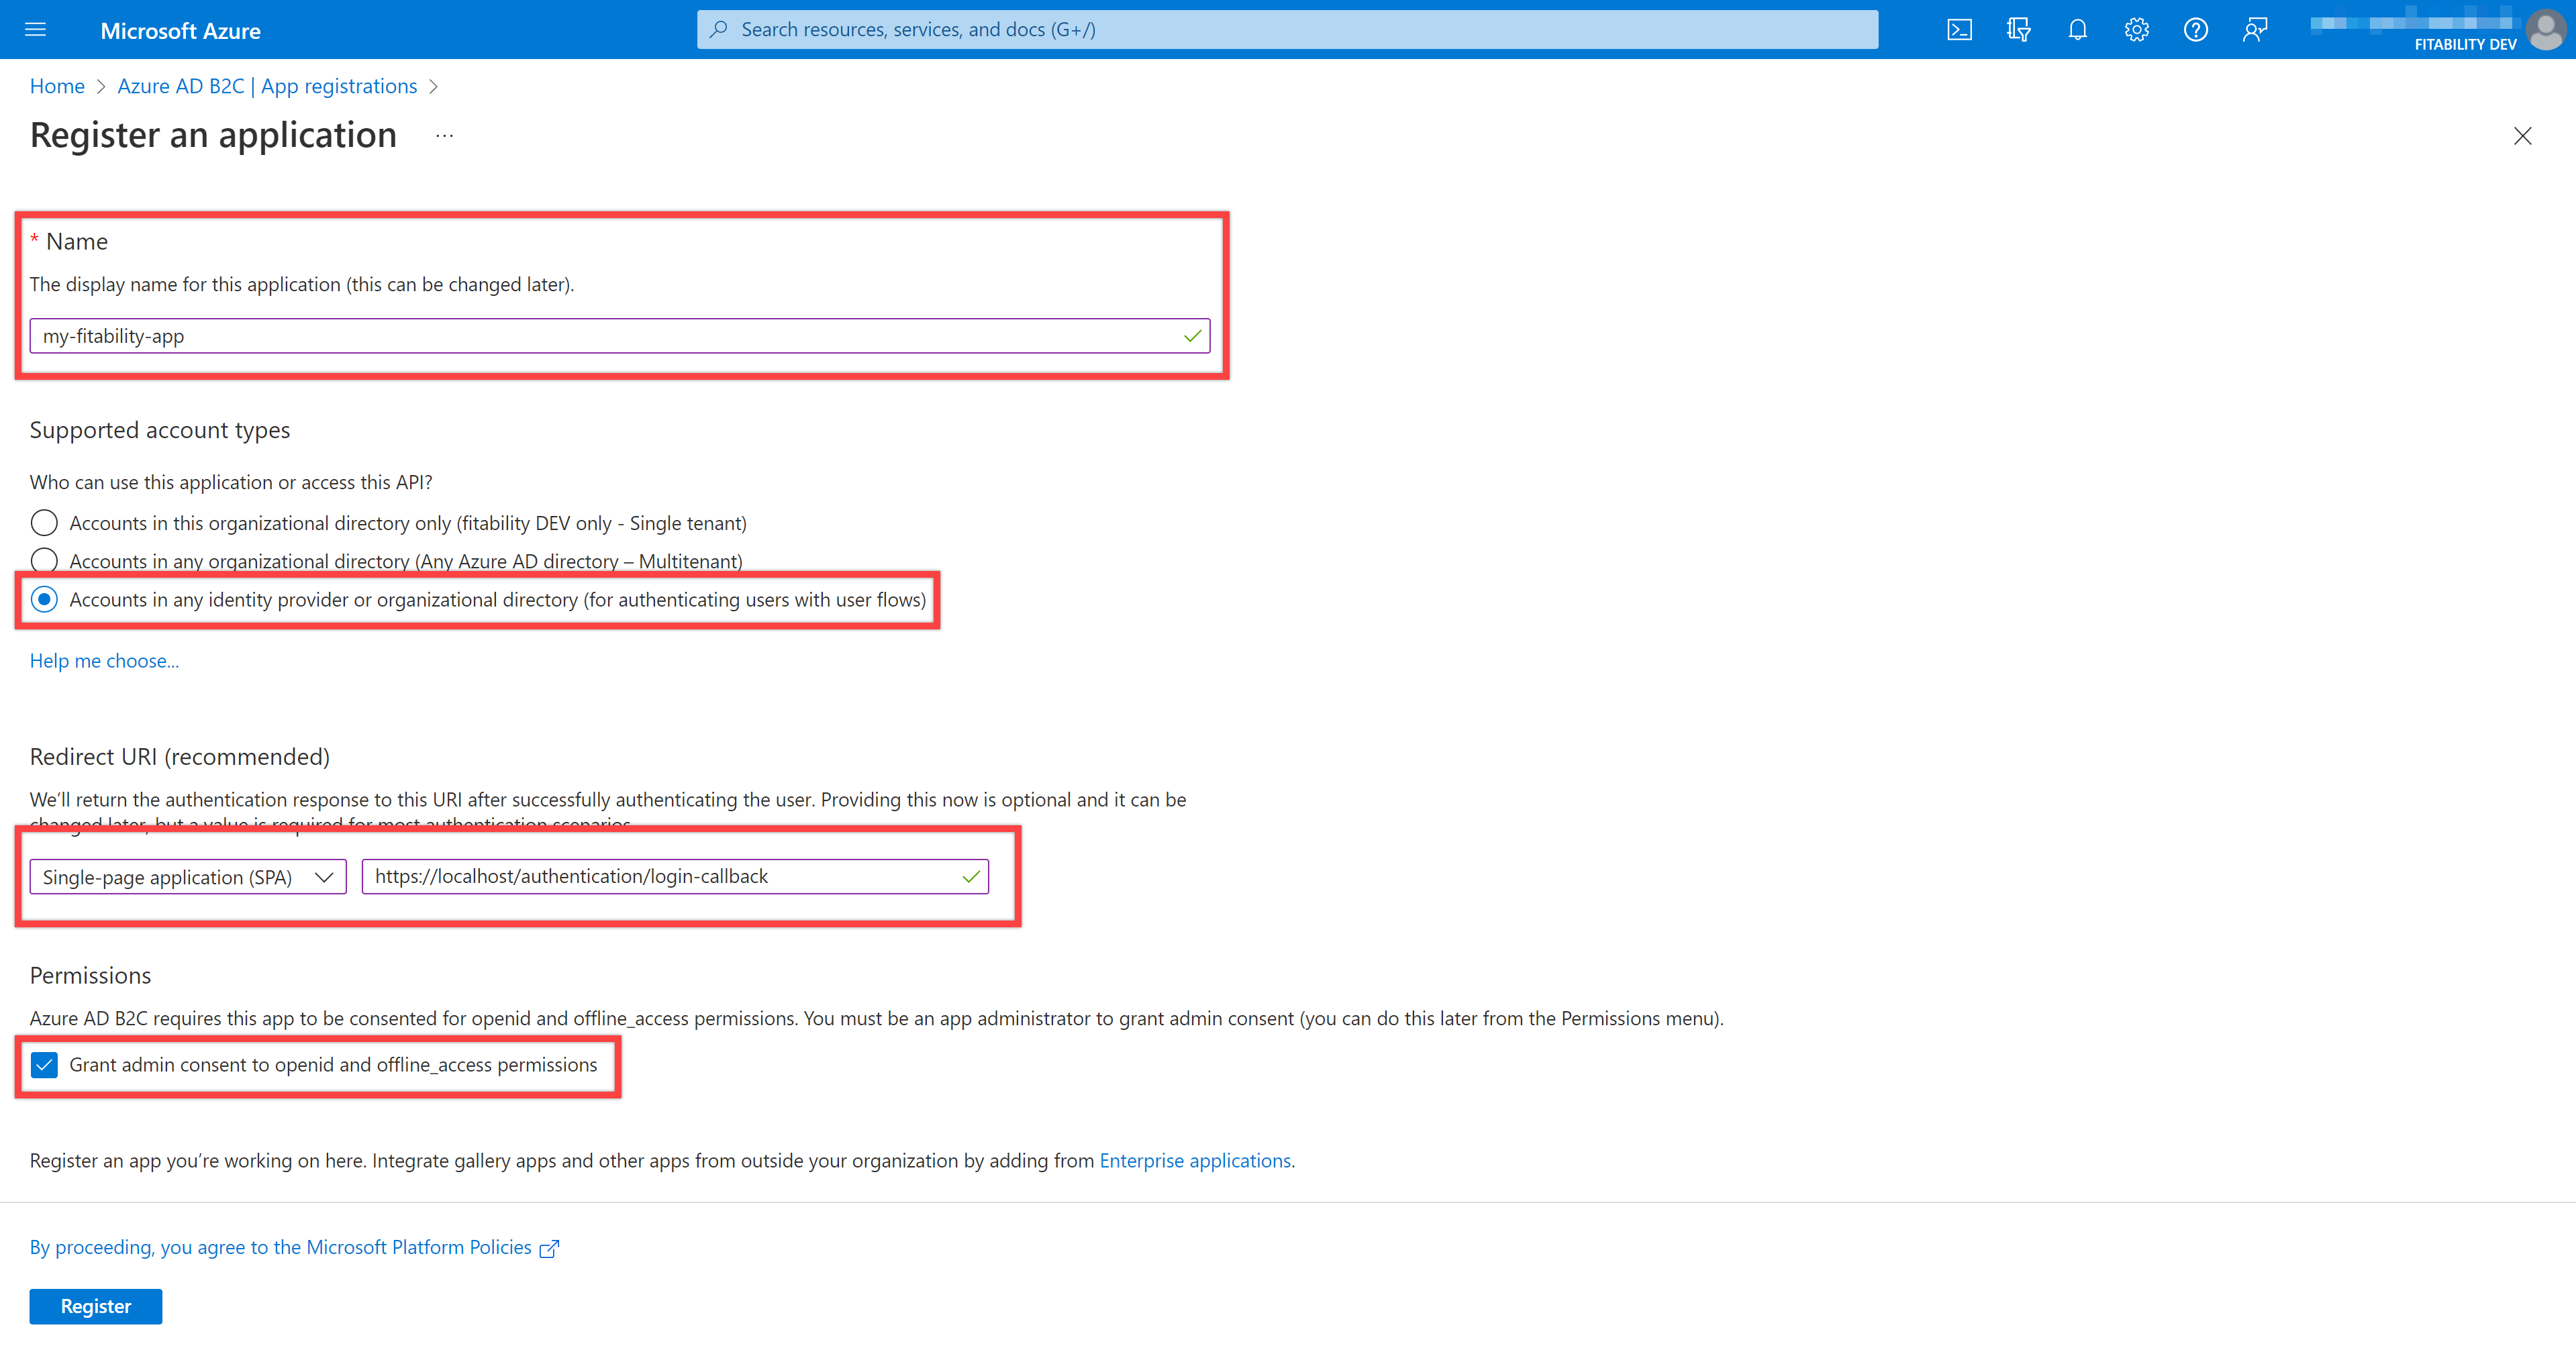
Enter the details like below:
- Name: Name of the app. Say,
my-fitability-app. - Supported account types: Choose the option "Accounts in any identity provider or organisational directory".
- Redirect URI (Recommended): Select "Single-page Application (SPA)", then enter
https://localhost/authentication/login-callback. - Permissions: Tick "Grant admin consent to openid and offline_access permissions"
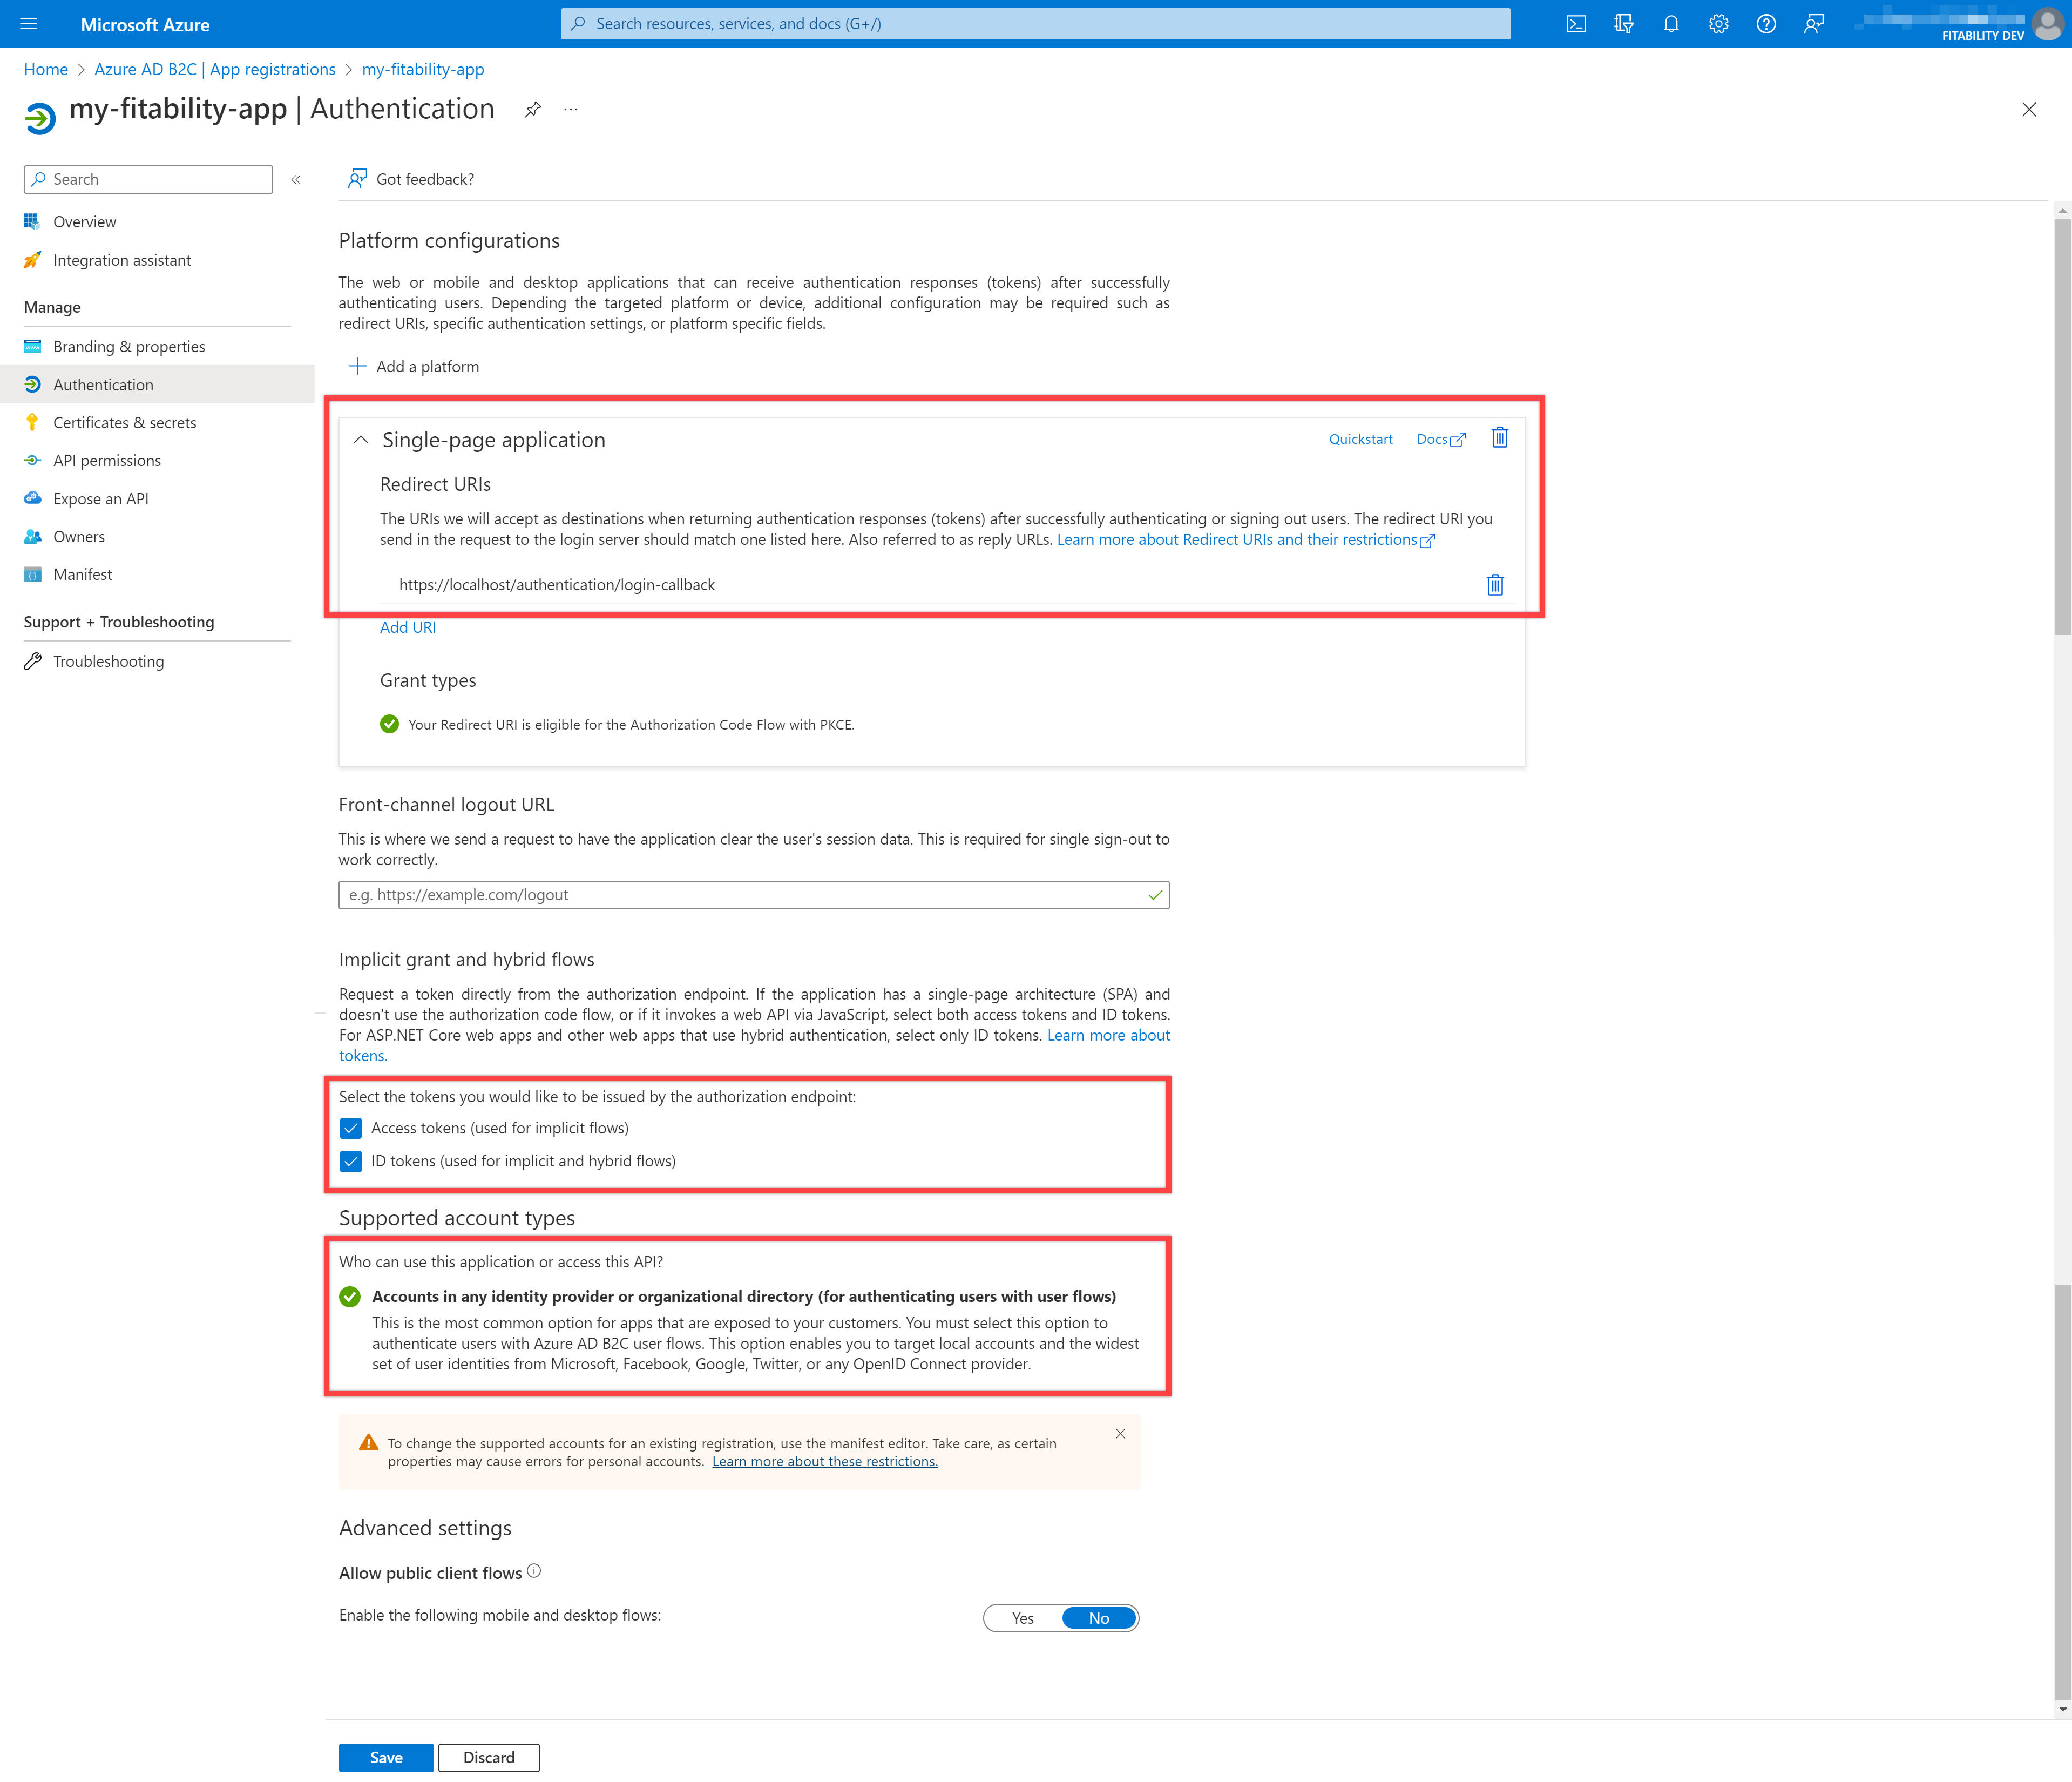
Once registered, double-check the following details:
- Single-page Application – Redirect URIs
- Implicit grant and hybrid flows – Access tokens, ID tokens
- Supported account types – Accounts in any identity provider or organisational directory
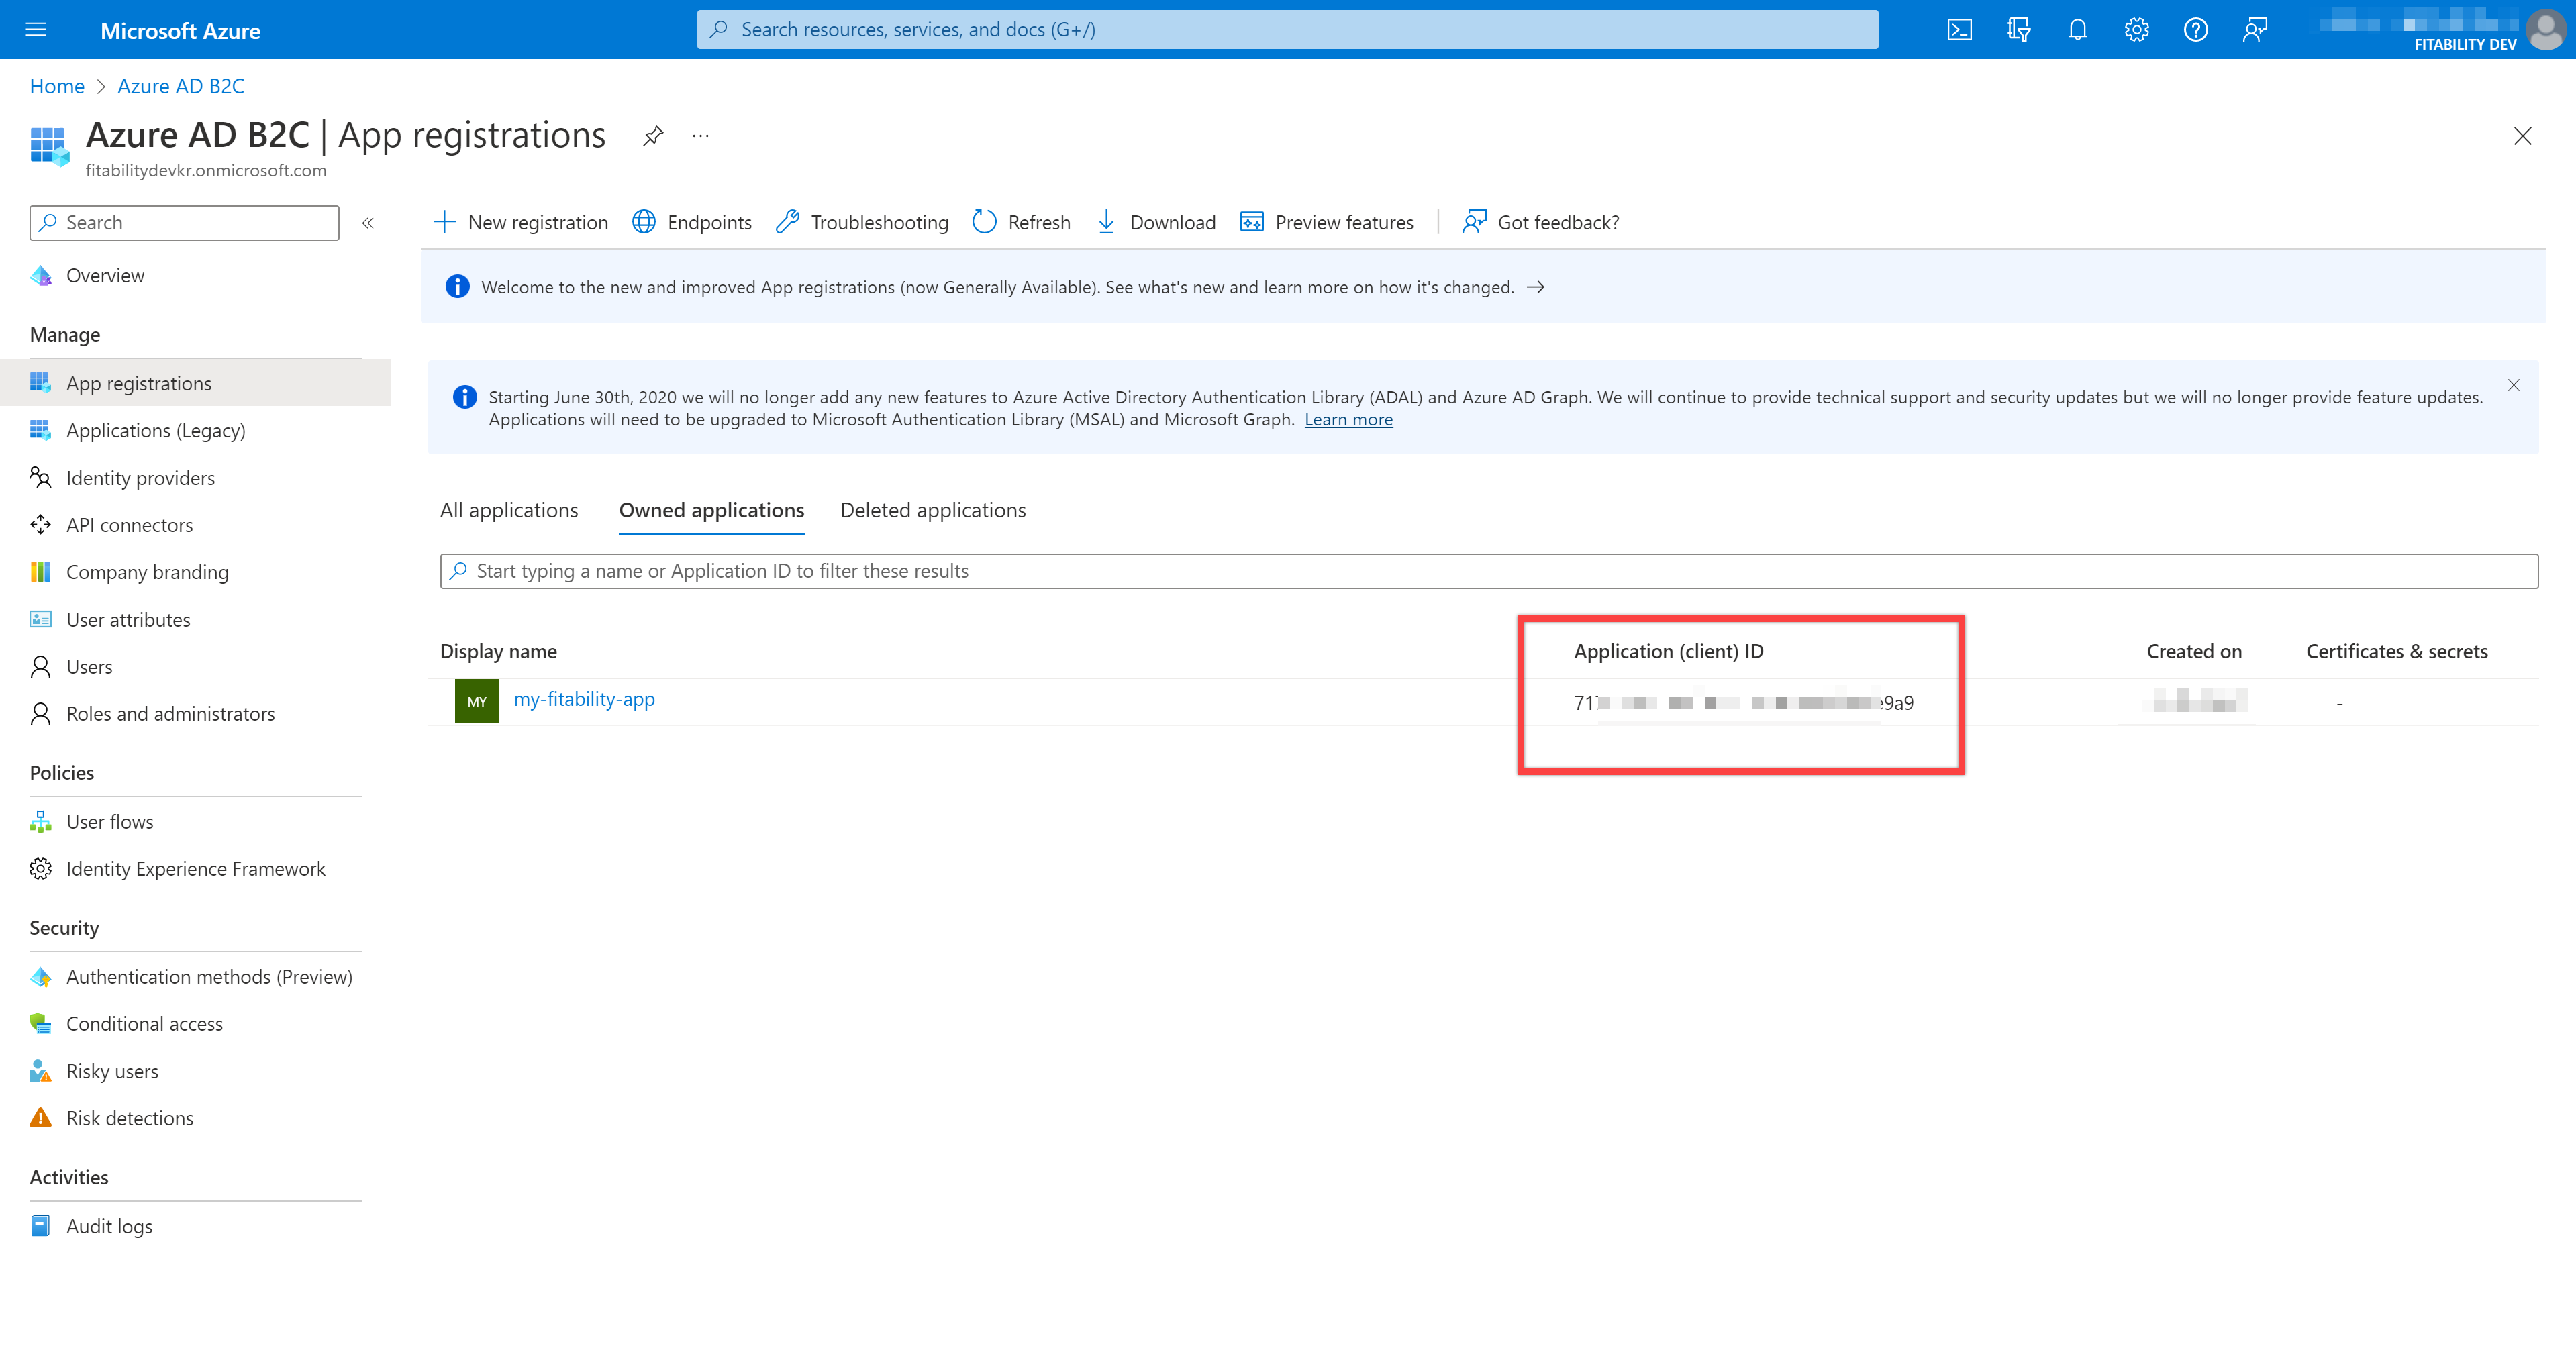
You can now see the new app registered. Note the application (client) ID.
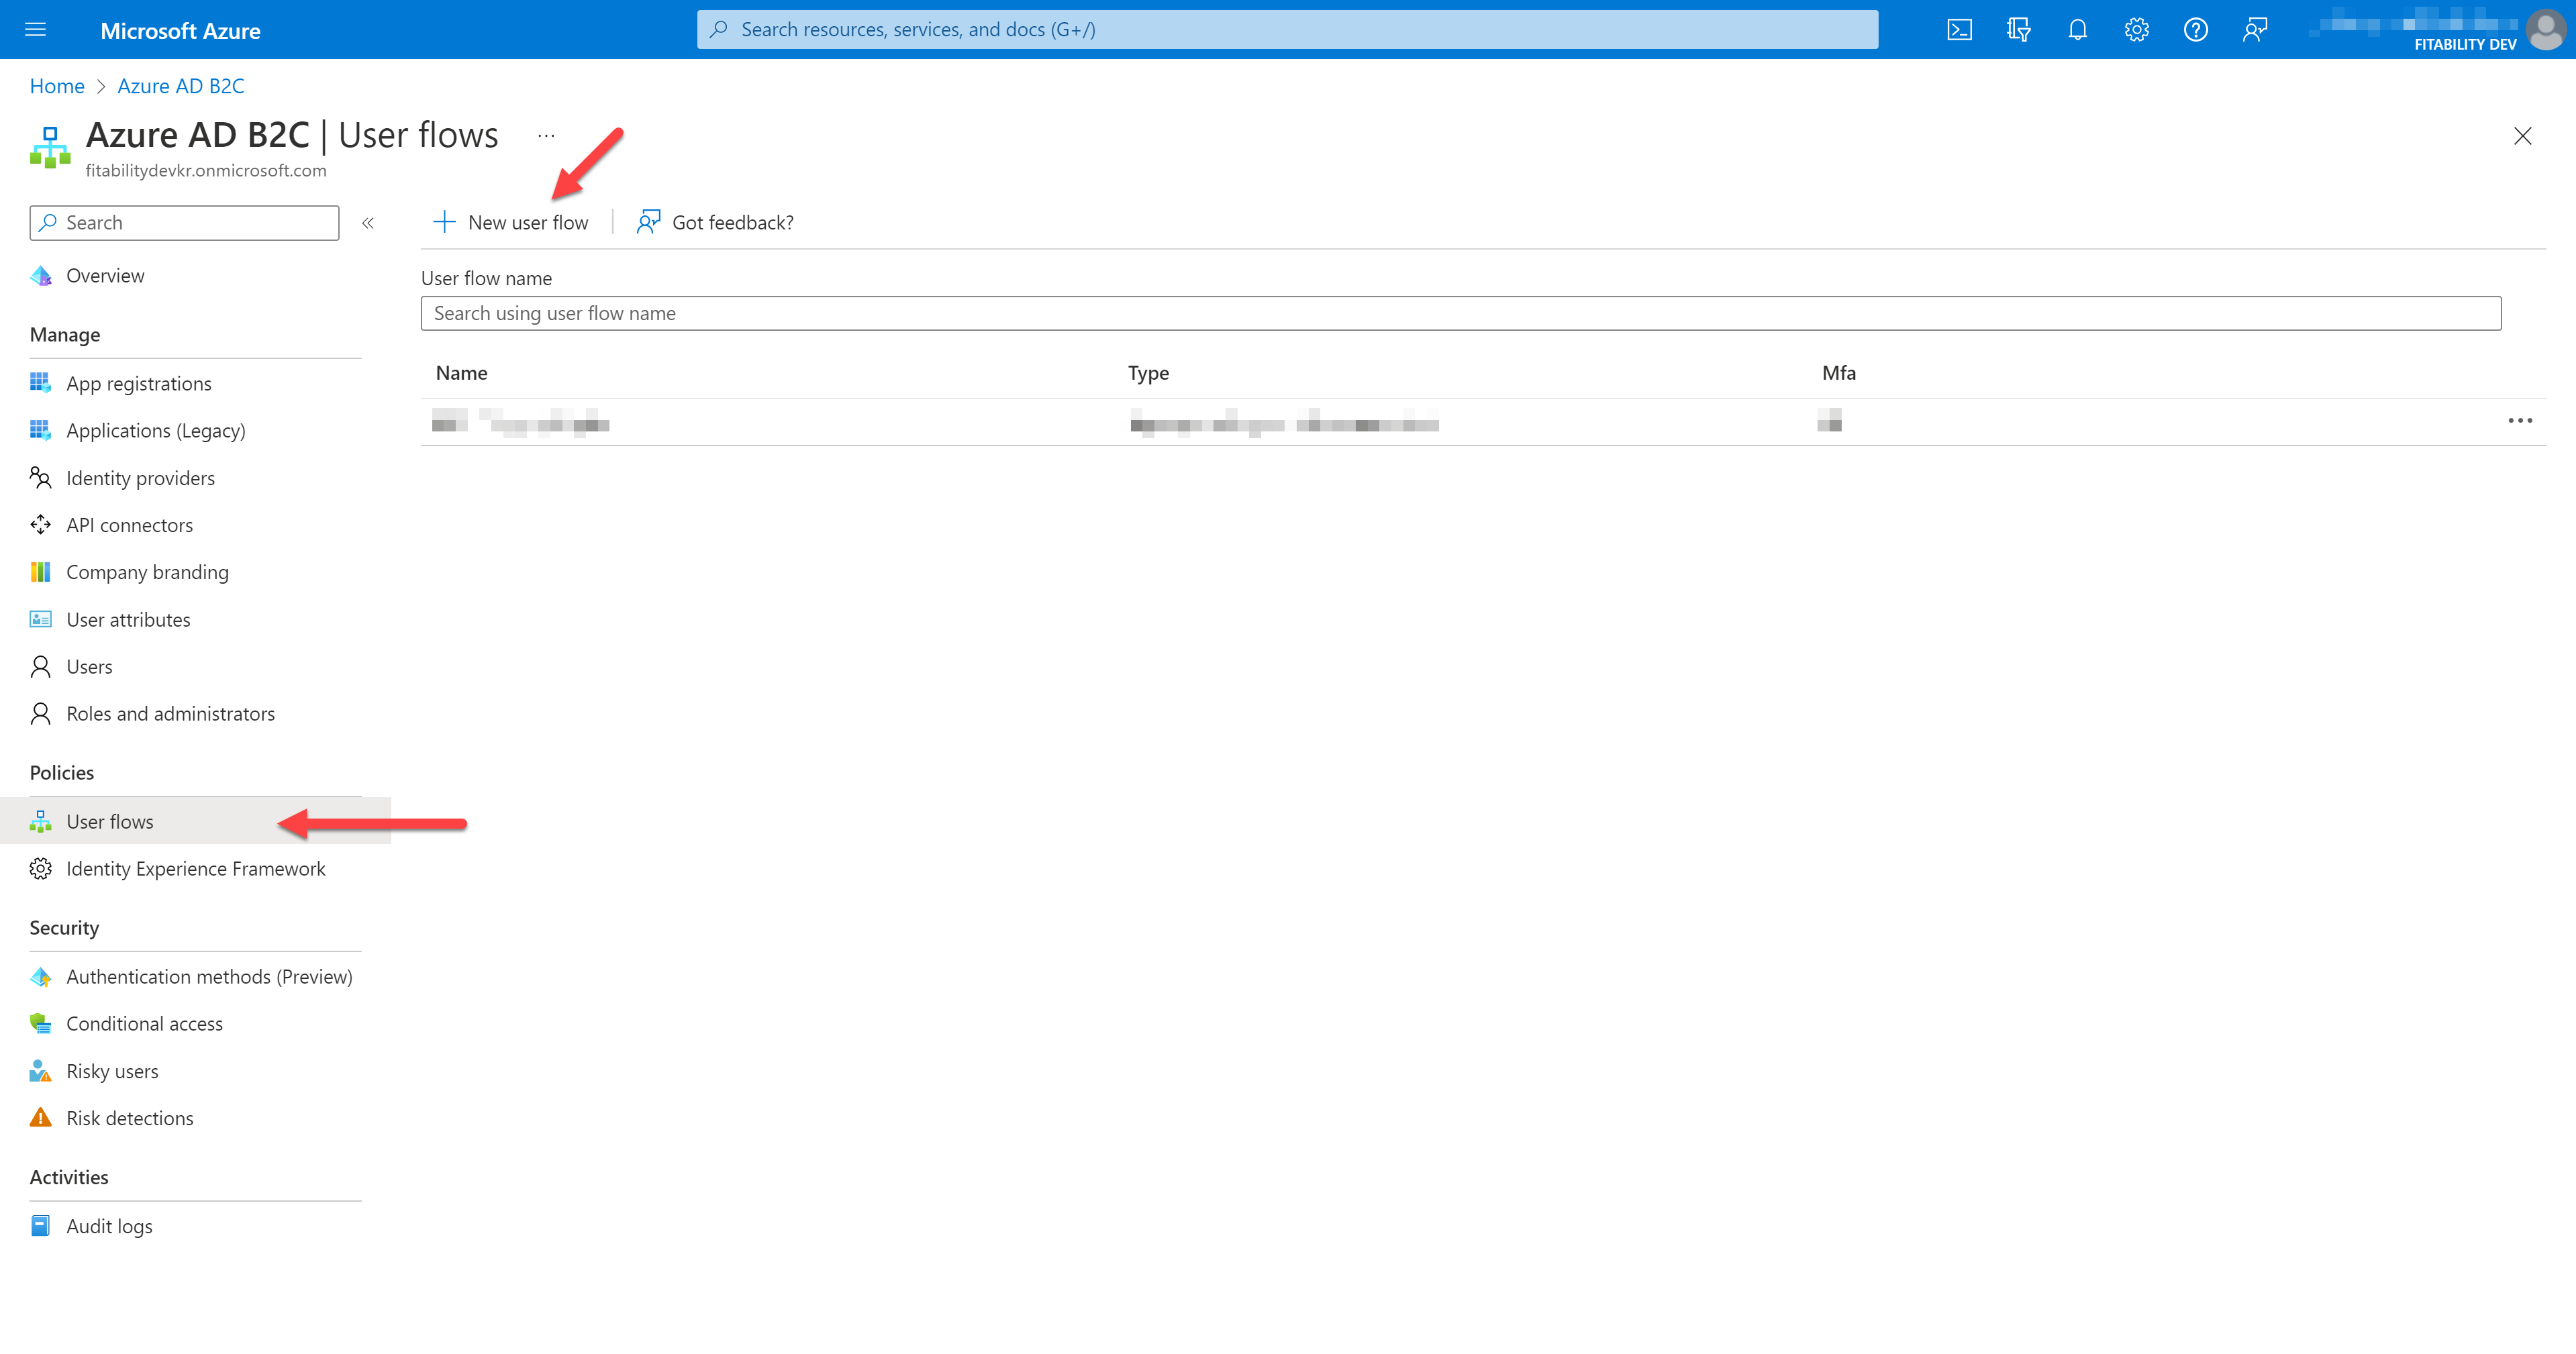
Let's define the log-in process. On the Azure AD B2C page, click the "User flows" menu on the left, then the "New user flow" menu at the top.
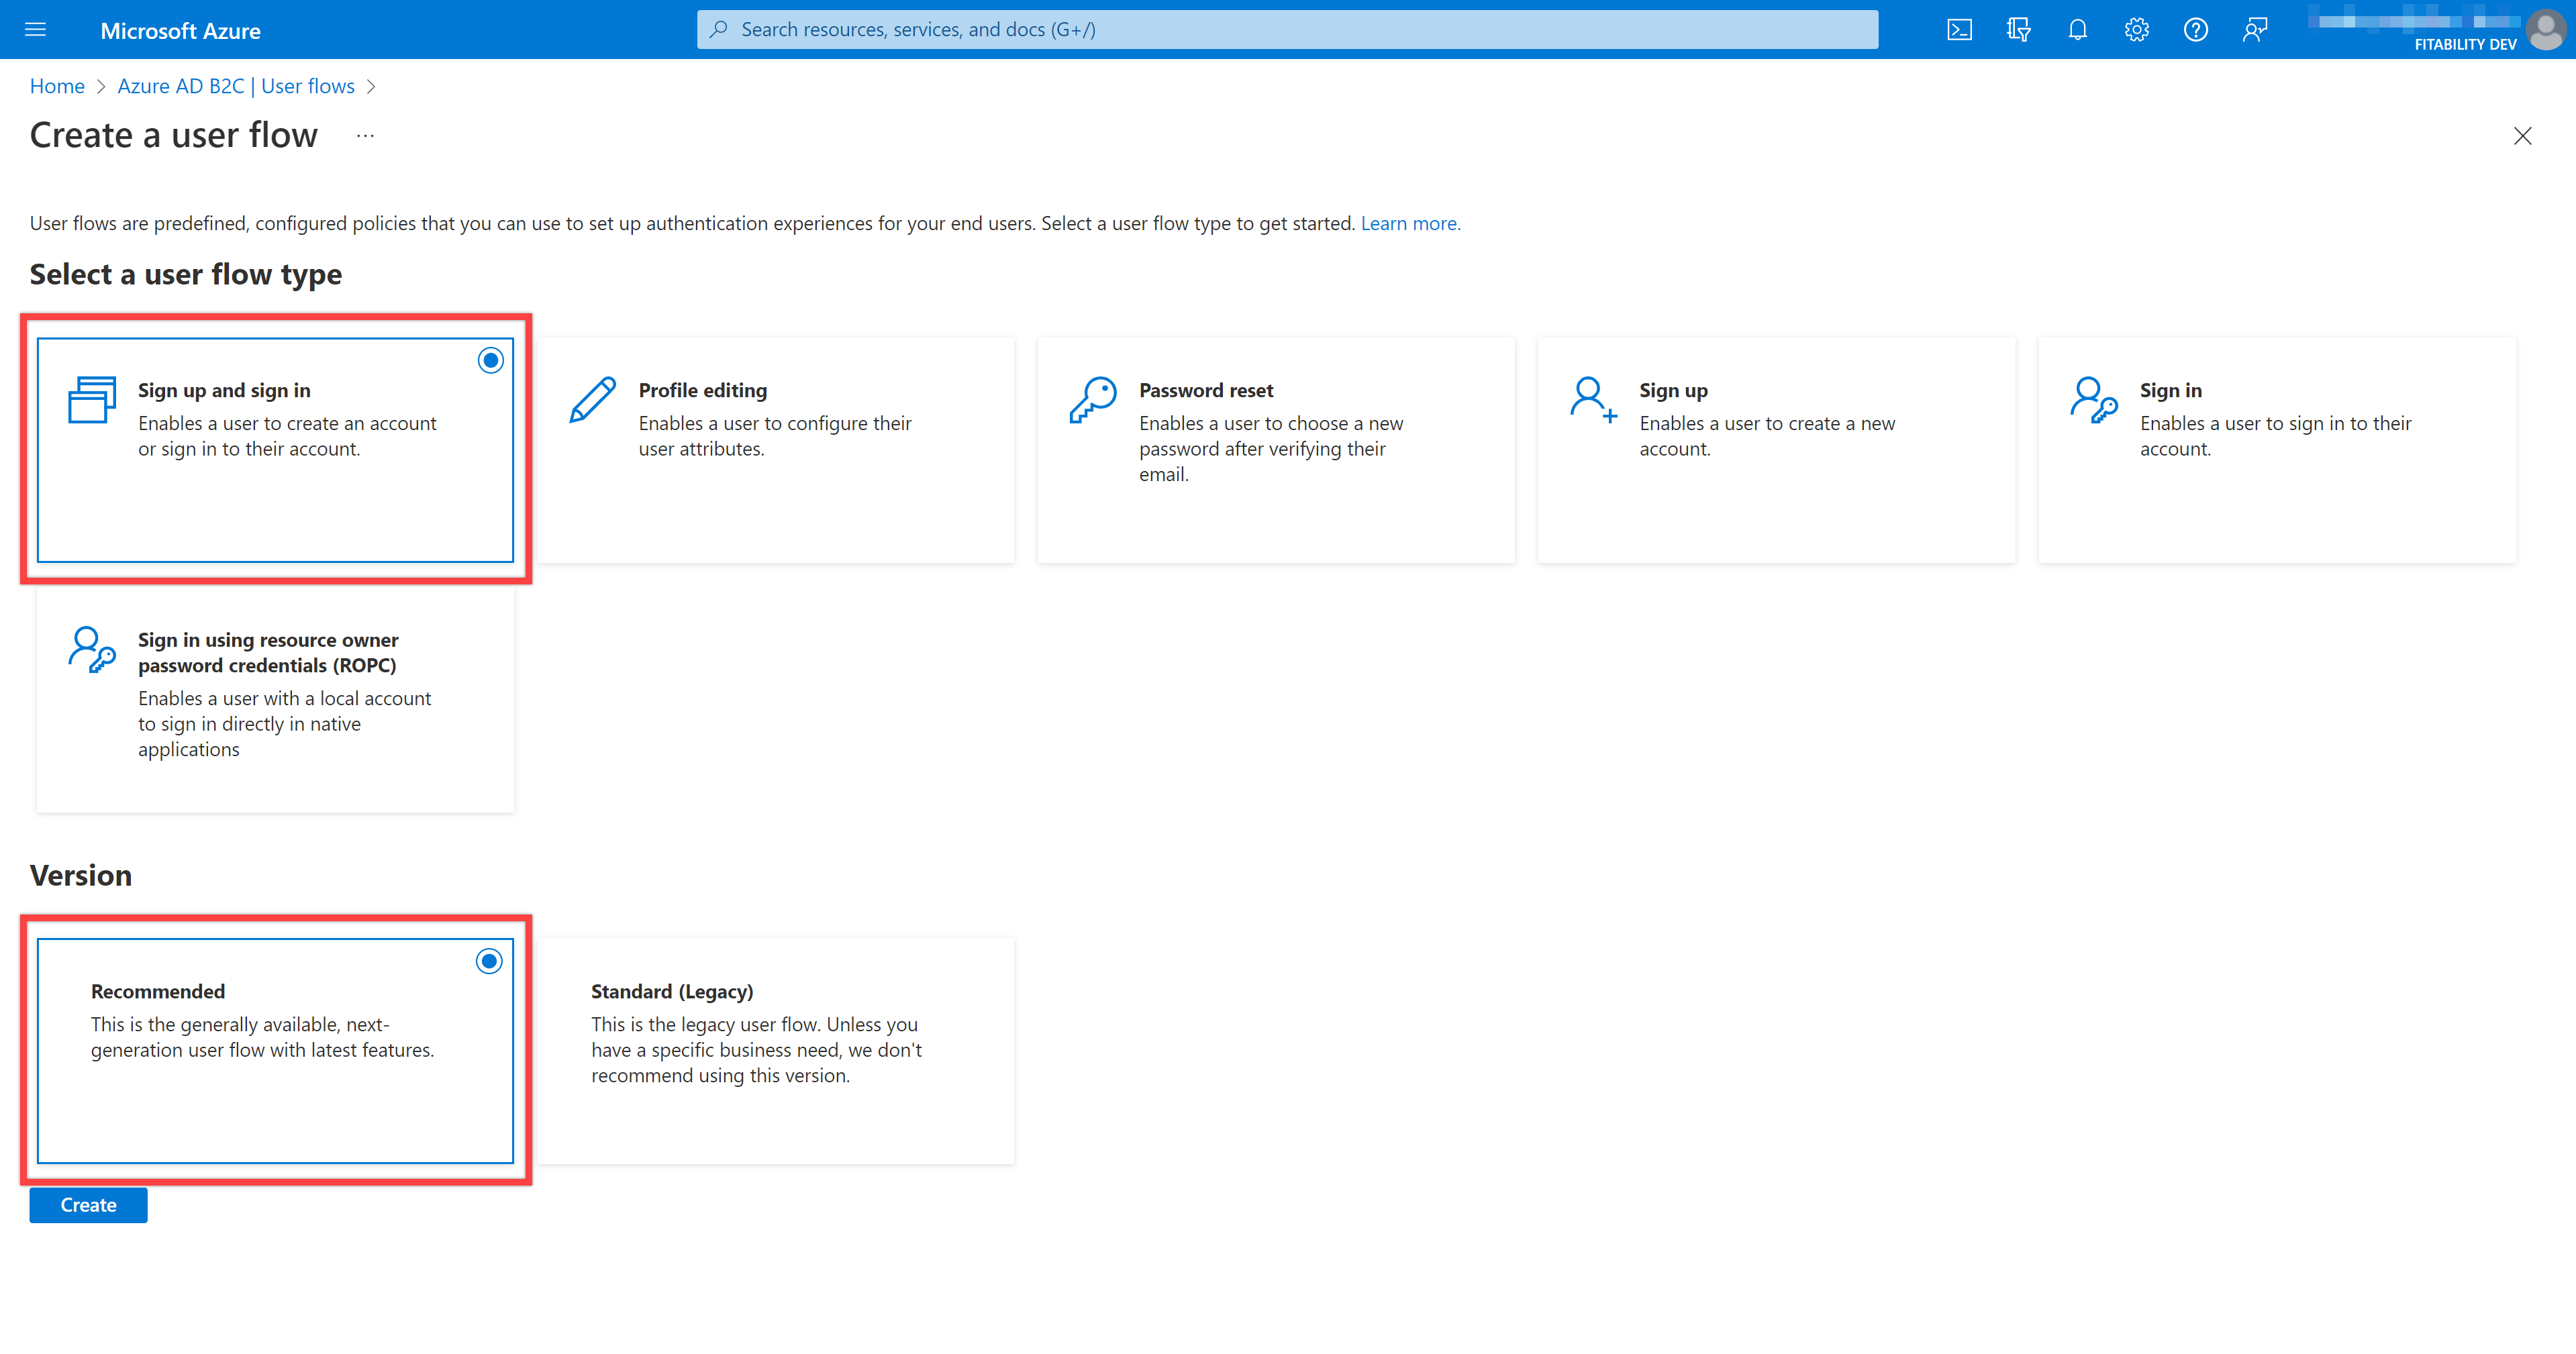
There are many different user flow types. This time, choose the "Sign up and sign in" flow. Then, select "Recommended".
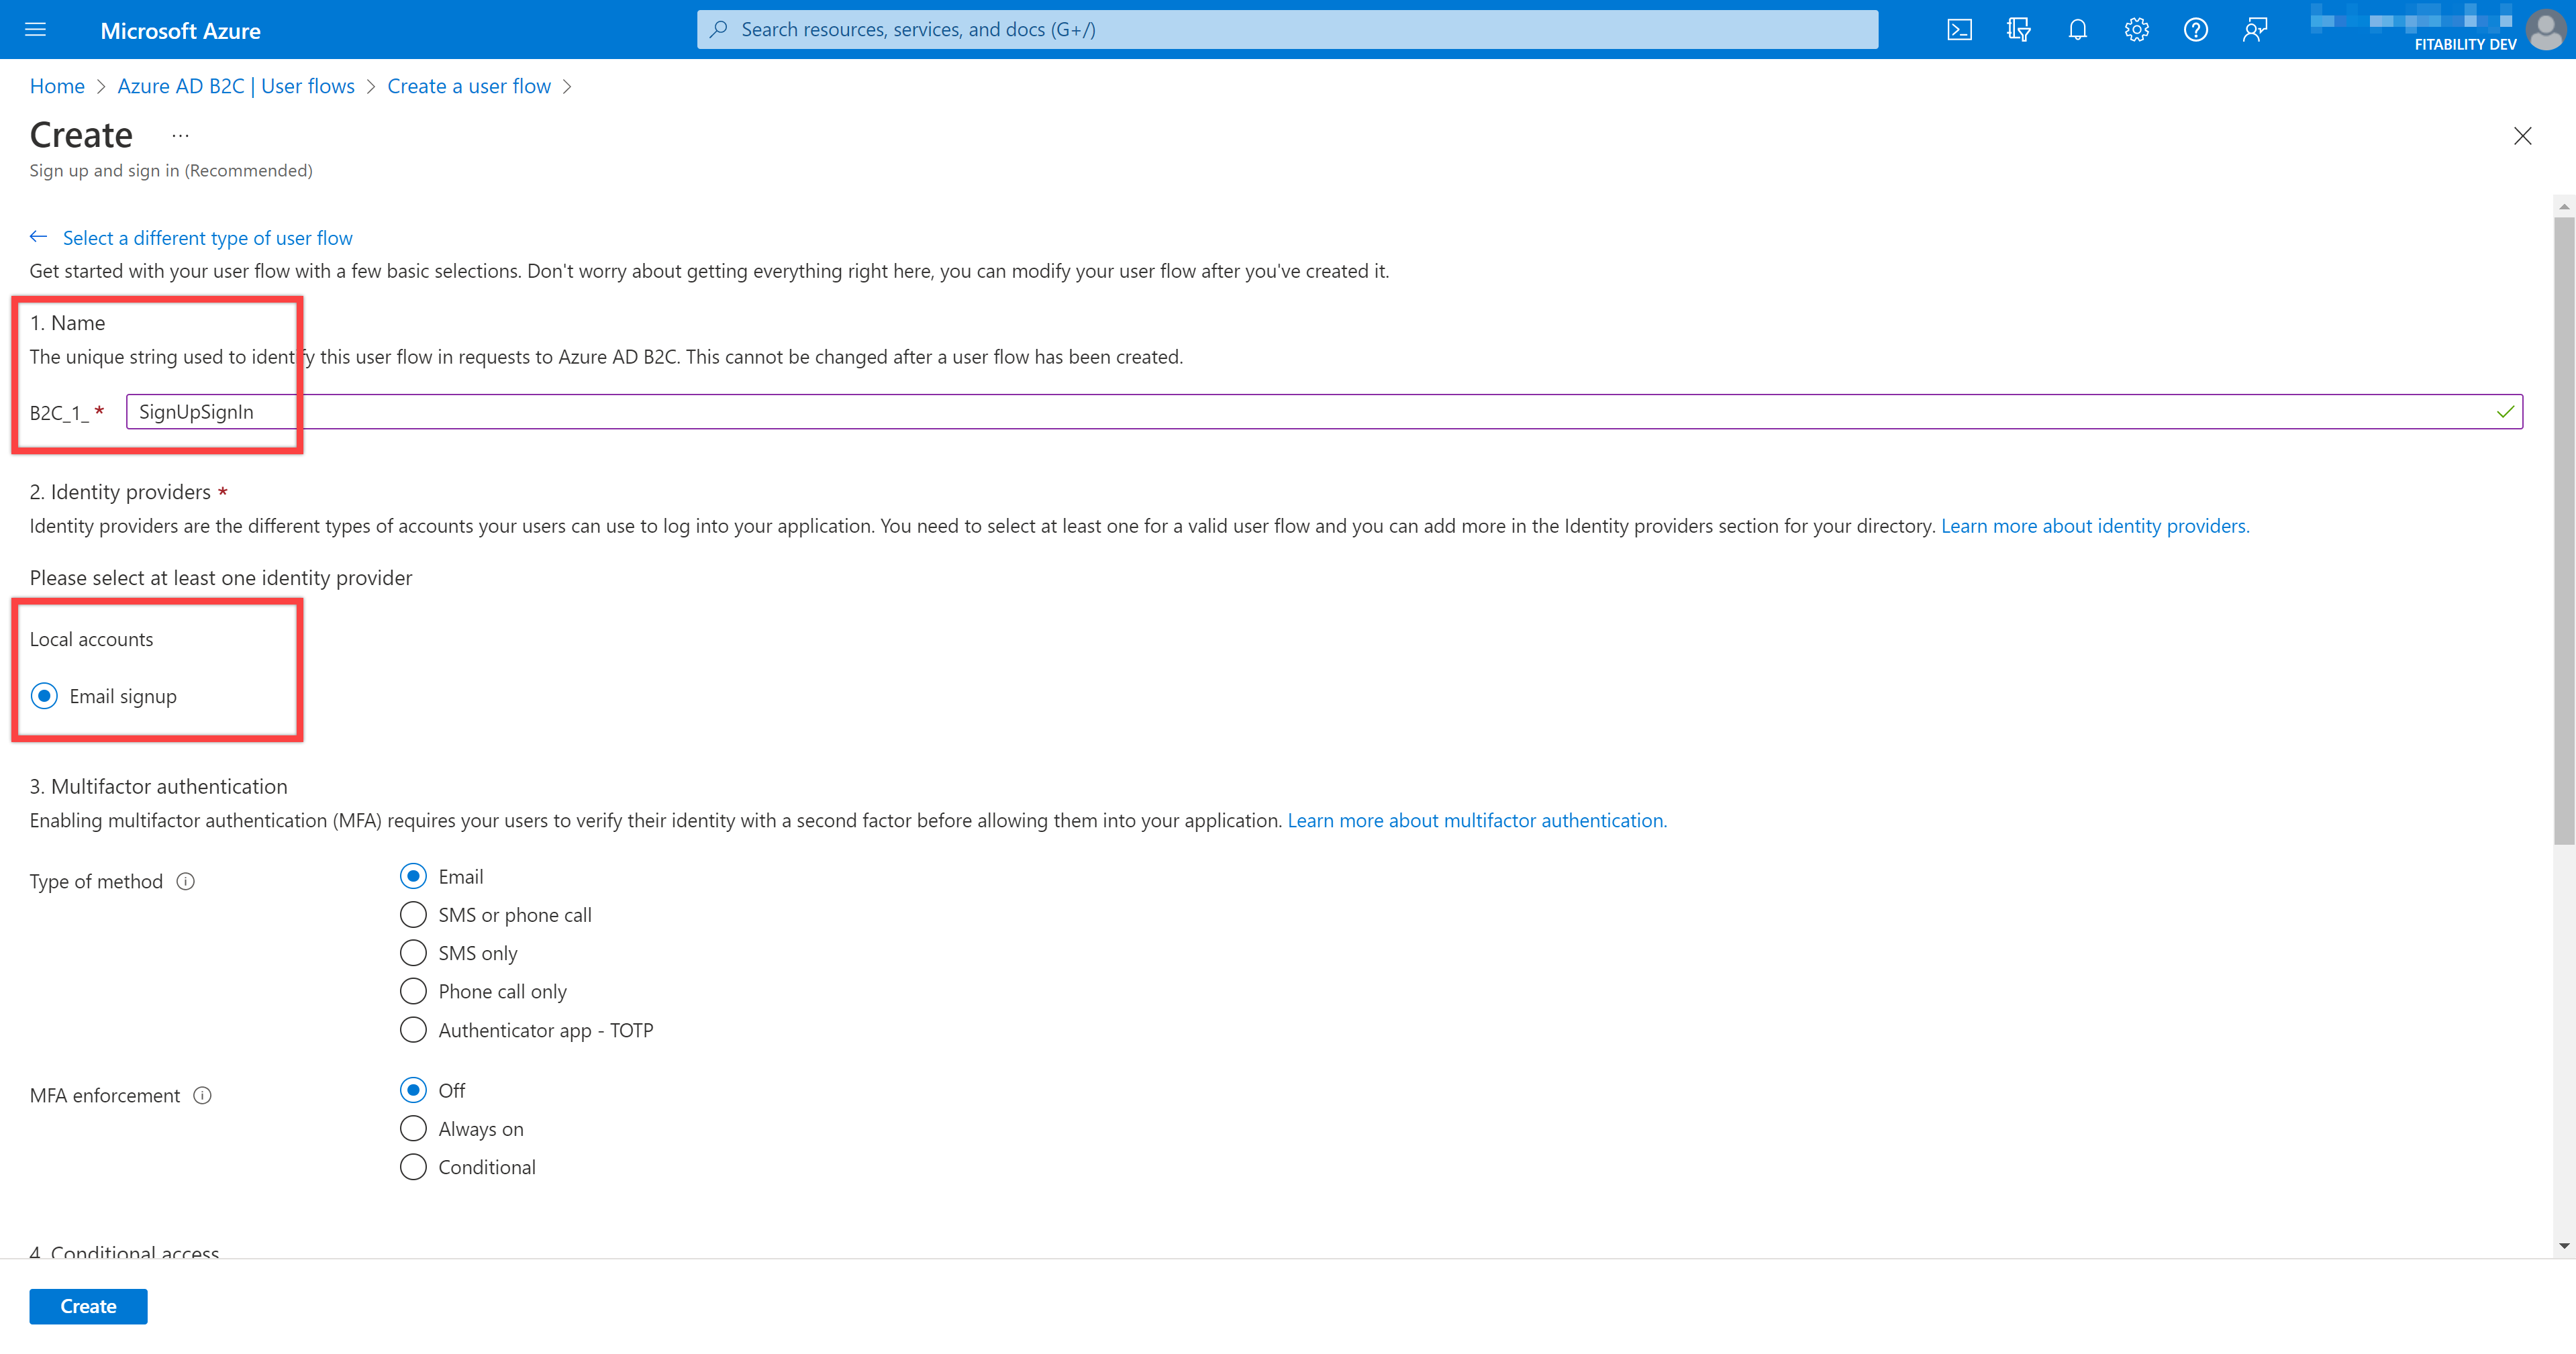
Enter the following values, and click "Create".
- Name:
SignUpSignIn - Identity providers: Email Signup
You can add as many identity providers as you like. But in this post, you can only choose the email sign-up option by default.
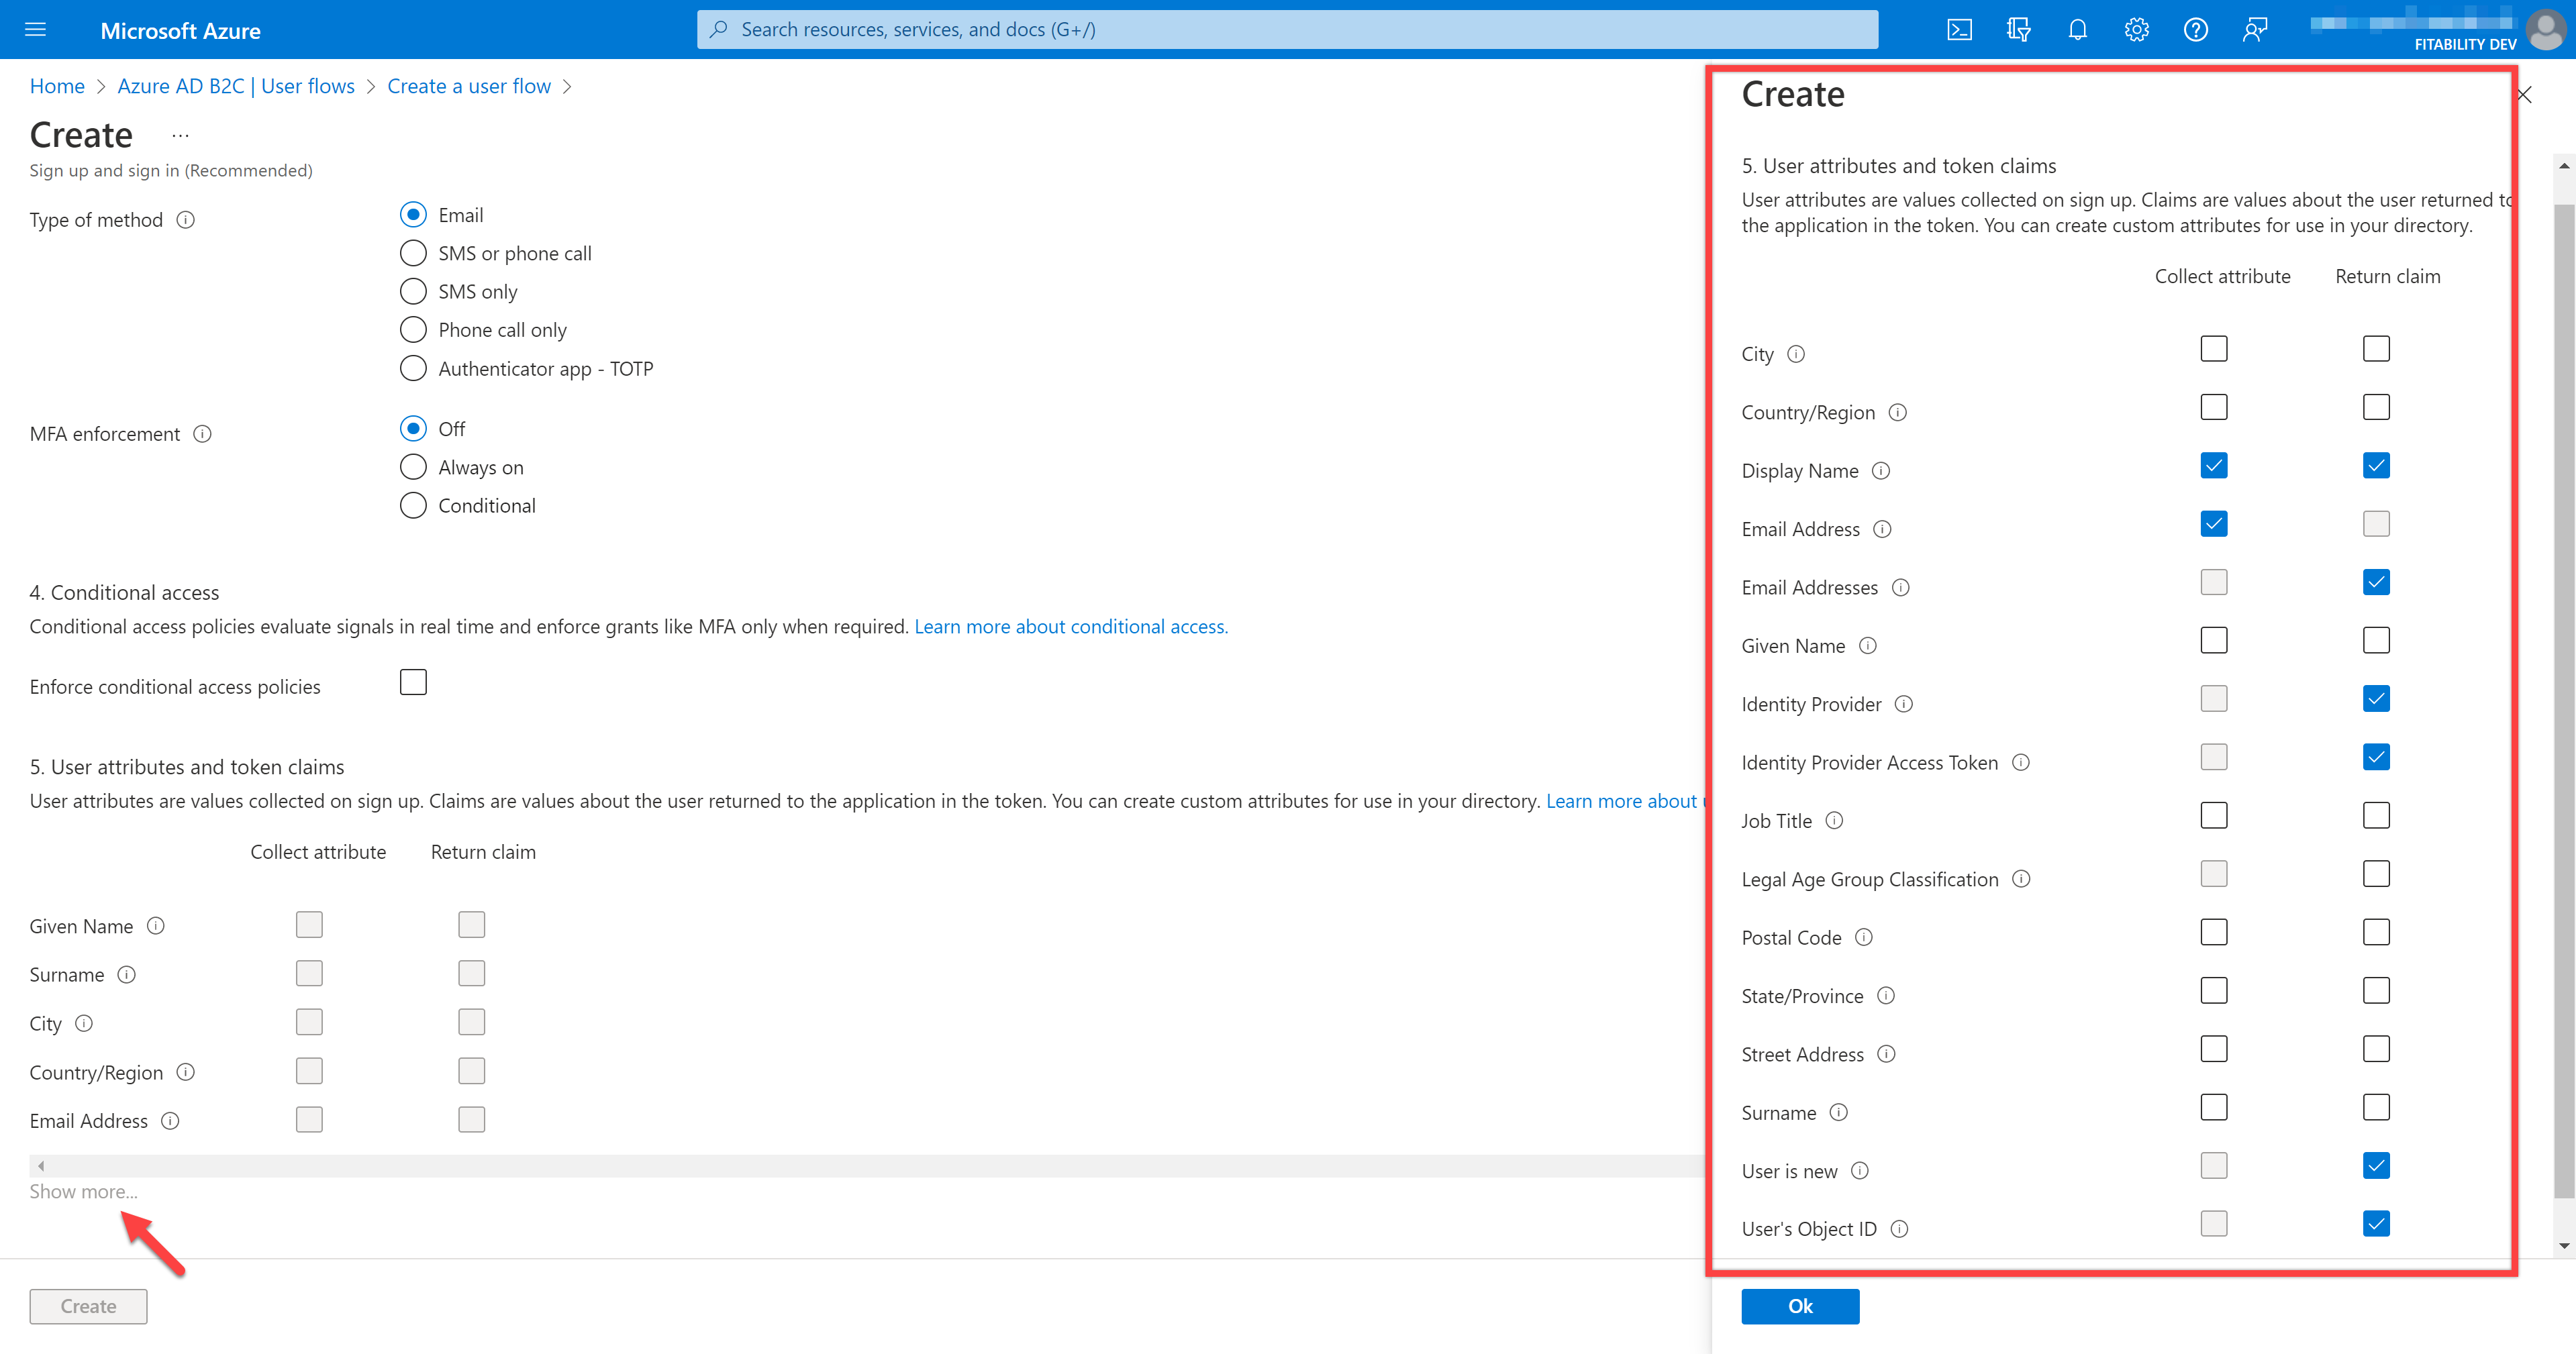
Tick more options if you want to include more details in the token.
You now complete Azure AD B2C configurations.
Building Blazor WASM App
To implement the authN feature with Azure AD B2C on a Blazor WASM app, you first need to create a Blazor WASM project. At the time of this writing, the latest version of Visual Studio is 17.3.4. So, unfortunately, it doesn't create the Blazor WASM project with Azure AD B2C.
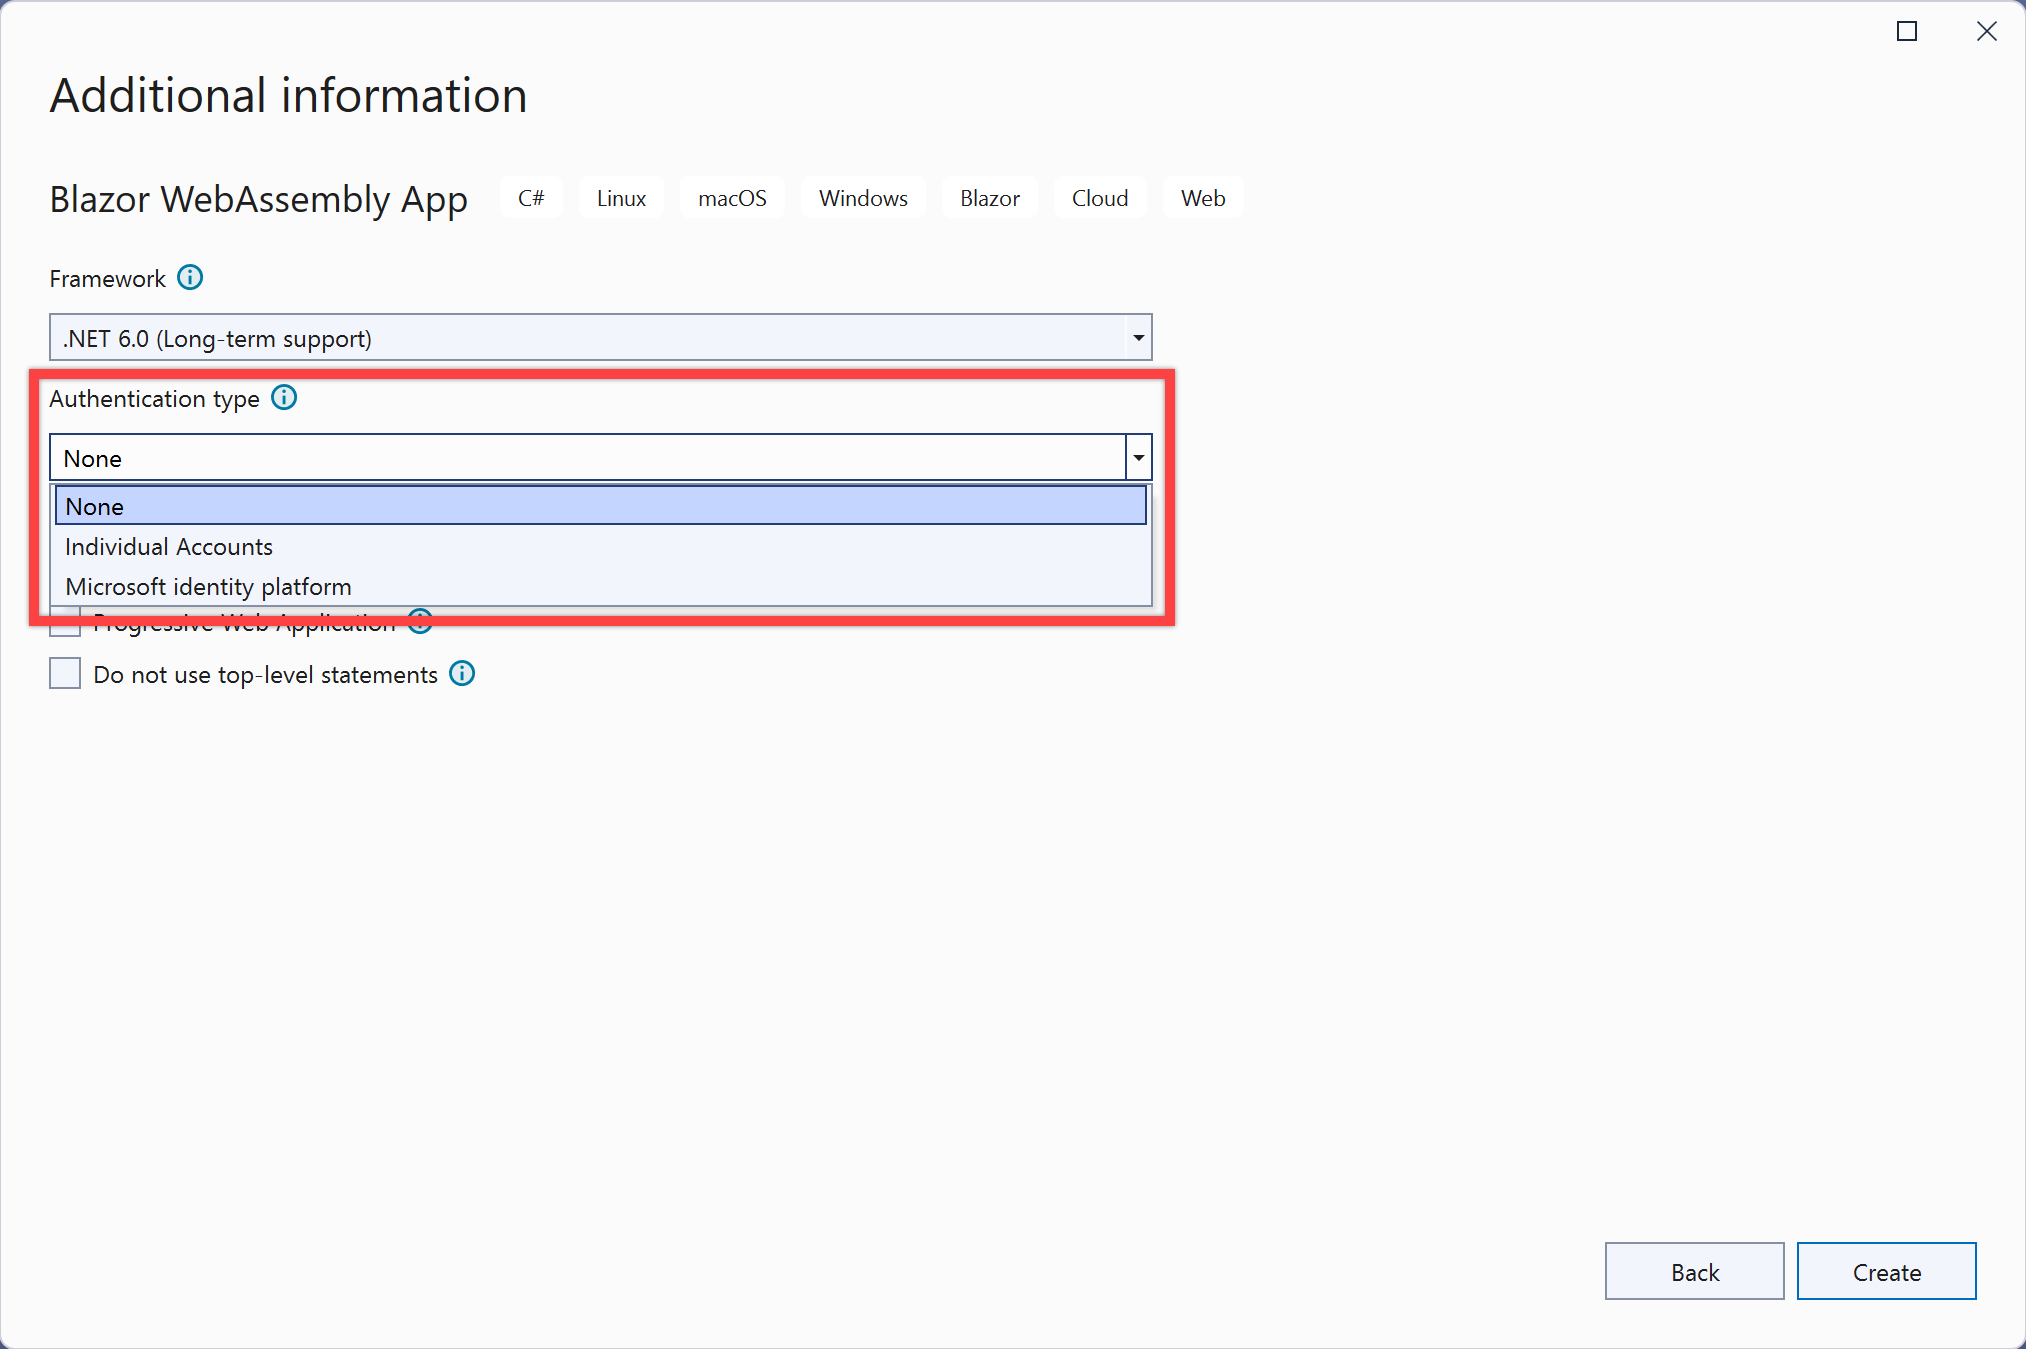
Therefore, you SHOULD use dotnet CLI for it. Enter the command below. You might be noticed the following options:
--framework net6.0: Without giving the framework option explicitly, it uses the latest version of the .NET framework. It explicitly declares thenet6.0value to fix the framework version.--hosted false: If you want to create a standalone Blazor WASM app, use this option. If you want a hosted Blazor WASM app, give this option withtrue.--auth IndividualB2C: Choose this option to use Azure AD B2C.--aad-b2c-instance "https://<TENANT_NAME>.b2clogin.com/": It's the login URL of the Azure AD B2C instance. In this post, let's use the tenant namefitabilitydevkr.--domain "<TENANT_NAME>.onmicrosoft.com": It's the domain URL of the Azure AD B2C instance. In this post, let's use the tenant namefitabilitydevkr.--client-id: The client ID value from the app created in the previous section.--susi-policy-id "B2C_1_SignUpSignIn": The policy name for authN. Use the policy name that you just created. In this post, useSignUpSignIn.
dotnet new blazorwasm \
    --output "MyBlazorWasmApp" \
    --framework net6.0 \
    --hosted false \
    --auth IndividualB2C \
    --aad-b2c-instance "https://<TENANT_NAME>.b2clogin.com/" \
    --domain "<TENANT_NAME>.onmicrosoft.com" \
    --client-id "<CLIENT_ID>" \
    --susi-policy-id "B2C_1_SignUpSignIn"
Now, you've got Azure AD B2C enabled on the Blazor WASM app. Let's configure the app. Open Program.cs and add the AddMsalAuthentication(...) method.
builder.Services.AddScoped(sp => new HttpClient
{
    BaseAddress = new Uri(builder.HostEnvironment.BaseAddress)
});

// ⬇️⬇️⬇️ Add these lines below ⬇️⬇️⬇️
builder.Services.AddMsalAuthentication(options =>
{
    options.ProviderOptions.DefaultAccessTokenScopes.Add("openid");
    options.ProviderOptions.DefaultAccessTokenScopes.Add("offline_access");

    builder.Configuration.Bind("AzureAdB2C", options.ProviderOptions.Authentication);
});
/// ⬆️⬆️⬆️ Add these lines above ⬆️⬆️⬆️

await builder.Build().RunAsync();
Then, update appsettings.json under the wwwroot directory.
{
  "AzureAdB2C": {
    "Authority": "https://<TENANT_NAME>.b2clogin.com/<TENANT_NAME>.onmicrosoft.com/B2C_1_SignUpSignIn",
    "ClientId": "<CLIENT_ID>",
    "ValidateAuthority": false
  }
}
All the configurations on the Blazor WASM app side are done! Build and run the app on your local machine.
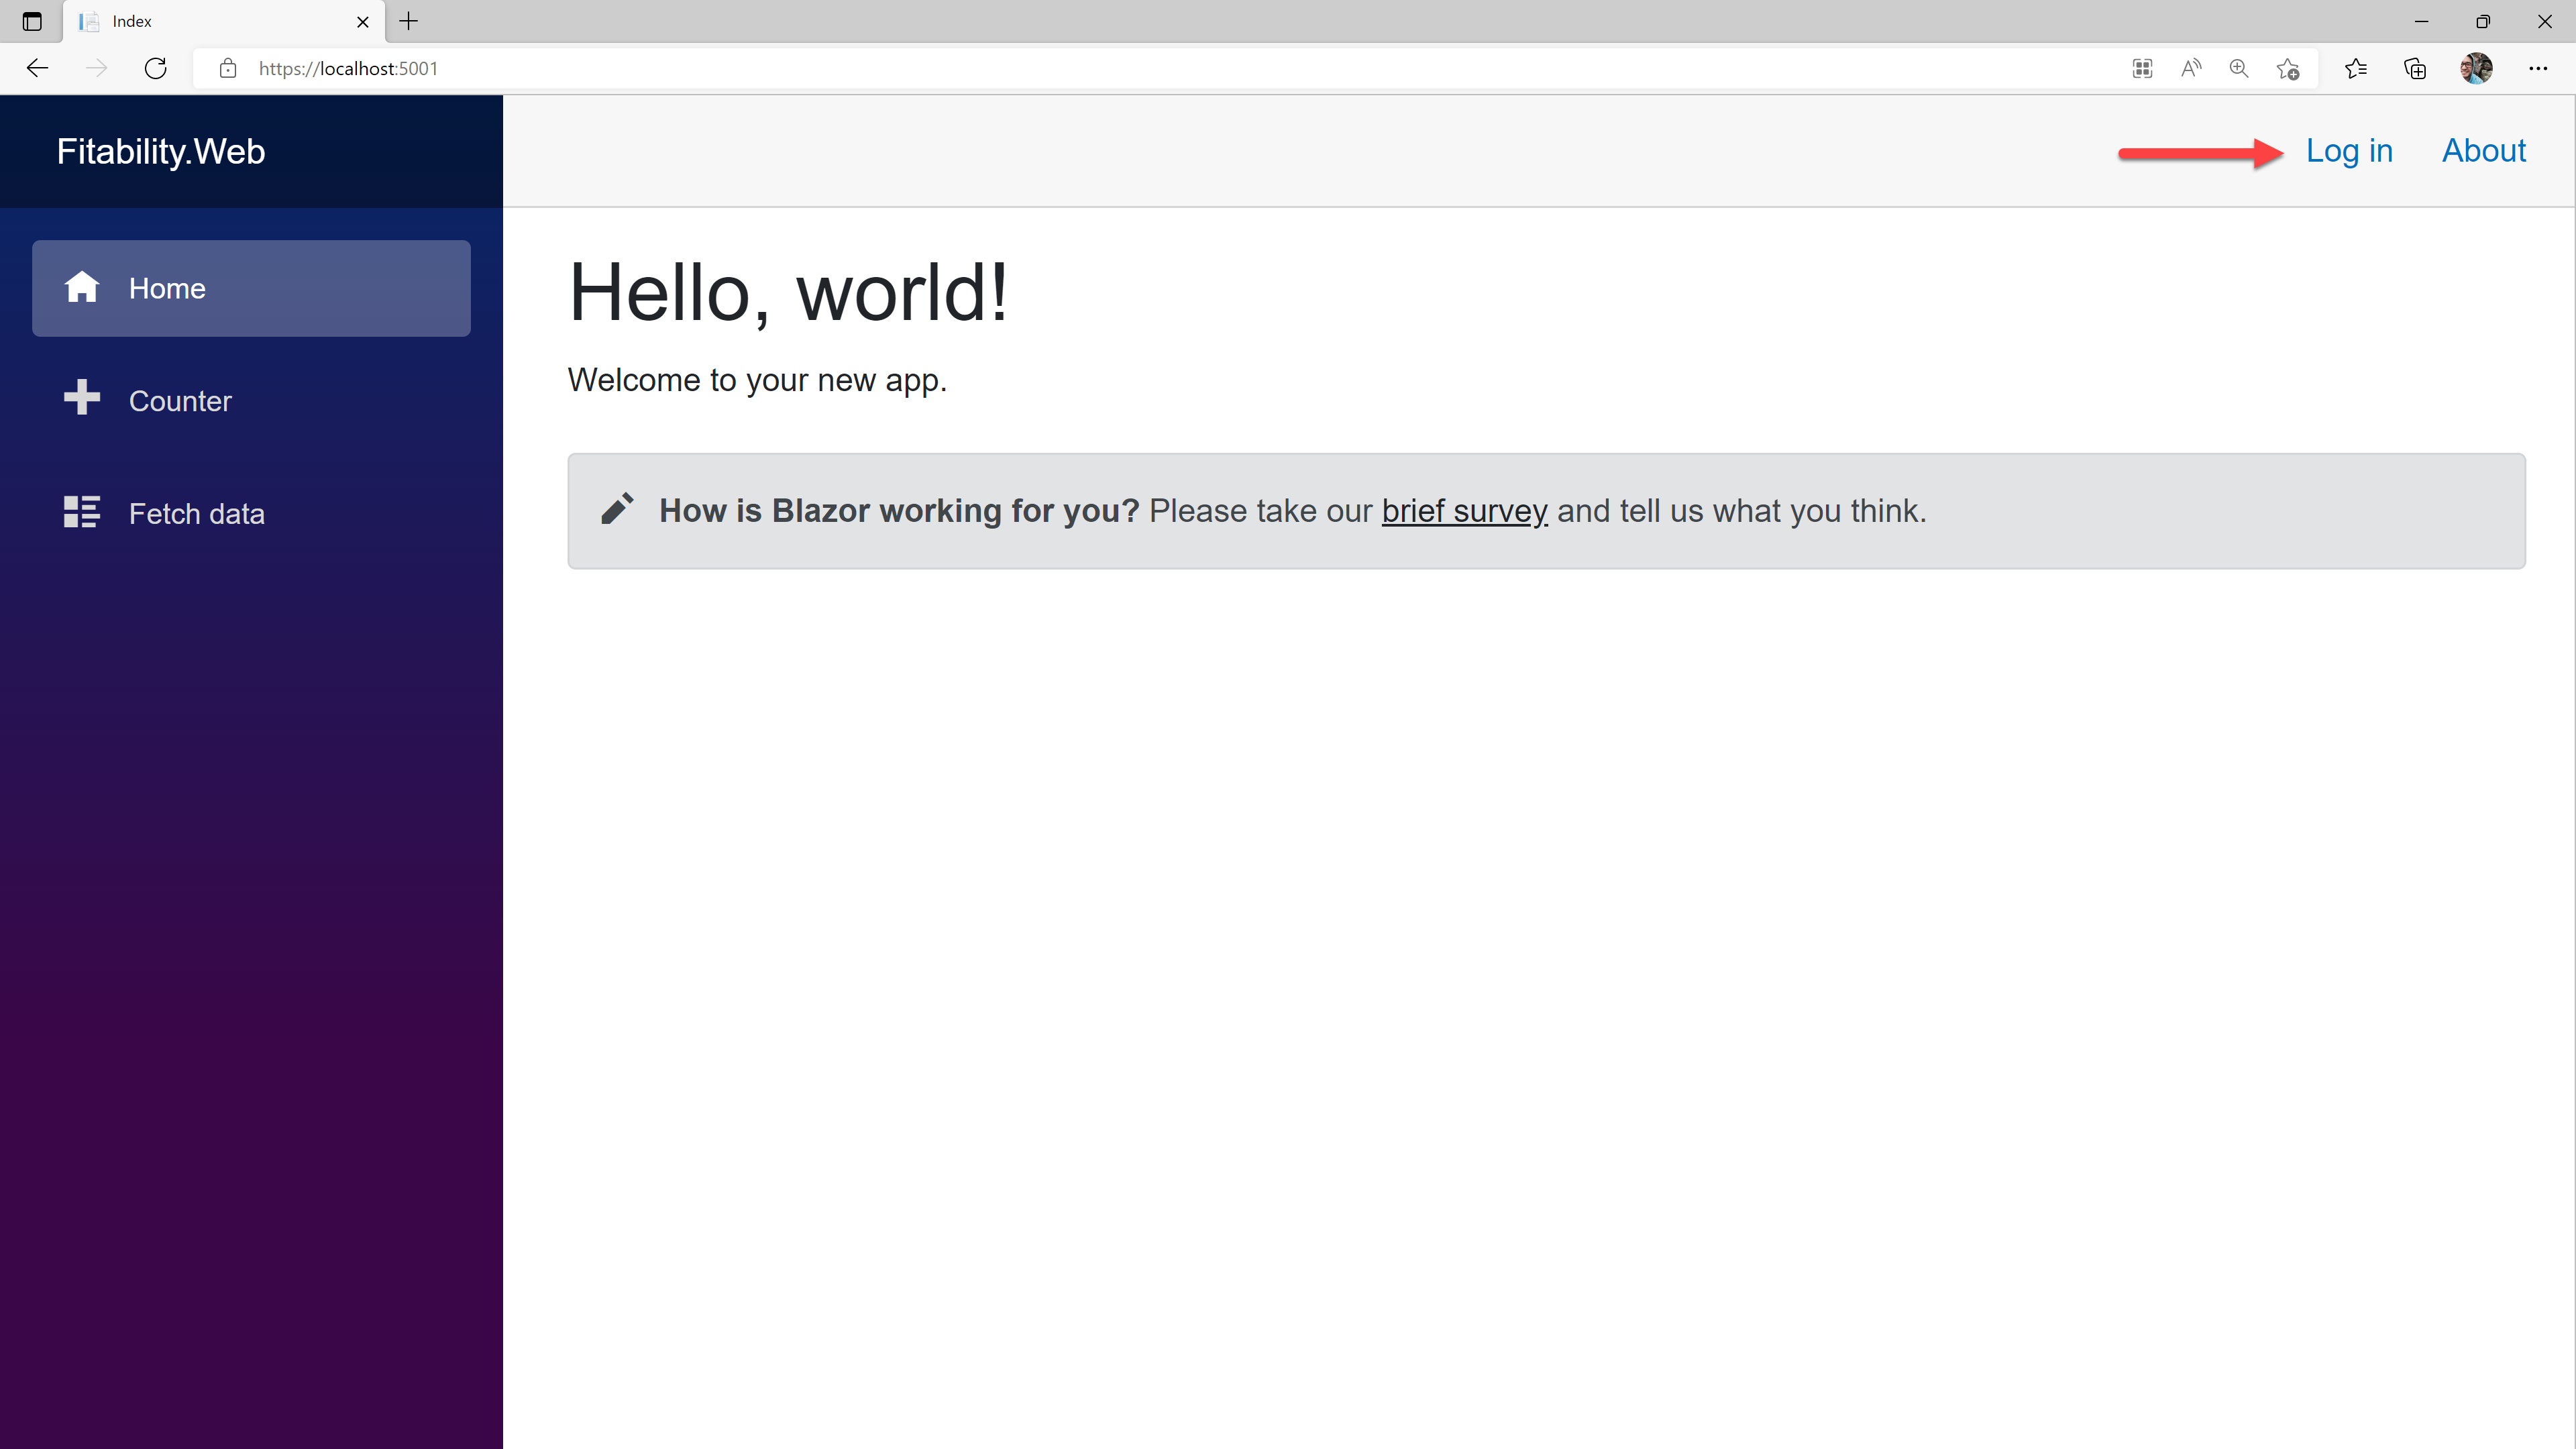
You will see the "Log in" button at the top right corner. Click it to see the log-in pop-up window.
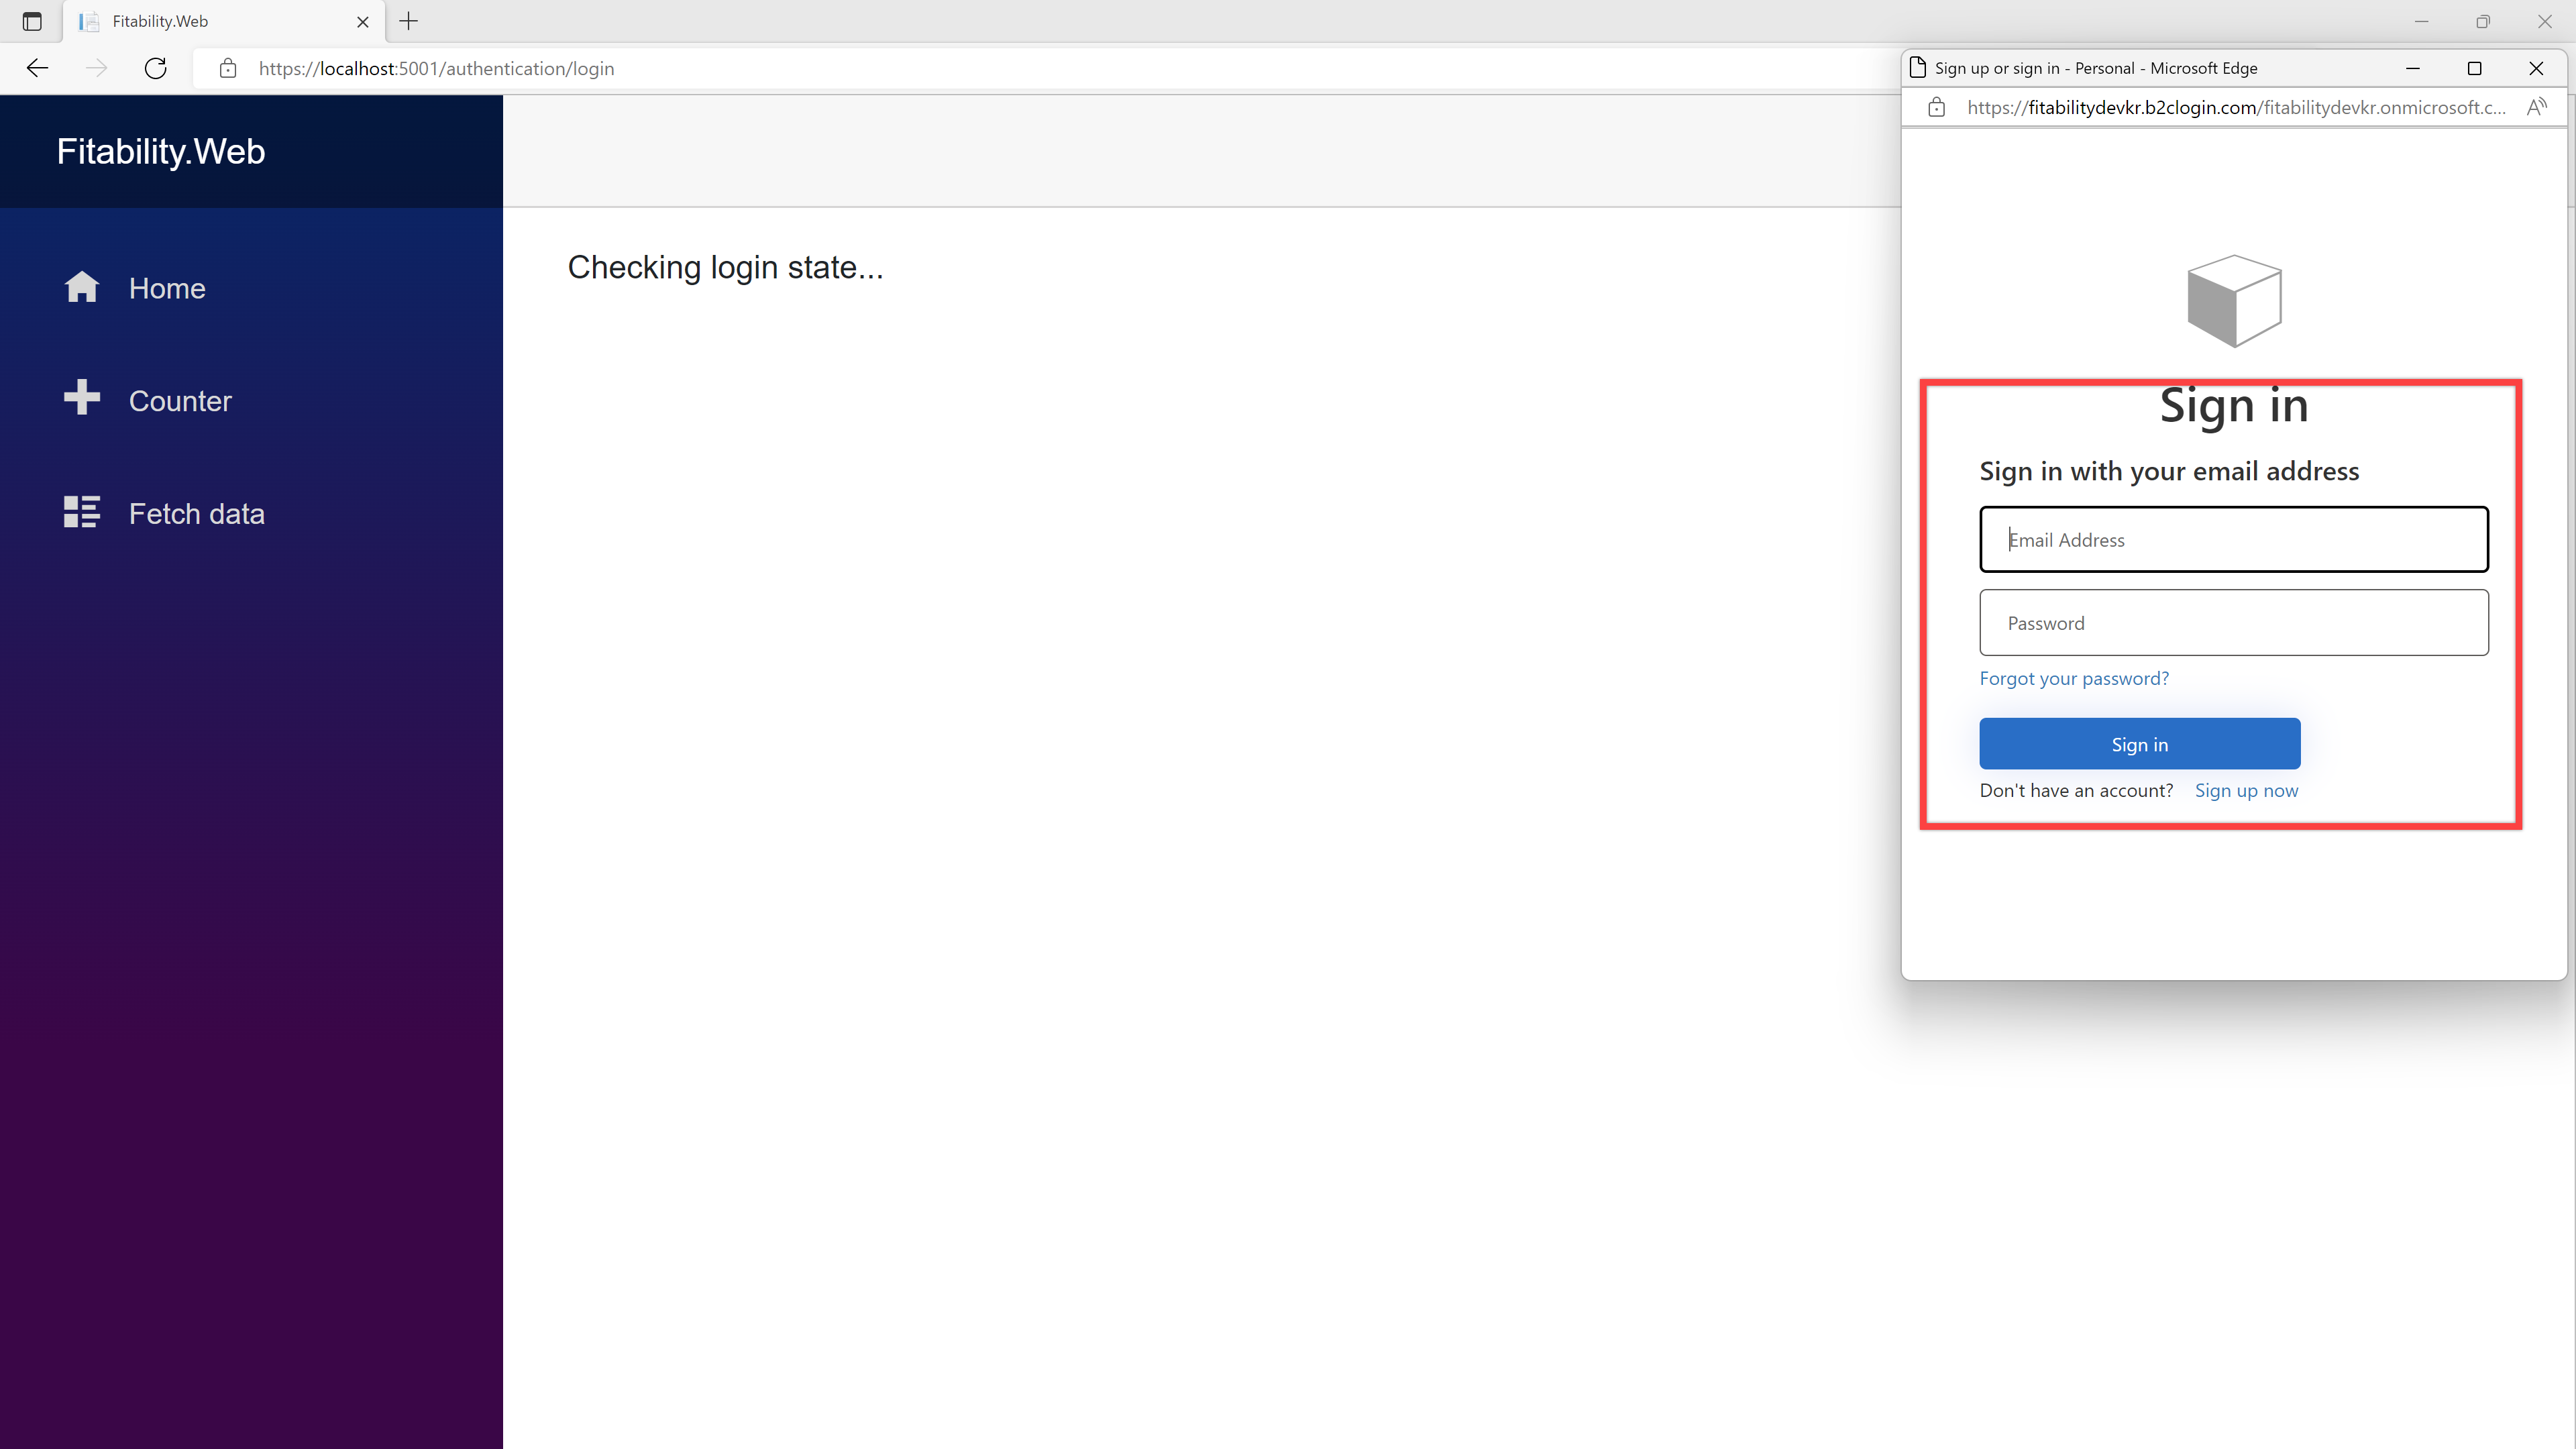
Add your email address and password to log-in, or register a new account by clicking the "Sign up now" button. Once you get logged in, you will see the screen like below:
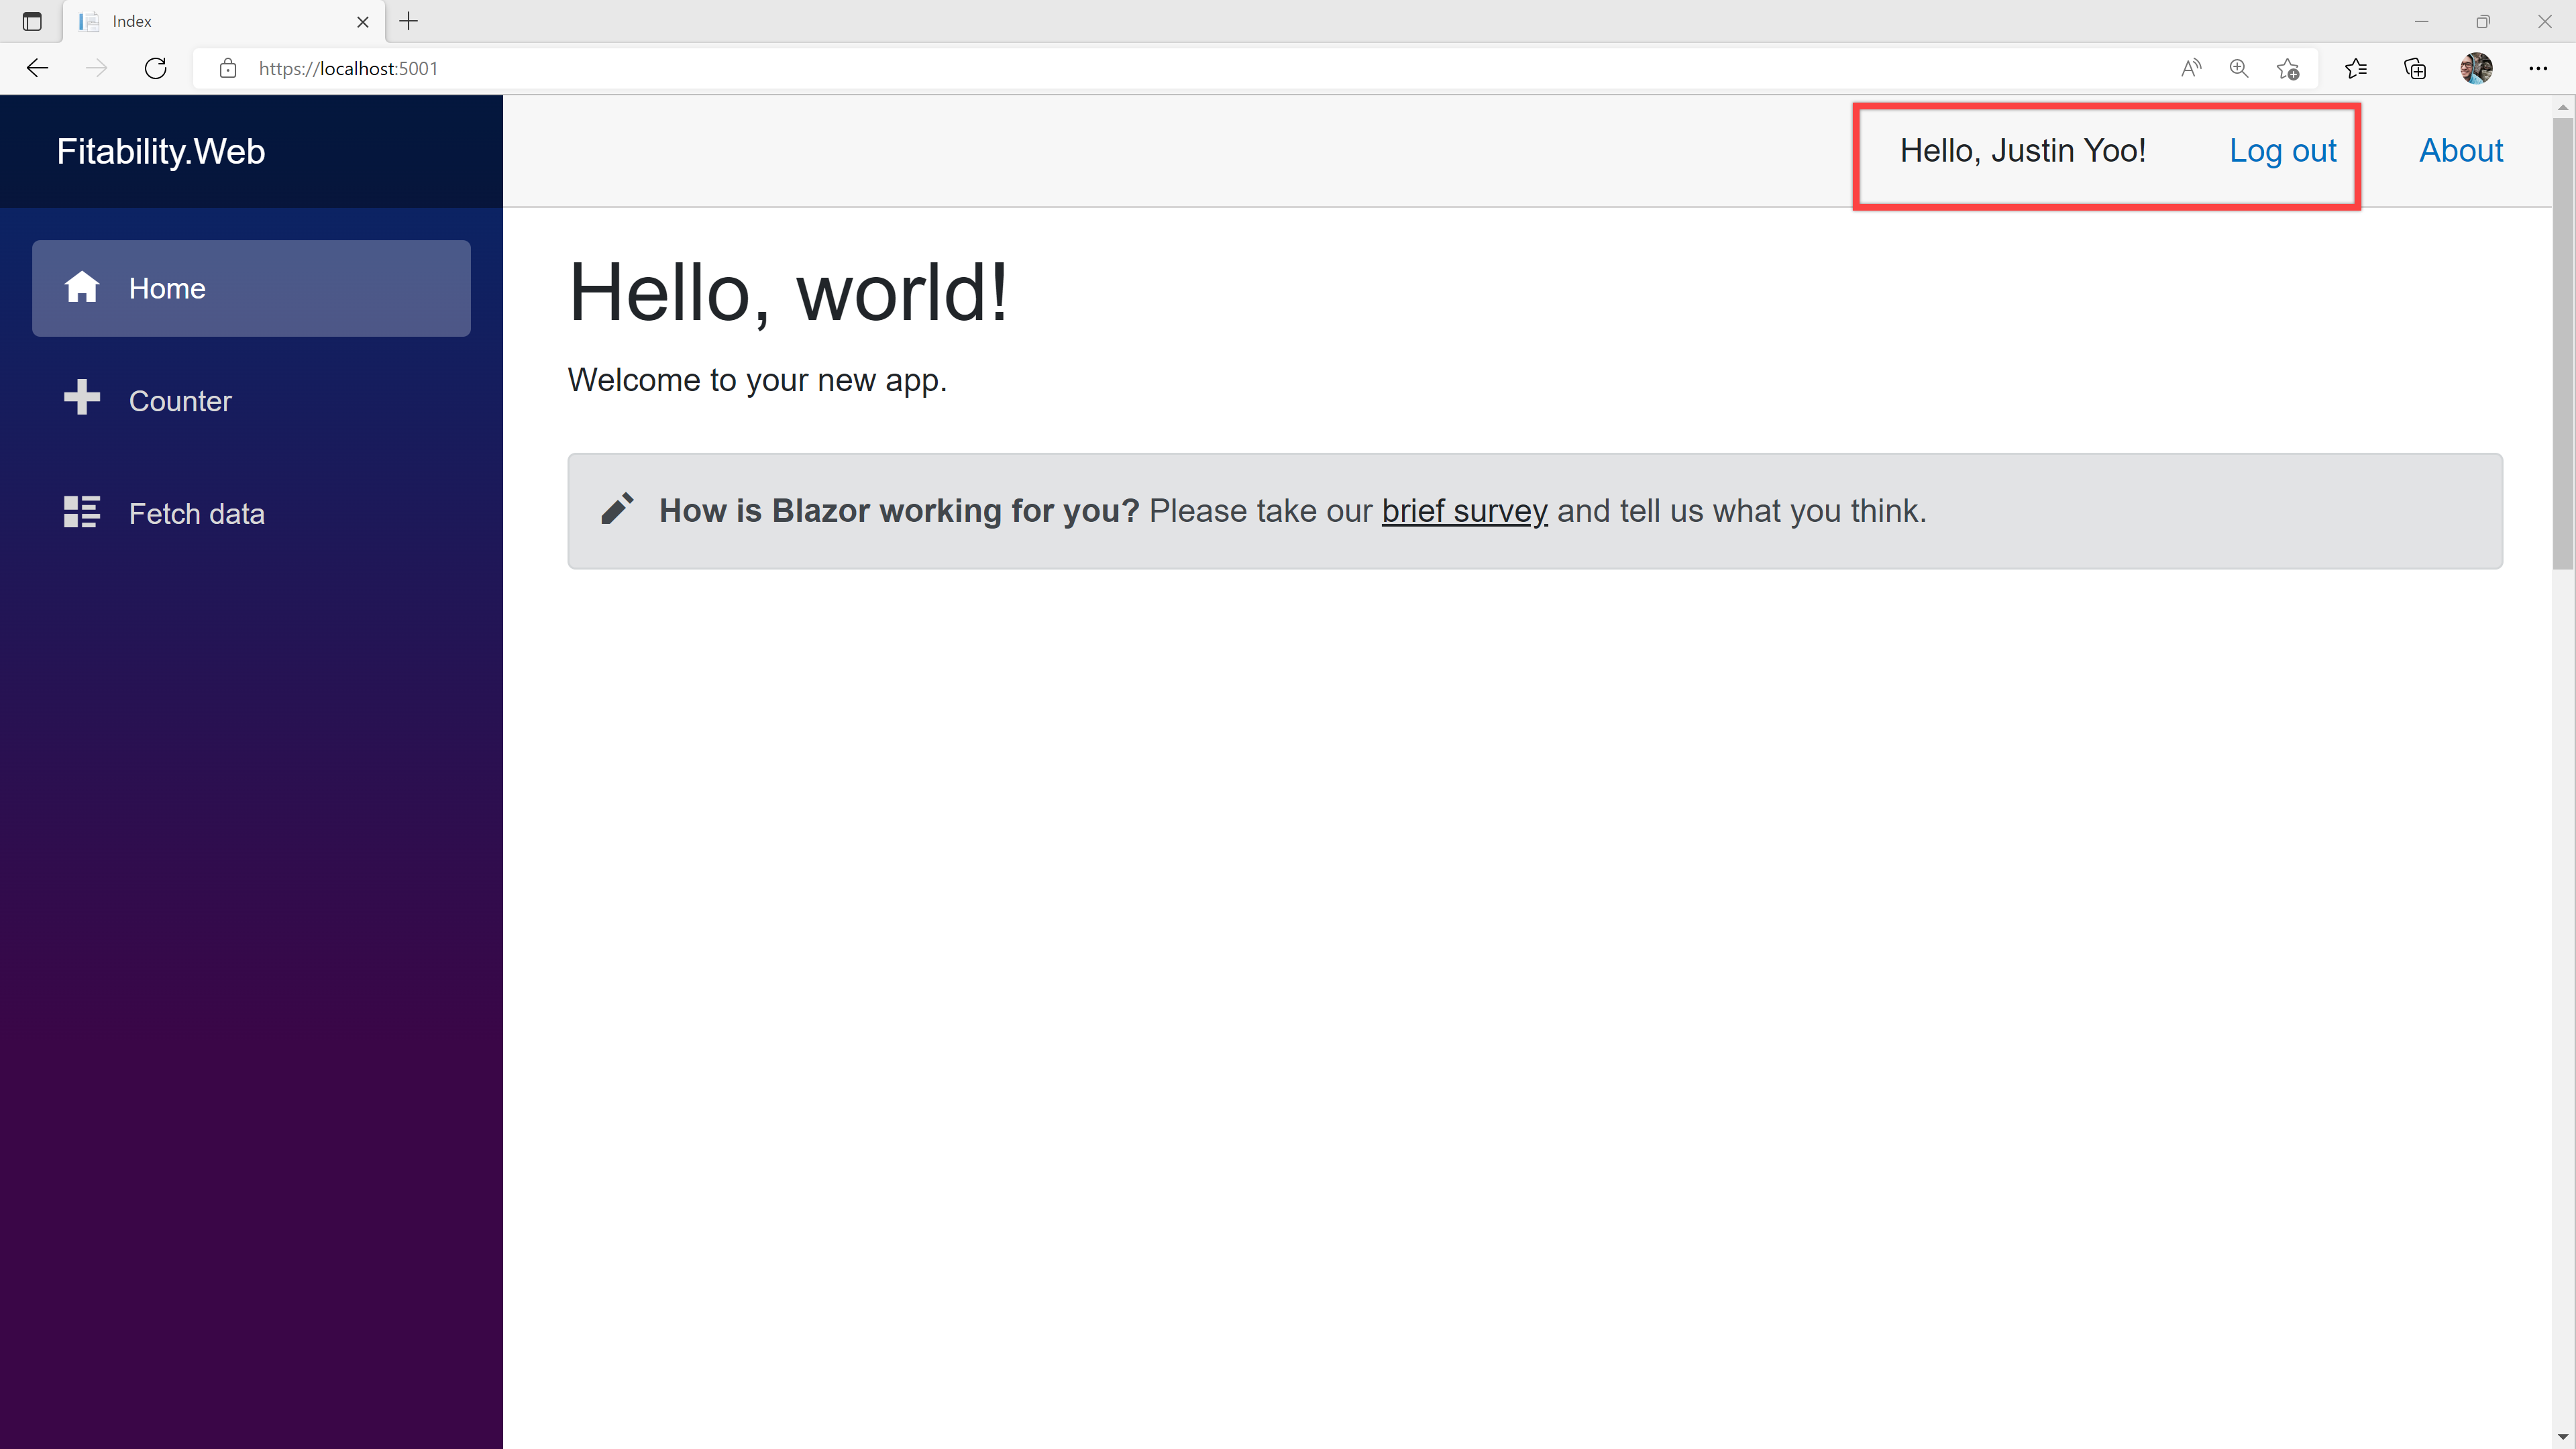
Can you see your username?
So far, I've walked through how to add the Azure AD B2C authN feature to the standalone type Blazor WASM app. With minimum code change, you can quickly implement the authN feature. In the next post, I'll give a try to add a social media log-in feature to Azure AD B2C.
Want to know more about Blazor?
It's great if you visit those sites for more Blazor stuff.