This is the third (and the last) post of the series to let teachers and lecturers build an online students' check-in app, using Power Apps, Azure Functions, and Azure Face API.
- Capturing Face Images from Browser to Azure Blob Storage via Azure Functions
- Identifying Students' Face with Azure Functions and Azure Face API
- Building Students' Check-in App with Power Apps, Azure Functions and Azure Face API
In my previous post, I walked through how to take faces from a webcam, using Azure Functions and upload them to Azure Blob Storage. In this post, let's figure out how to identify faces using Azure Face API.
The sample code used in this post can be downloaded from Azure Functions Face Recognition Sample.
The Workflow
Here's the simplified workflow for this post, which is the same one in the previous post. The only difference here is that we use Power App, instead of a web page.
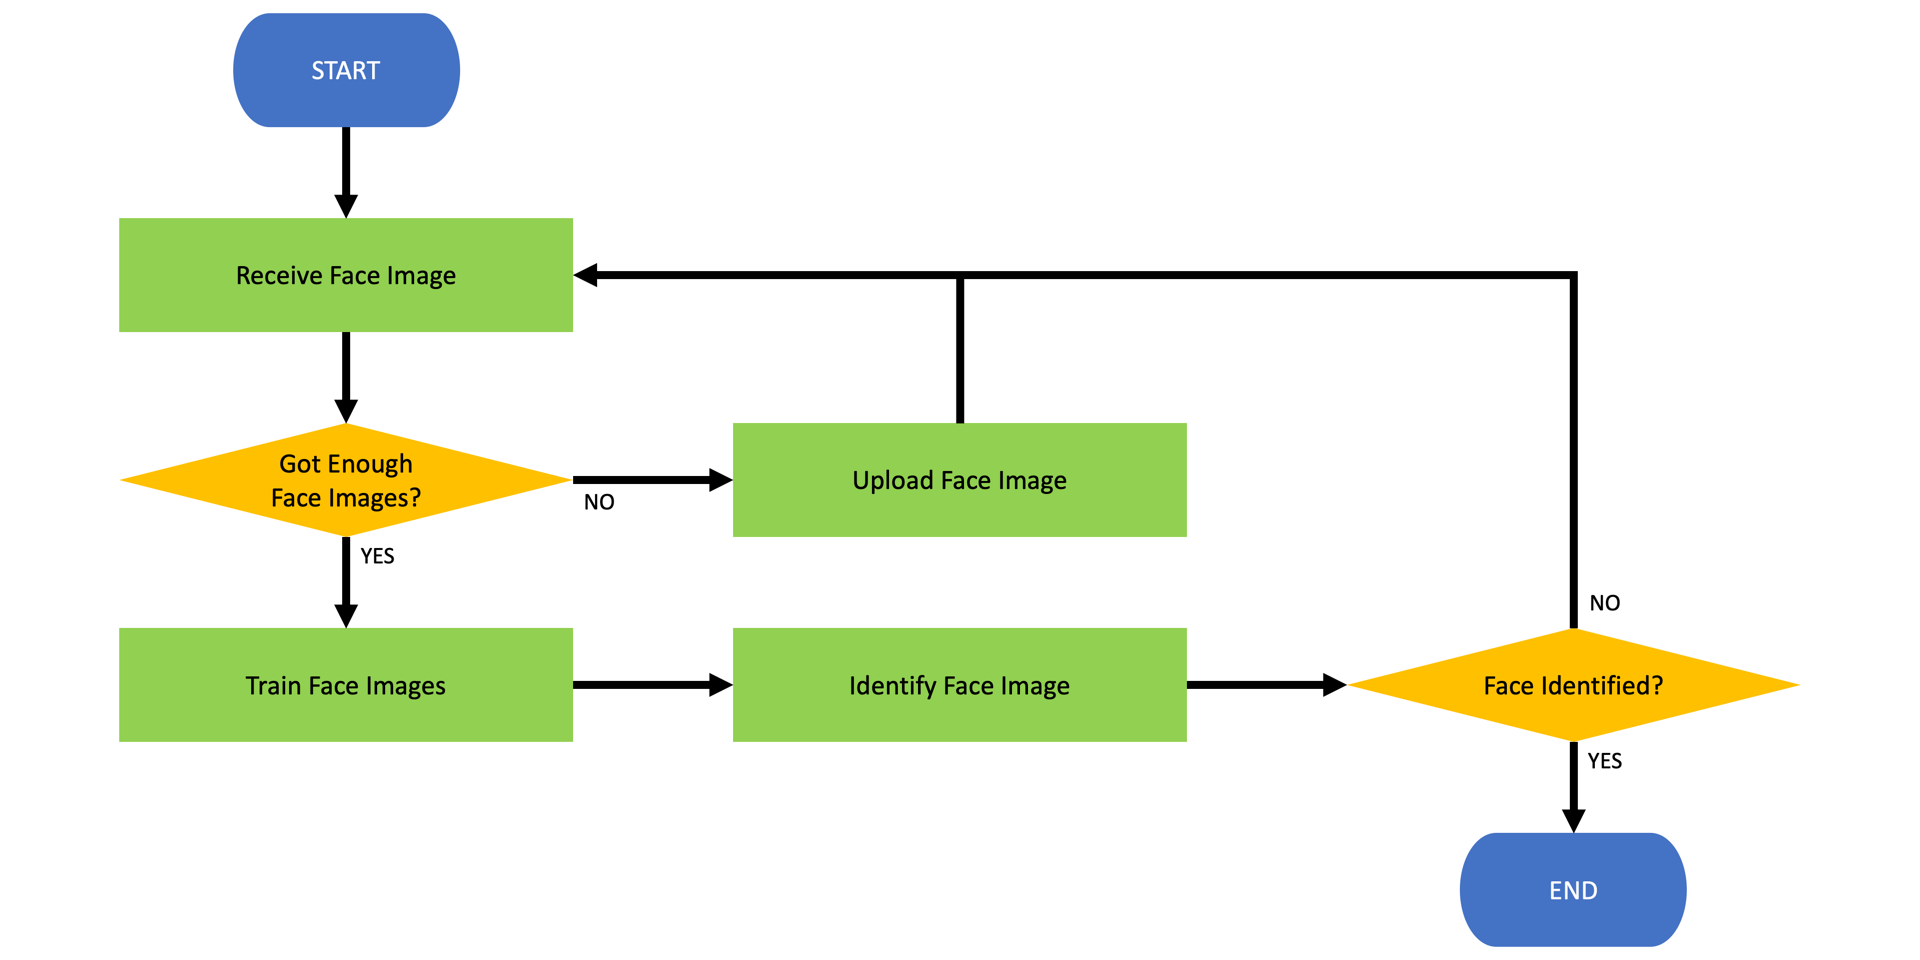
Due to this difference, the API request/response structure needs to be updated in the following ways.
Restructuring API Request/Response Payloads
From my previous posts, the request data only contains embedded image data. But for Power Apps, as it's online check-in app that many students use, the students' name should be included in the payload. Therefore, the request payload has been revised like:
| public class EmbeddedRequest | |
| { | |
| public virtual string PersonGroup { get; set; } | |
| public virtual string Image { get; set; } | |
| } |
In addition to this, the response payload also needs to be converted into a JSON object like following. For convenience, I intentionally included the constructor, which is optional.
| public class ResultResponse | |
| { | |
| public ResultResponse(HttpStatusCode statusCode, string message) | |
| { | |
| this.StatusCode = (int)statusCode; | |
| this.Message = message; | |
| } | |
| public virtual int StatusCode { get; set; } | |
| public virtual string Message { get; set; } | |
| } |
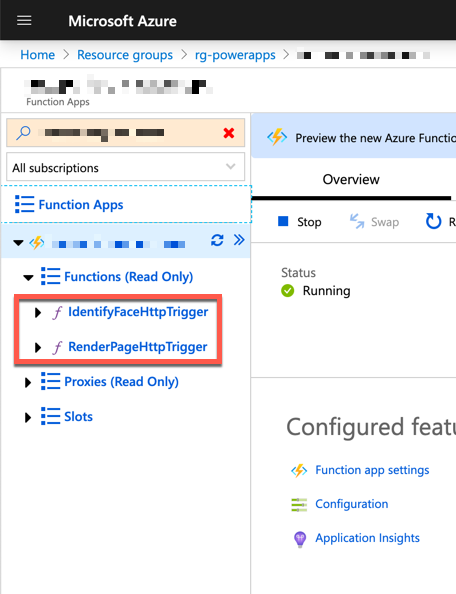
All the rest of the Azure Functions app hasn't been changed. It's all working now.
Creating Custom Connector
Now, we've got the Azure Functions API ready in the cloud. However, in order to use the API in Power Apps, we need to do one more thing – a custom connector. As I mentioned in my another post, direct API access from Power Apps is not less intuitive than expected. I think it's by design to keep the philosophy of "low-code" and "no-code". Hence, the custom connector is the answer to sort out this issue. Through the custom connector, the Power Apps calls the API and gets the result from there. The more bright side of using the custom connector is reusability. It's reusable for Logic Apps and Power Automate.
If an API app has implemented Open API spec, creating a custom connector is really easy. But unfortunately, the API used in this series hasn't implemented it because:
- Only the Azure Functions runtime version is 1.x officially supports Open API.
- There is a workaround by manually uploading a
swagger.jsonfile and rendering it. - There is another workaround by using a NuGet package and implementing it.
However, none of the above applies to the API in this series. Therefore, we need to create the custom connector from scratch. Let's start.
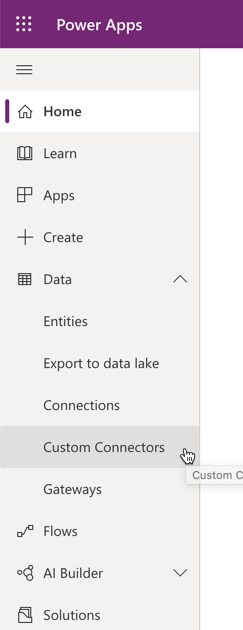
Login to Power App page and click the Custom Connectors menu.
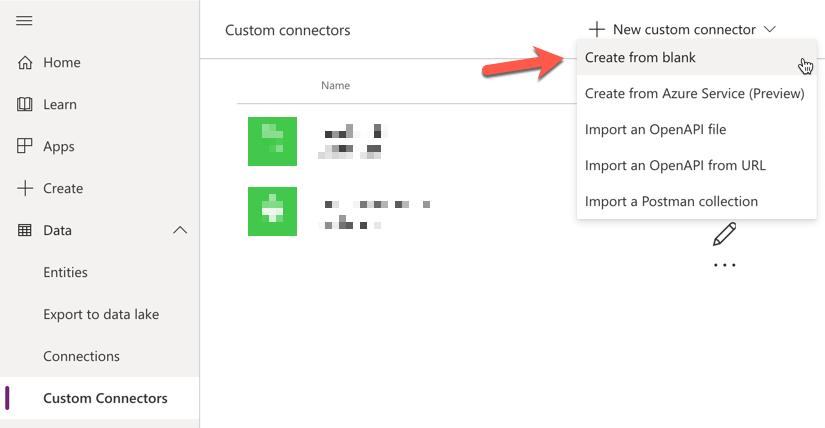
Click the + New custom connector button and select Create from blank.
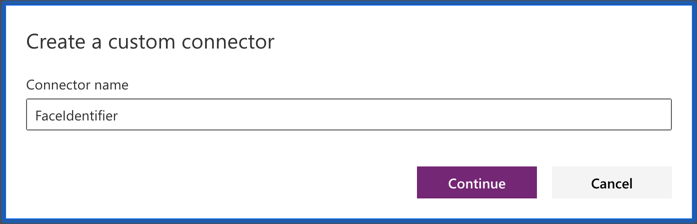
The first thing we're going to do is to give the connector a name. I use FaceIdentifier.
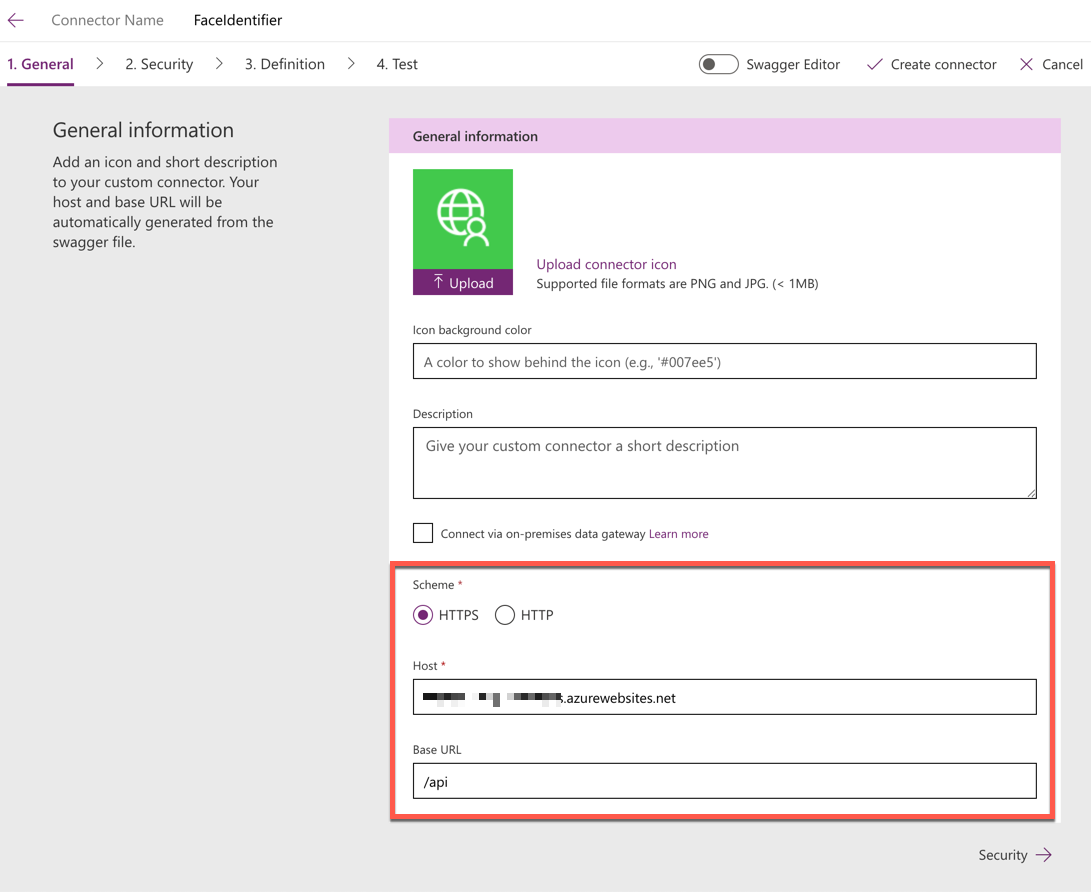
If you're familiar with authoring the Open API definition doc, you can choose the Swagger Editor at the top. For now, we're using the UI form. First of all, select the HTTPS protocol and URL of the Azure Functions. Put /api in the Base URL field. Then, click the Security button to proceed.
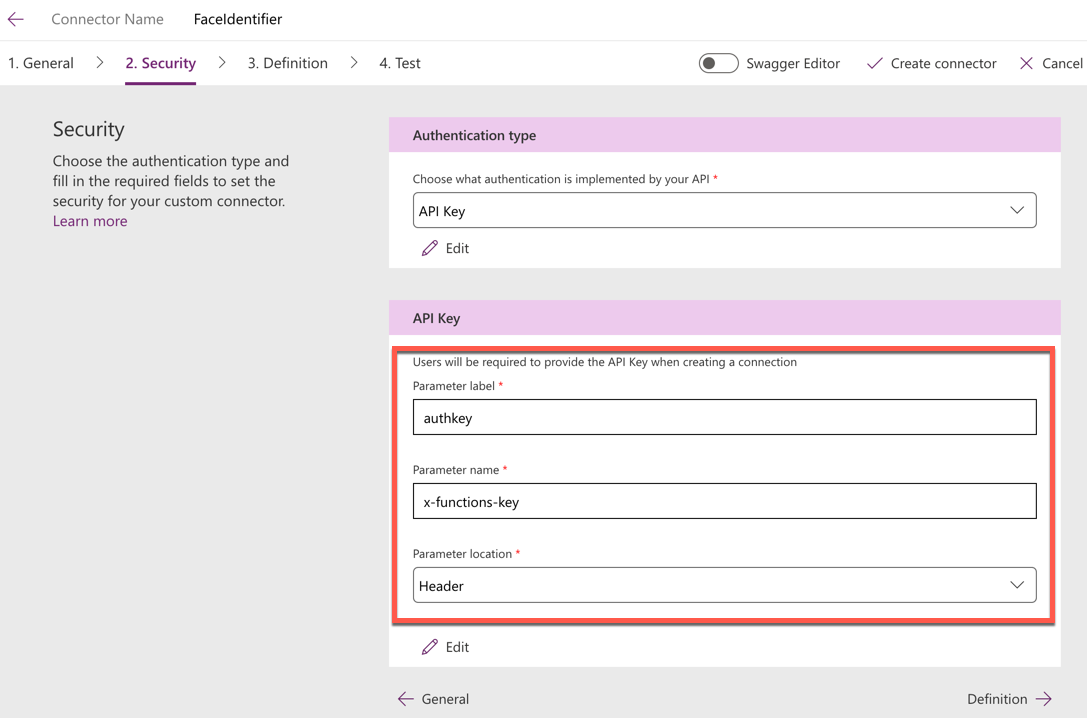
In this screen, we're setting up authentication. Each endpoint of an [Azure Function] app has its unique access key. So, choose the API Key option for the authentication type, enter authkey for the parameter label, x-functions-key for the parameter name, and choose Header for parameter location. Then click the Definition button to proceed.
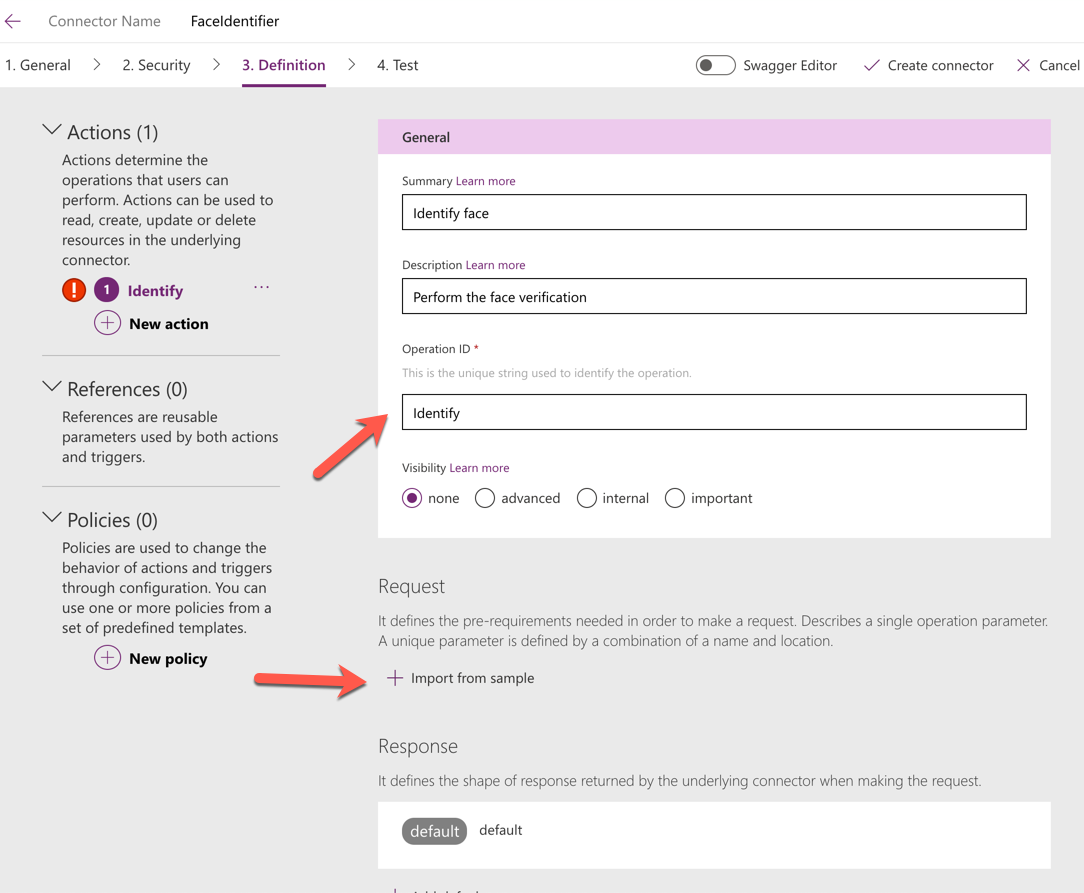
Let's define the operation and data structure. Click the New action button at the left and give a name to the Operation ID. I use Identify for it. Then click the + Import from the sample under the Request section.
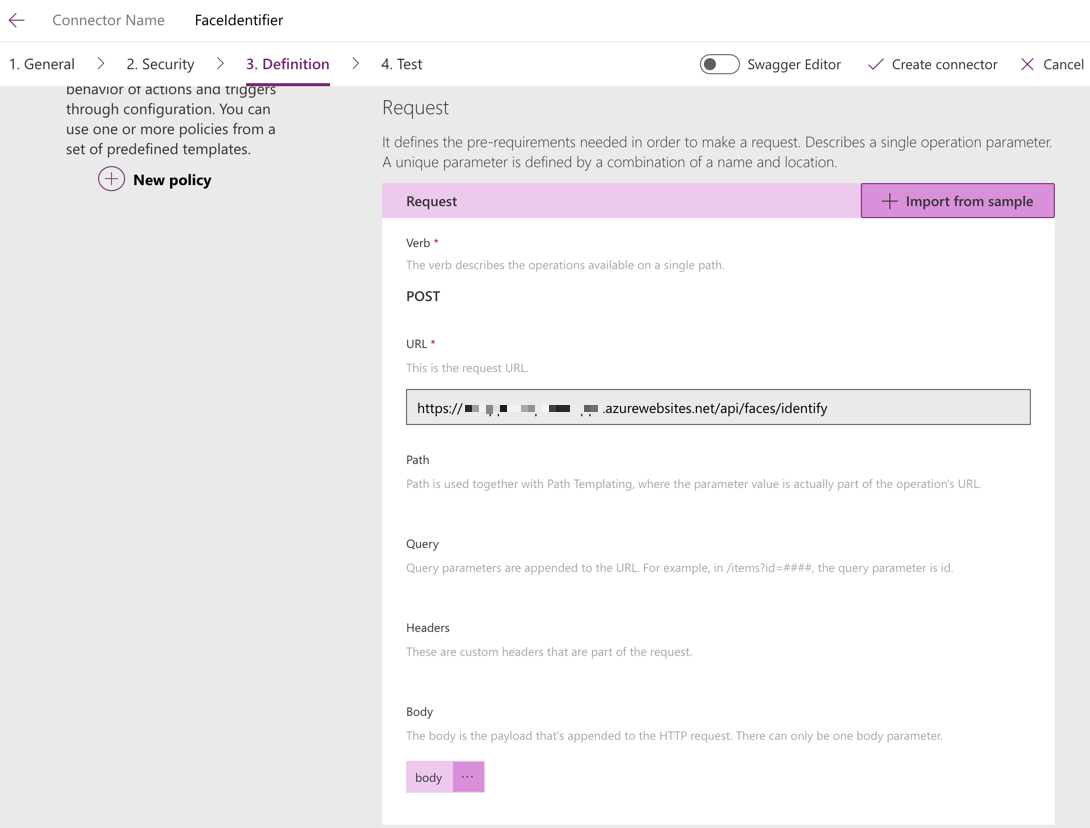
We use the POST method, and its URL is /faces/identify. The JSON payload consists of two fields, personGroup of string type and image of string type. We don't need the real value here. Then click the Import button to finish.
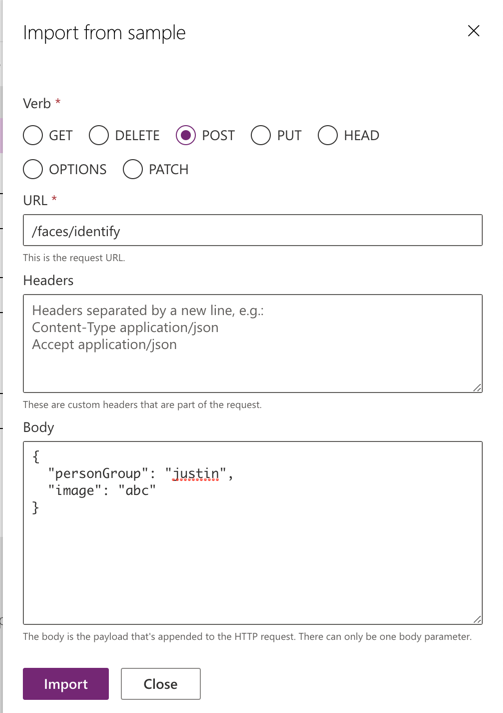
Now, we got the request data defined.
Let's define the response data format. Click the default data.
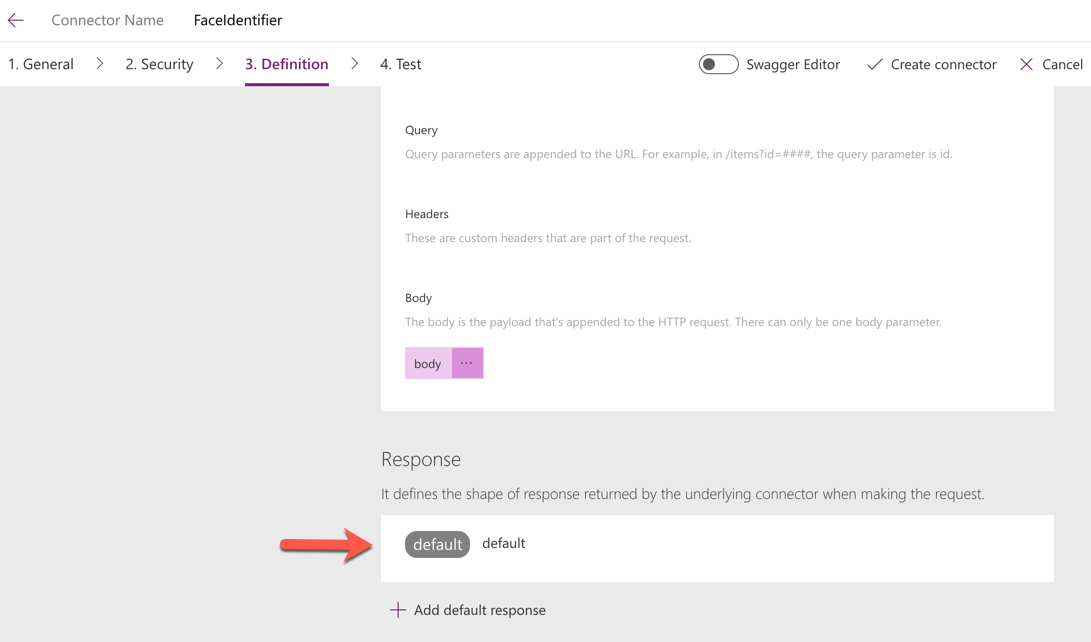
The default response defines the HTTP Status Code of 200 (OK). Its body has the key-body-output field, but ignore this for now. Give it a name 200 and click the + Import from sample button.
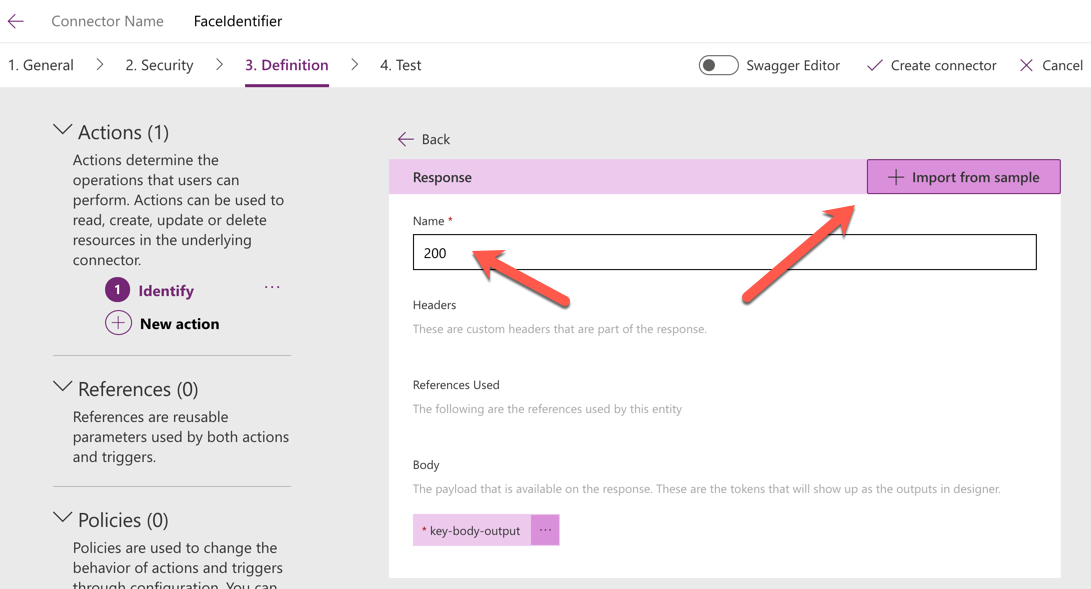
As we defined above, the response JSON looks like below. Then click the Import button to finish.
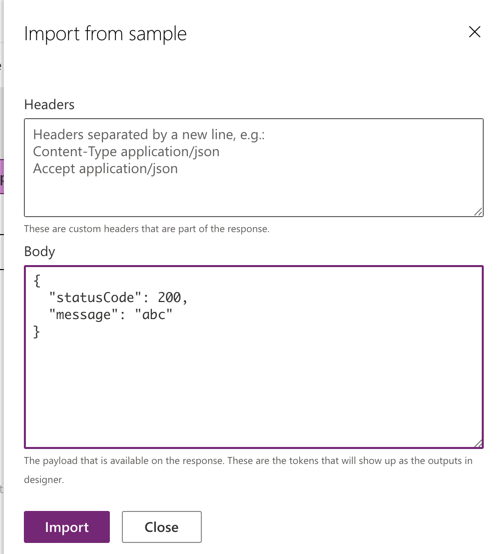
Now, the key-body-output has gone, and both statusCode and message fields have appeared.
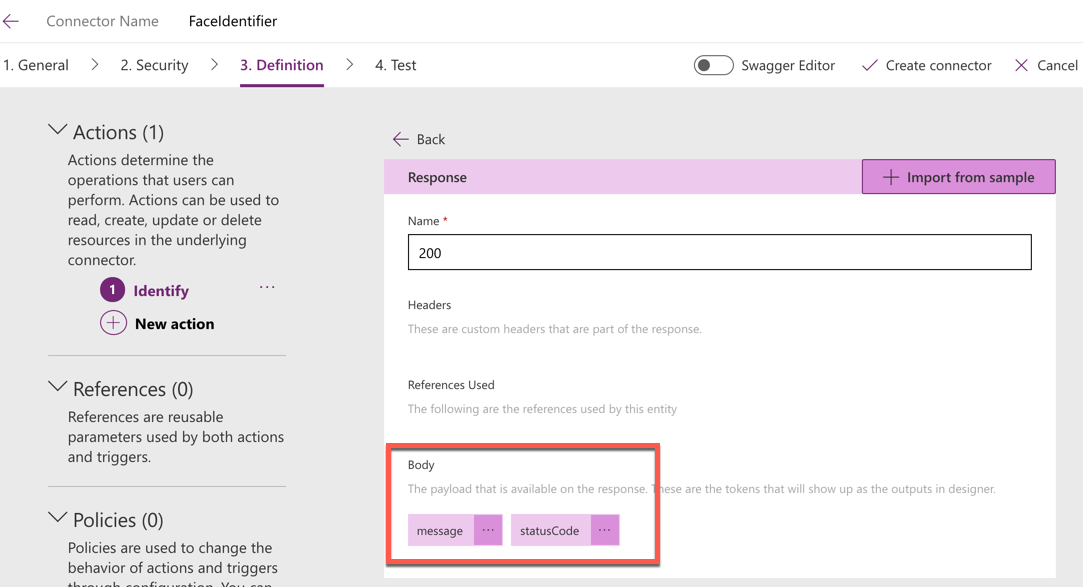
We've completed the custom connector definition. Click the ✅ Create connector button to save it.
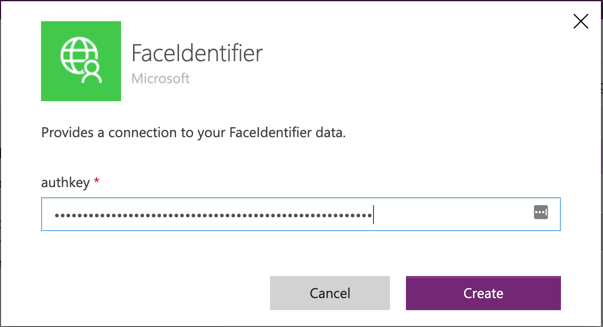
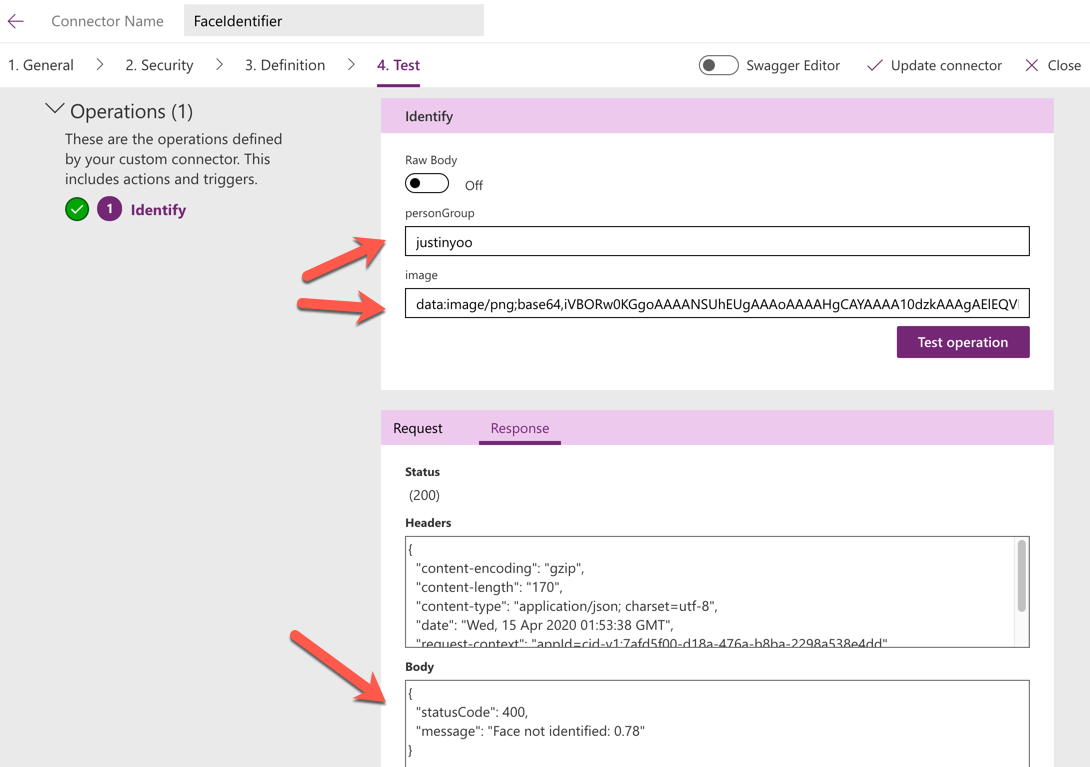
Let's test the connector. Click the Test button at the bottom right to proceed and click the + New connection button.
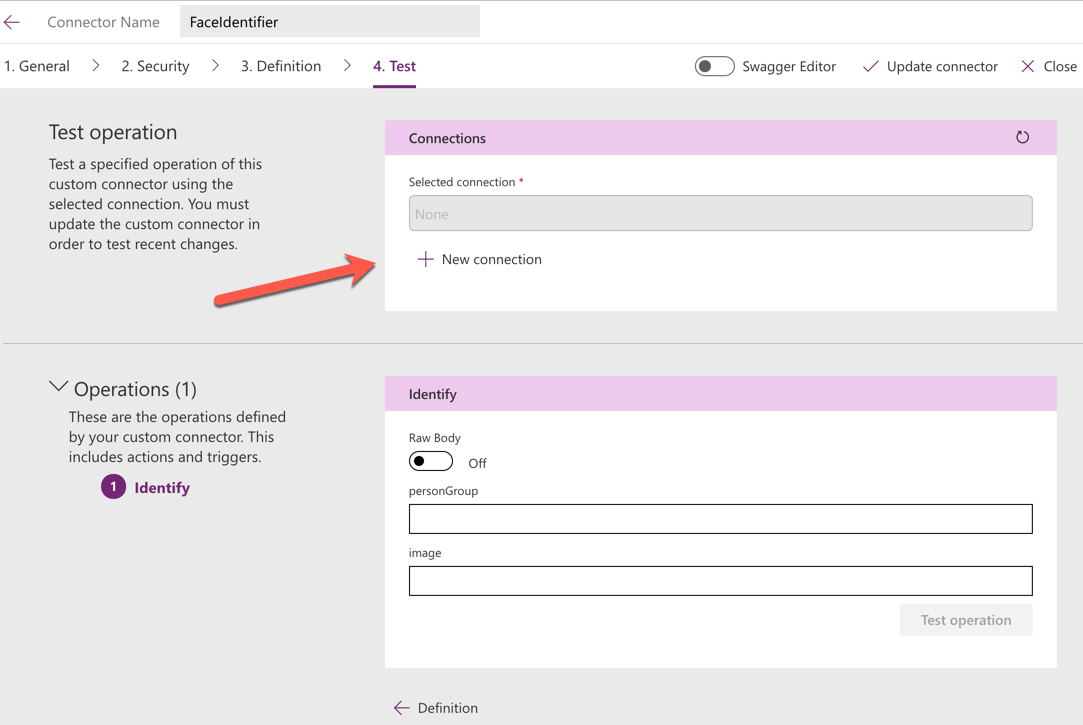
As mentioned earlier, each endpoint of Azure Functions API has its unique access key. Use this key or host key that is applicable to the entire endpoints.
Once authenticated, run the test with data to verify the connector.
We've got the custom connector ready! Let's build the Power App.
Building Power App
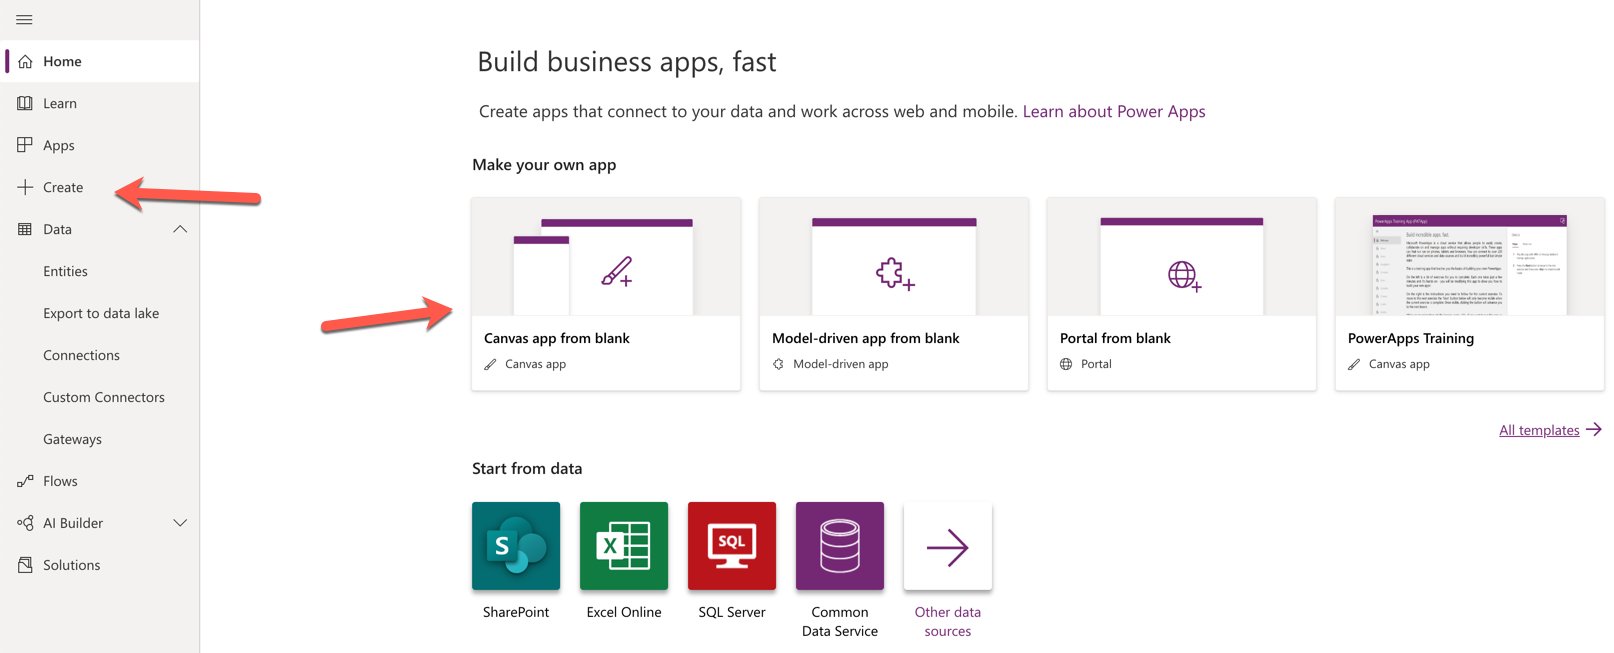
At the homepage of Power App, click Canvas app from blank.
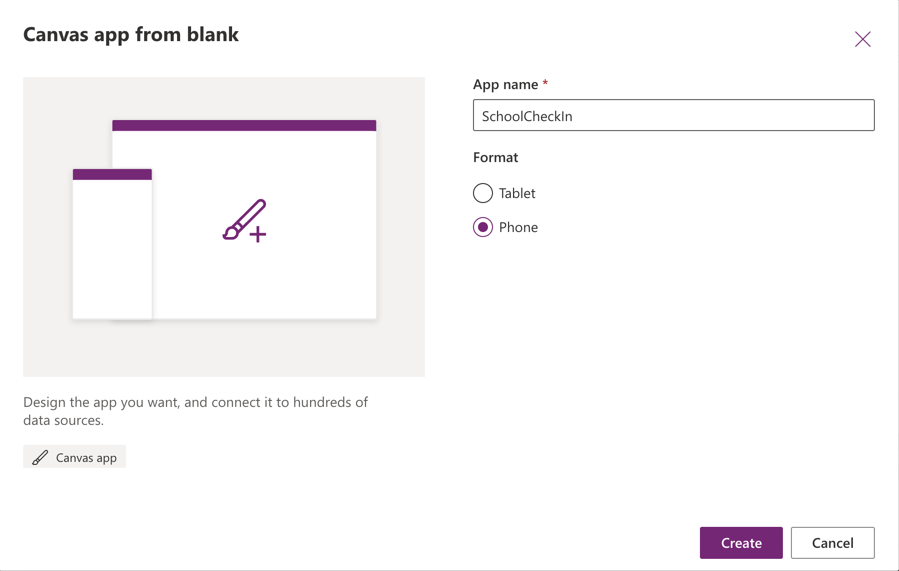
Give the name to the app, SchoolCheckIn for example. The format can be either Tablet or Phone. I chose Phone.
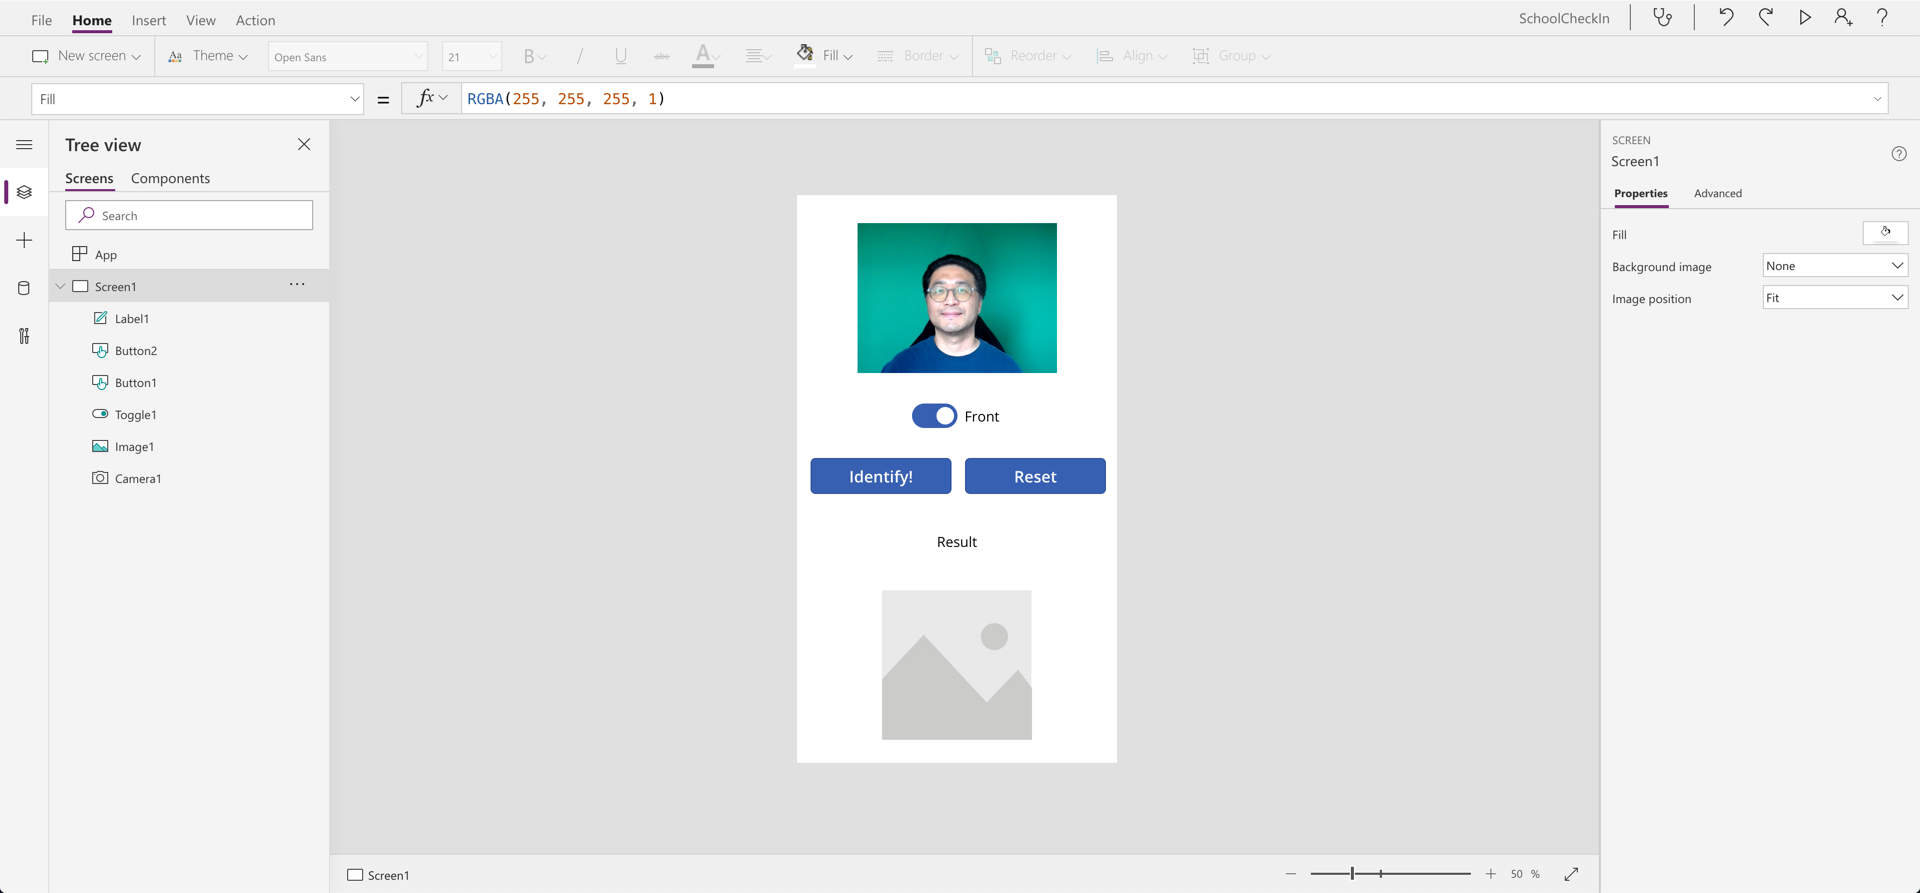
We got the empty canvas ready. Let's put some controls on it. From the top, Camera, Toggle, Two Buttons, Label, and Image controls are placed.
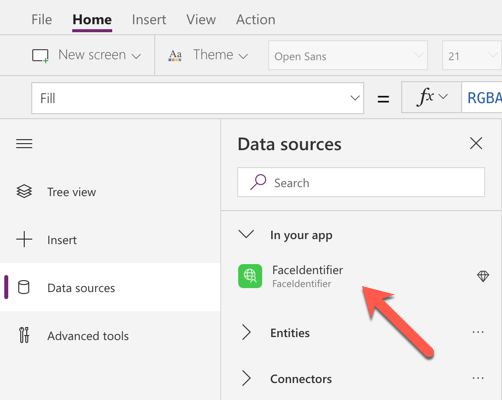
Register the custom connector that we created above. From the Data Sources menu at the left, we can find out the FaceIdentifier connector.
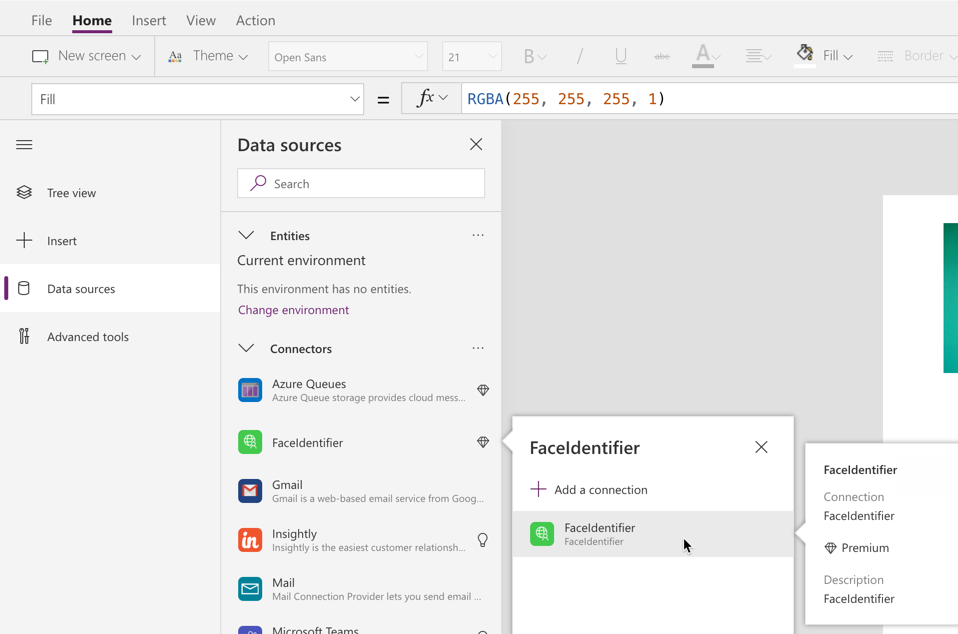
It's registered to my app and available to use.
Let's handle the controls one by one.
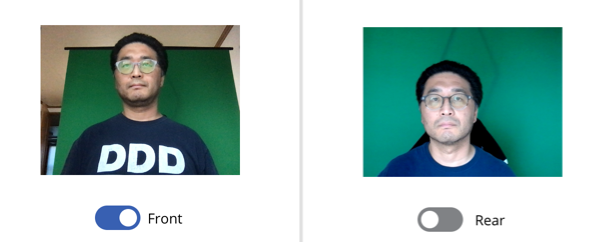
Toggle Control
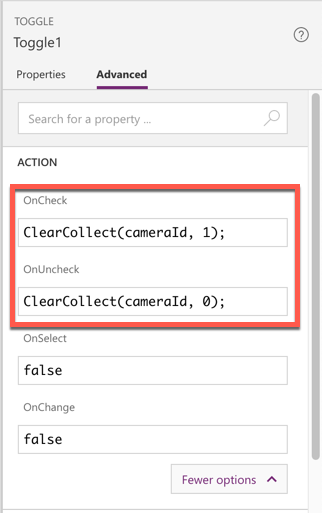
Through the Toggle control, we decide to use either the front-facing camera or rear-facing one. Phones nowadays have two cameras. iPhone, for example, takes 0 for the rear camera and 1 for the front camera. Therefore, enter the following formula into the OnCheck field.
| ClearCollect(cameraId, 1); |
And another formula for the OnUncheck field.
| ClearCollect(cameraId, 0); |
The cameraId is a collection. The ClearCollect() function clears the collection then fill a new value into it. As there's no concept of "defining variables" in Power Apps, every collection and variable are created and disposed of implicitly. The cameraId collection also follows the same rule. We just use it.
Camera Control
Let's adjust both Camera and StreamRate fields in the Camera control. Put the minimum value of 100 to StreamRate, which is the refresh rate for every 100ms. Then enter the following formula into the Camera field.
| First(cameraId).Value |
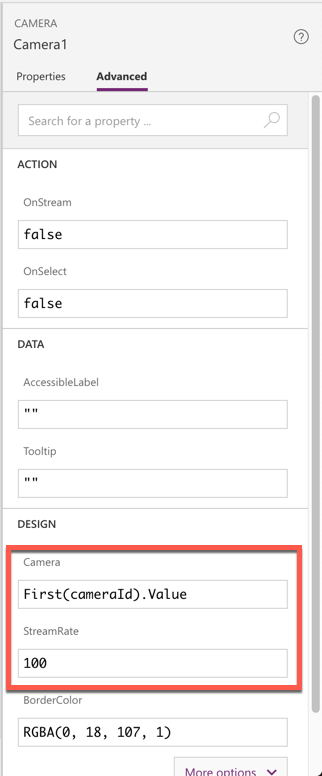
Once completed, depending on the value from the Toggle control, either front-/rear-facing camera is selected. Let's test it.
Button Control
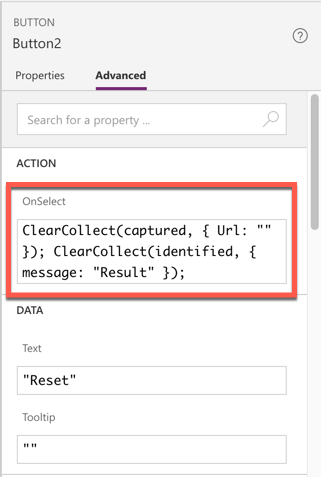
There are two Button controls in this app. First, take a look at the "Reset" button. Enter the formula into the OnSelect field.
With the ClearCollect() function, both identified and captured collections are initialised. They are used for Label and Image controls respectively.
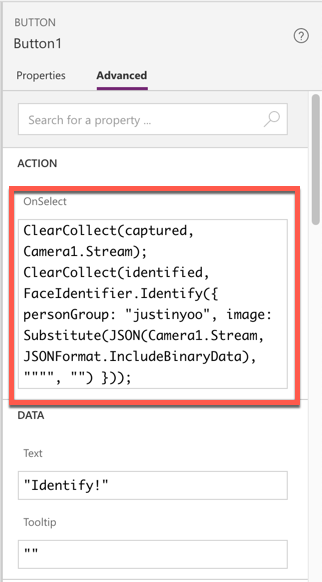
Let's have a look at the "Identify!" button. It uses the following formula on its OnSelect field. This is the core part of this app, actually.
Hmmm, looks a bit complicating. 🤔
- The
capturedcollection is refreshed with theStreamvalue from the Camera control. This collection will pass the image data to the Image control. - The
identifiedcollection stores the API request result from the custom connector,FaceIdentifier, using itsIdentify()operation. -
The
FaceIdentifier.Identify()operation requires bothpersonGroupandimagevalues from the control.personGroupis hard-coded for now, but it should be the real value from individual student's identity.- The
Streamfield of Camera is interesting. To use theStreamvalue for API request, we have to use theJSON()function to convert it to a JSON-ised string. But, as the converted string is wrapped with double-quotes ("), we should alsoSubstitute()function to remove the quotes. For the quote escaping, we again use the double-quotation mark ("""").
Don't you feel as if you're using an Excel spreadsheet? At least I do. Even the function usage pretty closes to it.
Label Control
This Label control displays the verification result from the API call. The identified is responsible for it. The response object from the API call contains the message field, so we pass the value to the Text field like:
| First(identified).message |
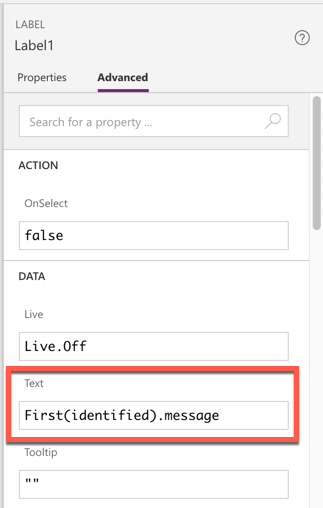
Did you notice that we put { message: "" } on the "Reset" button when we initialise the identified collection? Here's why.
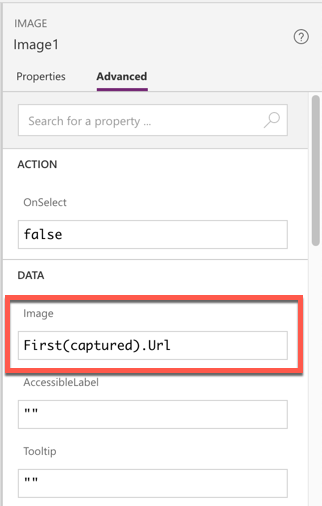
Image Control
In the Image control, let's put the following formula into the Image field. The Url comes from the captured collection.
| First(captured).Url |
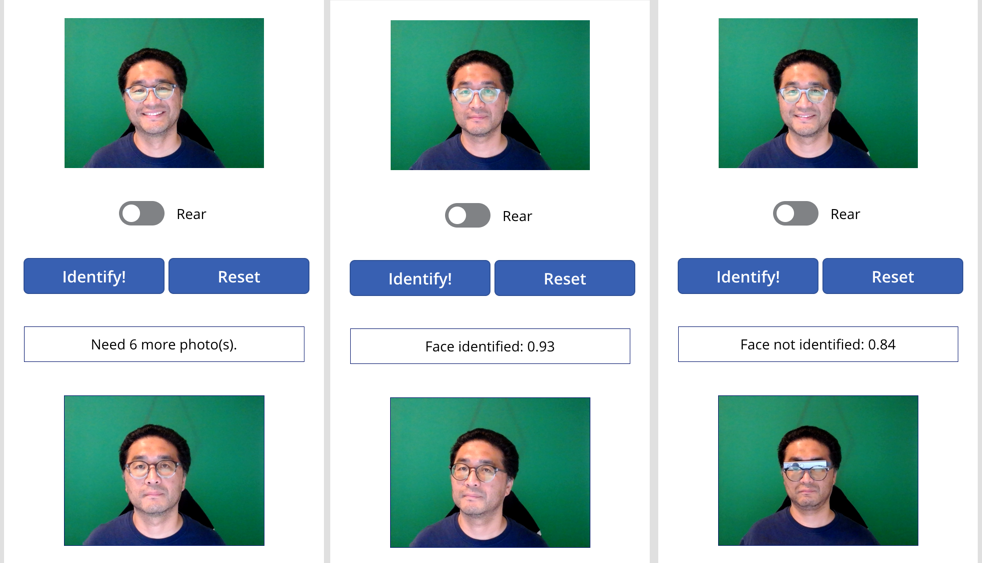
Testing Power Apps
Apparently, we've built the brand-new app! How simple is that? Let's try in my local machine before publishing. On Windows, click the button with your mouse while pushing down the ALT key. For mac, use the OPTION key instead. Everything works as expected like below:
Publishing Power App
When you're comfortable for the app, let's publish. Once published, it appears on your mobile app. Run the app on your mobile!
So far, we've used Power Apps, Azure Functions and Azure Face API to build an app for online attendance check-in. Power Apps is often called as "low-code" or "no-code" app builder, as we barely used codes for the app building. All the data exchange is done through connectors. Of course, we need codes for the API app, but this is outside the scope of Power Apps. Therefore, once API is ready for use, Power Apps simply consumes it to build apps, which comes really handy. It's time for you to develop your own app!