Throughout this blog post series, let's find out an example how Power Platform increases productivity by simplifying an ad-hoc workflow to provision resources like Azure VM onto Azure.
- Auto-installing Applications on Azure VM with Chocolatey for Live Streaming
- Ad-hoc Azure Resource Provisioning via Power Platform
In my previous post, we walked through how to install live-streaming related applications to Azure Windows VM while provisioning it. By the way, this type of VM provisioning is required ad-hoc basis, rather than a regular schedule. We create an ARM template for it, but we never know when it is used. The nature of ad-hoc workflows is like this. We may use it again, but we never know when it will be. We may not be ready to run when it needs to be run.
Power Apps is the right fit to handle this sort of running ad-hoc workflows on mobile devices. This post shows a glimpse of an idea how Power Apps and Power Automate handles Azure resource provisioning so that your IT pros in your organisation can create ad-hoc resources without having to get a DevOps engineer.
One Parameter Rules Power Automate Workflow?
The number of parameters from Power Apps is determined by the Power Apps trigger on Power Automate. If the number of parameters or parameter names used in a Power Automate workflow is too many, changes often, or is non-deterministic, this approach would be useful.
First of all, add a Compose action and change its name to ParametersInJson. Then create a parameter for it, which will be named to ParametersInJson_Inputs.
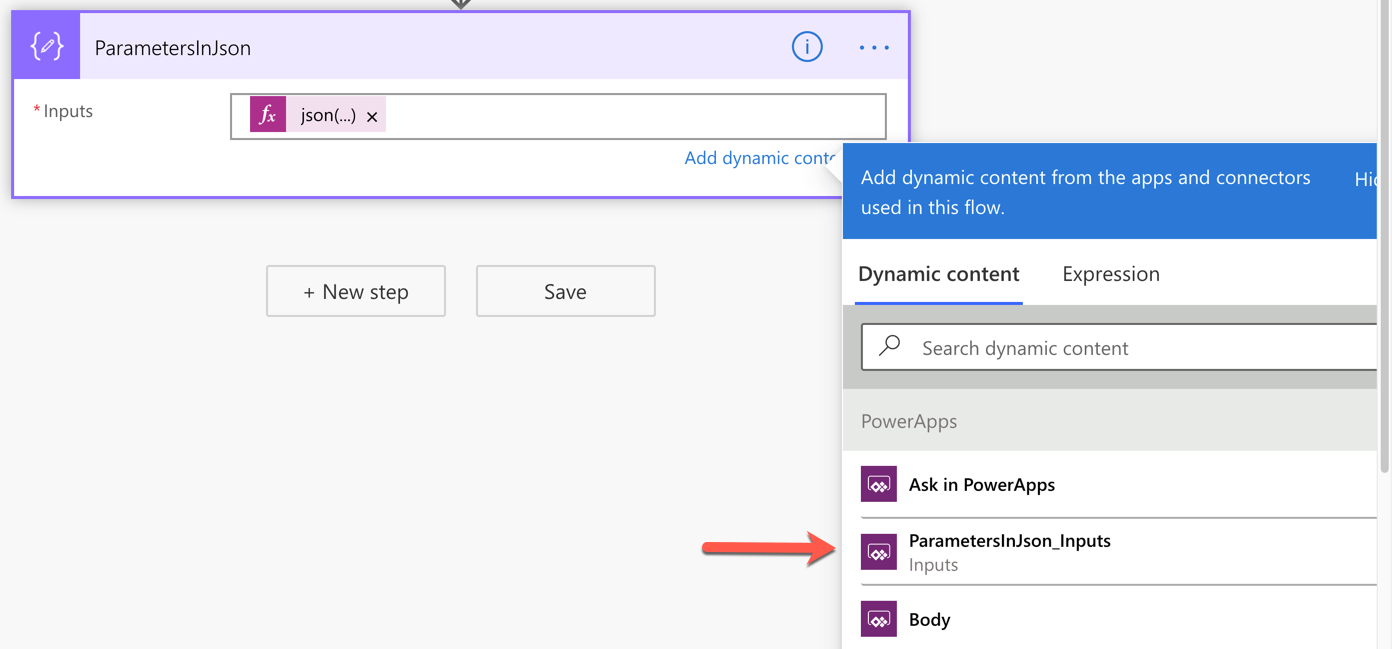
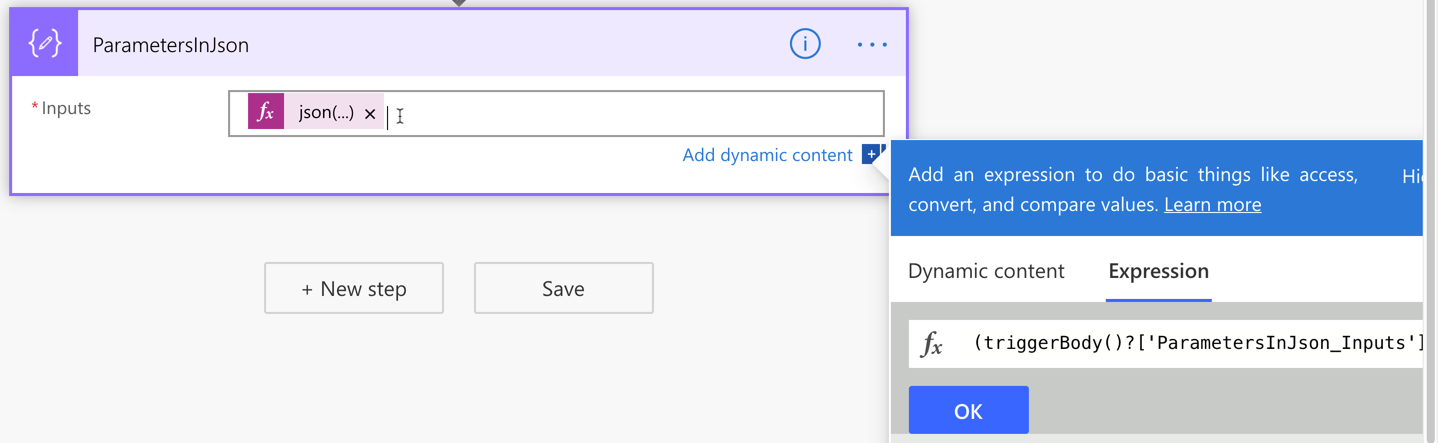
Add the function expression, json(triggerBody()?['ParametersInJson_Inputs']), to the Inputs field like this:
If we handle all the parameters passed from Power Apps in this way, we only have one parameter but take all values passed from Power Apps flexibly. This approach also avoids Power Apps from keeping remove and re-connect Power Automate over and over again whenever the parameters are updated.
Power Automate Workflow – Azure Resource Provisioning
With the flexible parameter passed from Power Apps, run the ARM template deployment using the Azure Resource Manager deployment action. All the parameters used for this action are like:
outputs('ParametersInJson')?['resourceGroupName'],outputs('ParametersInJson')?['deploymentName'],outputs('ParametersInJson')?['vmName'],outputs('ParametersInJson')?['vmAdminUsername']andoutputs('ParametersInJson')?['vmAdminPassword'].
Also, notice that the Wait for Deployment field value is set to No. I'll discuss it soon.

Once this action is run, the result should be returned to Power Apps through the Response action. The following screenshot shows how it uses the output of the ARM deployment action with JSON schema.
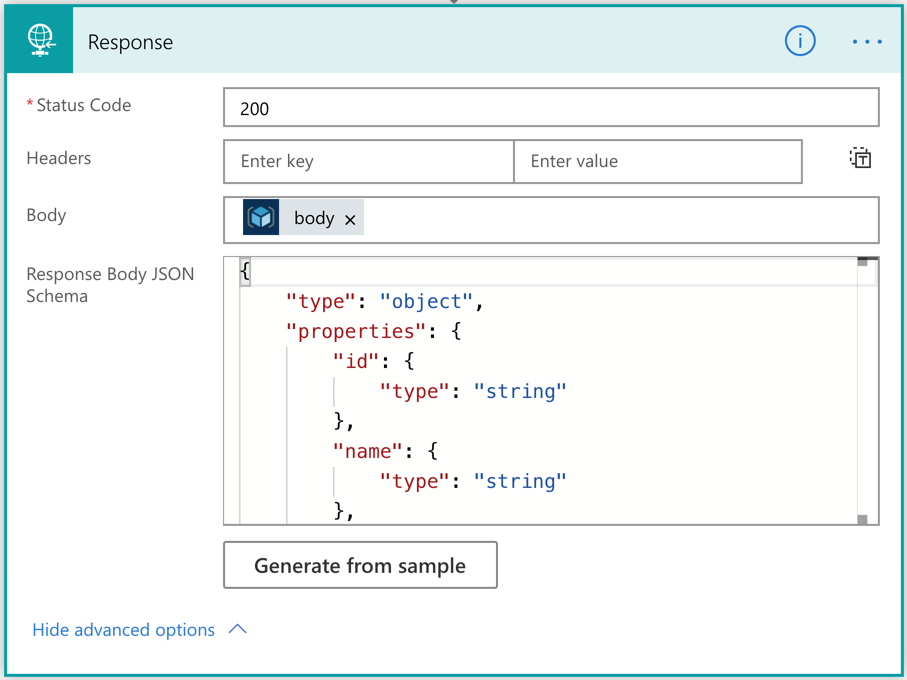
Now, we've created the workflow for Azure resource provisioning.
By the way, we need to consider the nature of this action. It takes from 30 seconds to 40 minutes or longer that completes the resource provisioning. As Power Apps can't wait for it, the workflow should be running asynchronously. Did you remember that the Wait for Deployment field has been set to No in the previous action? The actual response has the status code of 201, not 200, because of this option.
How can we check the result of the resource provisioning? Let's build another workflow for it.
Power Automate Workflow – Azure Resource Provisioning Status Check
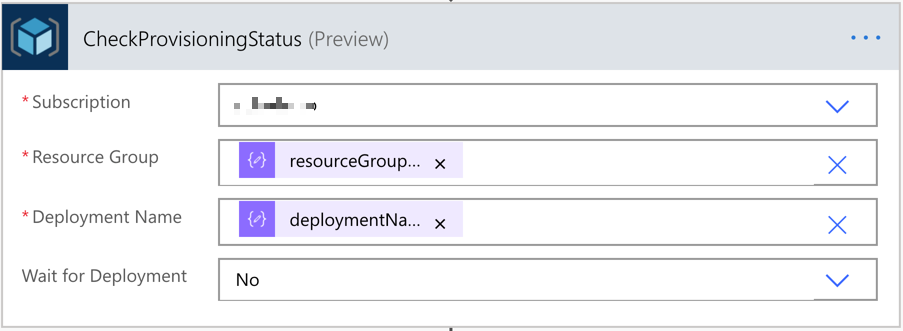
This time, let's build another workflow that checks the resource provisioning status. It only checks the status. We also use the same approach above to take the parameters from the Power App instance.
And let's use the action to check the provisioning status. All the relevant variables look like:
outputs('ParametersInJson')?['resourceGroupName']andoutputs('ParametersInJson')?['deploymentName']
The last action is the Response action that sends the action response back to Power Apps.
We've now got two workflows for the resource provisioning. Let's build the Power Apps now.
Power Apps – Ad-hoc Azure Resource Provisioning
The layout of the app that IT pros in your organisation will use might look like the following. It accepts five parameters from the user, which will be used for both Power Automate workflows. One button starts the resource provisioning, and the other button checks the provisioning status.
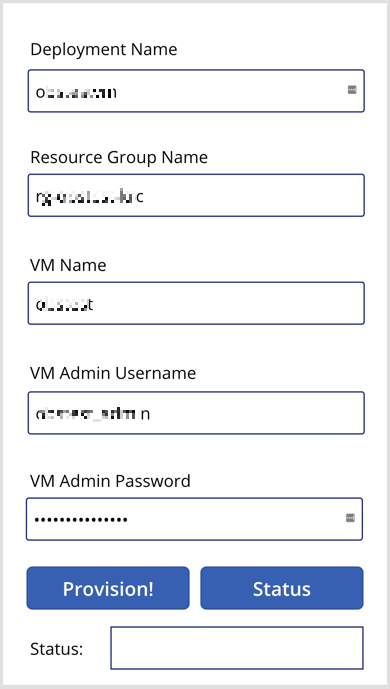
Connect the resource provisioning workflow to the Provision! button and define the button action like below.

Note that we use the Set() function this time. With this function, we create a temporary variable of request and assign the JSON object as its value. Then, the request value is sent to the Power Automate workflow via the CreateResource() function. The request object will be decomposed to a JSON object in the Power Automate workflow. And the response of this function is stored to the result collection, using the ClearCollect() function.
| Set(request, "{ 'deploymentName': '" & DeploymentName.Text & "', 'resourceGroupName': '" & ResourceGroupName.Text & "', 'vmName': '" & VMName.Text & "', 'vmAdminUsername': '" & VMAdminUsername.Text & "', 'vmAdminPassword': '" & VMAdminPassword.Text & "' }"); | |
| ClearCollect(result, CreateResource.Run(request)) |
As mentioned above, the resource is not instantly provisioned as soon as we tap the Provision! button. Therefore, we should use the Status button to check the provisioning status.

Similar to the approach above, we use the Set() function to initialise the status variable and send it to Power Automate through the CheckProvisioningStatus() function. Then the result will be stored to the result collection.
| Set(status, "{ 'deploymentName': '" & DeploymentName.Text & "', 'resourceGroupName': '" & ResourceGroupName.Text & "' }"); | |
| ClearCollect(result, CheckProvisioningStatus.Run(status)) |
I use the
Statusbutton for simplicity. But you can make use of theTimercontrol for a more meaningful way, which is beyond the discussion of this article.
Finally set the label control to take the result from the workflow like First(result).properties.provisioningState, using the First() function.

We've now got the Power App, too! Let's run the Power App with the actual value.
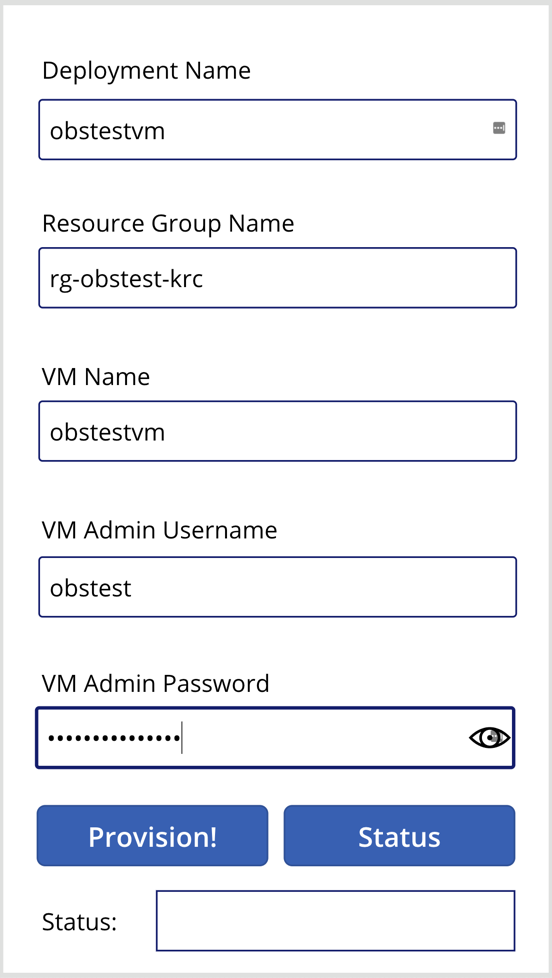
The first response from the provisioning will be like this:
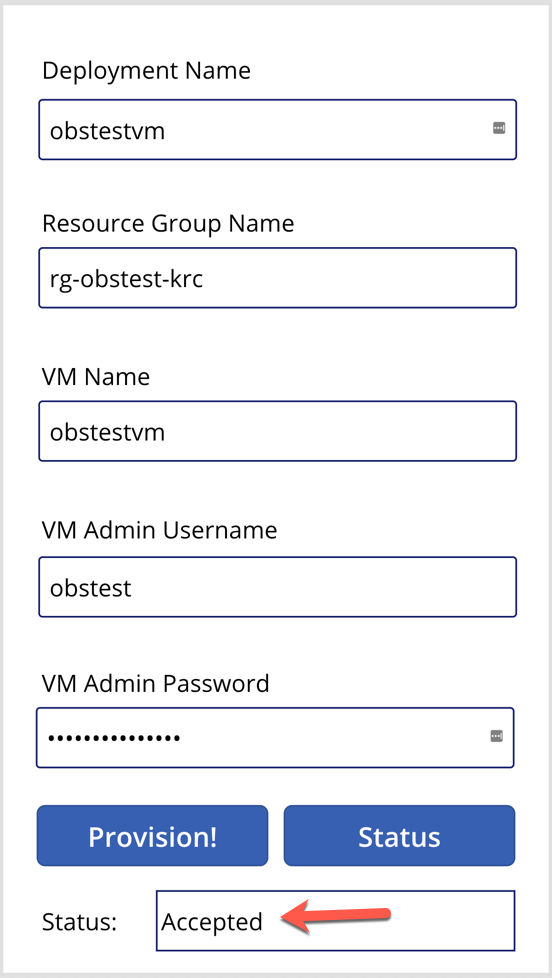
In the middle of the provisioning, the status will look like this:

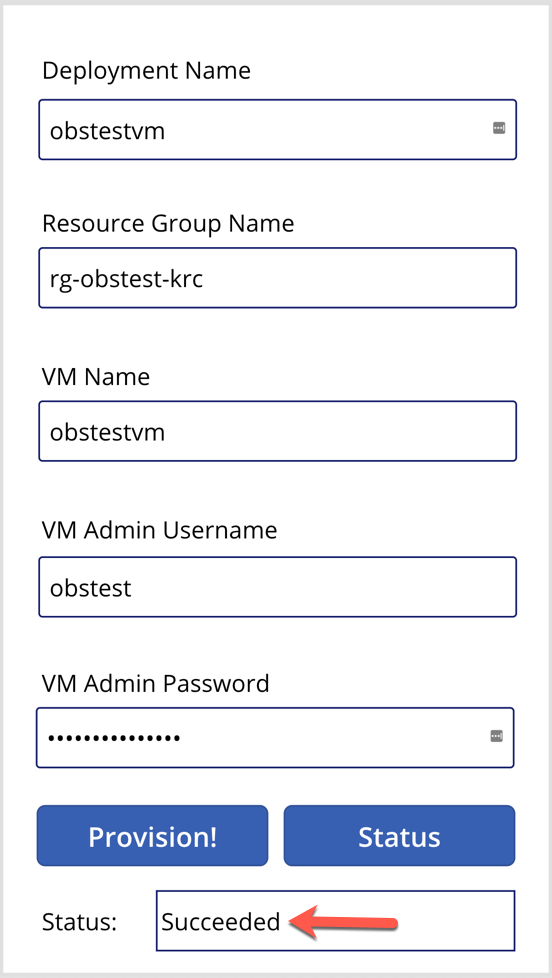
And after the resource provisioning is complete, the status will look like this:
So far, we've walked through how we built Power Automate workflows and Power Apps for ad-hoc Azure resource provisioning. We only used one use case here for simplicity, but there are more complex real-world examples with many ad-hoc scenarios in your business domain. If you can materialise those scenarios based on priority and frequency, it will increase productivity for sure.